Categories: AdhesiveManufacturing, Manufacturing
This page describes the process of applying the softer mold wax on top of a machinable wax carrier to prepare for micromachining molds.
Preparing a New Block
- Make sure the piece is cut to 6.0" in length.
- The vise in the Haas OM-2A can only clamp on blocks a little under 4" in width; if your block is nominally 4", machine the block to just fit in the vise by:
- If at least one of the large faces is not machined flat, machine it flat with a few light skim cuts.
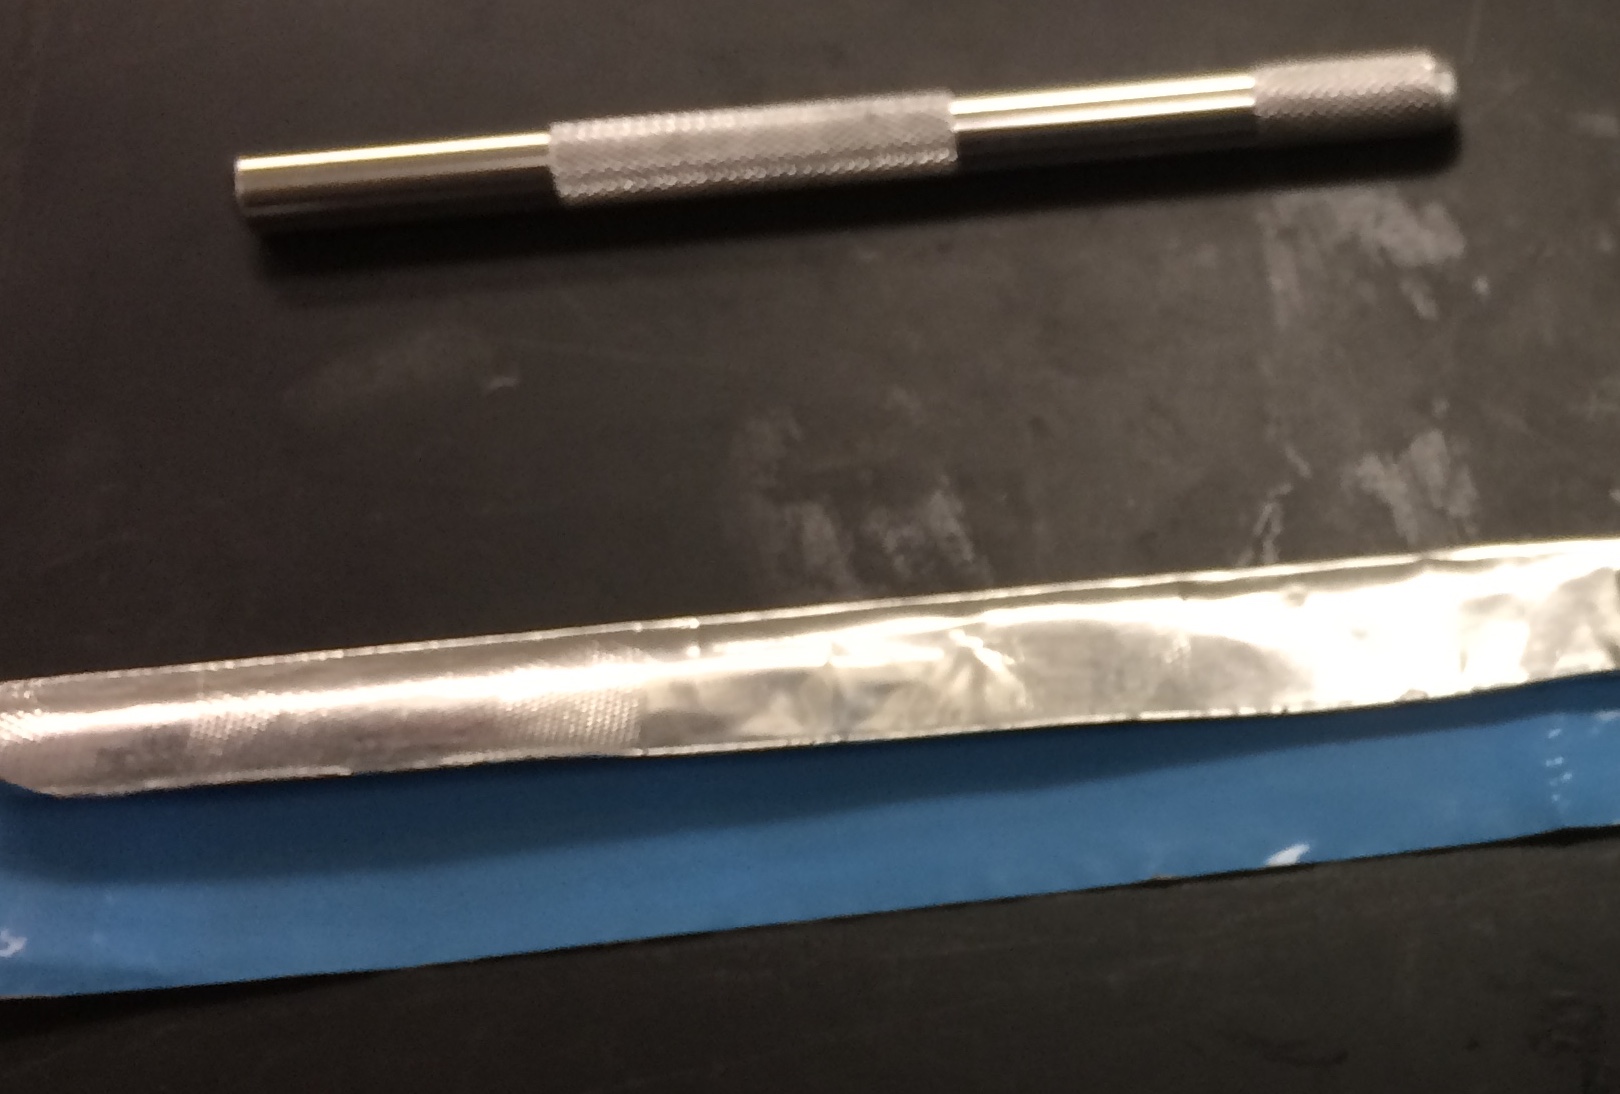
- With this flat face against the fixed jaw of the vise, use a metal rod to clamp the block in place with one of the sides facing up. Take skim cuts to flatten this face. The moving jaw will press against an as-yet-unmachined surface, so the metal rod is to prevent the movable vise jaw from applying moments and twisting the block out of alignment with the fixed jaw.
- Flip the block 180° so the base remains against the fixed jaw, and the just-faced side is flat against the bottom of the vise, using the metal rod to clamp again. Take skim cuts until the block measures about 3 7/8" in width.
- Clamp the block in the vise as it will be oriented for micromachining, and using a 1/4" end mill (approx), use program #04442 (Wax Channels) from machine memory to cut longitudinal slots into the top of the block, about 0.1-0.2 inches deep. These grooves are to improve adhesion of the yellow wax to the blue wax carrier block.
Resurfacing an Existing Block
Note: melting the wax can take as much as a couple hours, depending on how much wax needs to be melted. Plan accordingly.
Melting the wax
- Cut the yellow wax
- The yellow wax should be located in the racks near the CNC machine, in a cardboard sleeve.
- Also retrieve the large beaker and aluminum tape, also located on the racks or in the adhesives cabinet.
- Note: if the beaker still has wax in it, evaluate the cleanliness of the wax. If it's clean, with no dust adhered, proceed to adding new wax.
- If there's dirt or dust that can't be removed, melt down the wax at 100 �C. Pour out the wax, and make sure there are no particles in the beaker that will get into your new batch
- Since the sheet is 1/8" thick, cut about two times the area of the machinable wax block(s) you will be surfacing to add 1/4" to each.
- As of Spring 2019, we still have stock of the old "Master Sheet Wax," which has since been discontinued. If restocking becomes necessary, purchase the replacement formulation from Freeman Manufacturing and Supply Co., PN 203125.
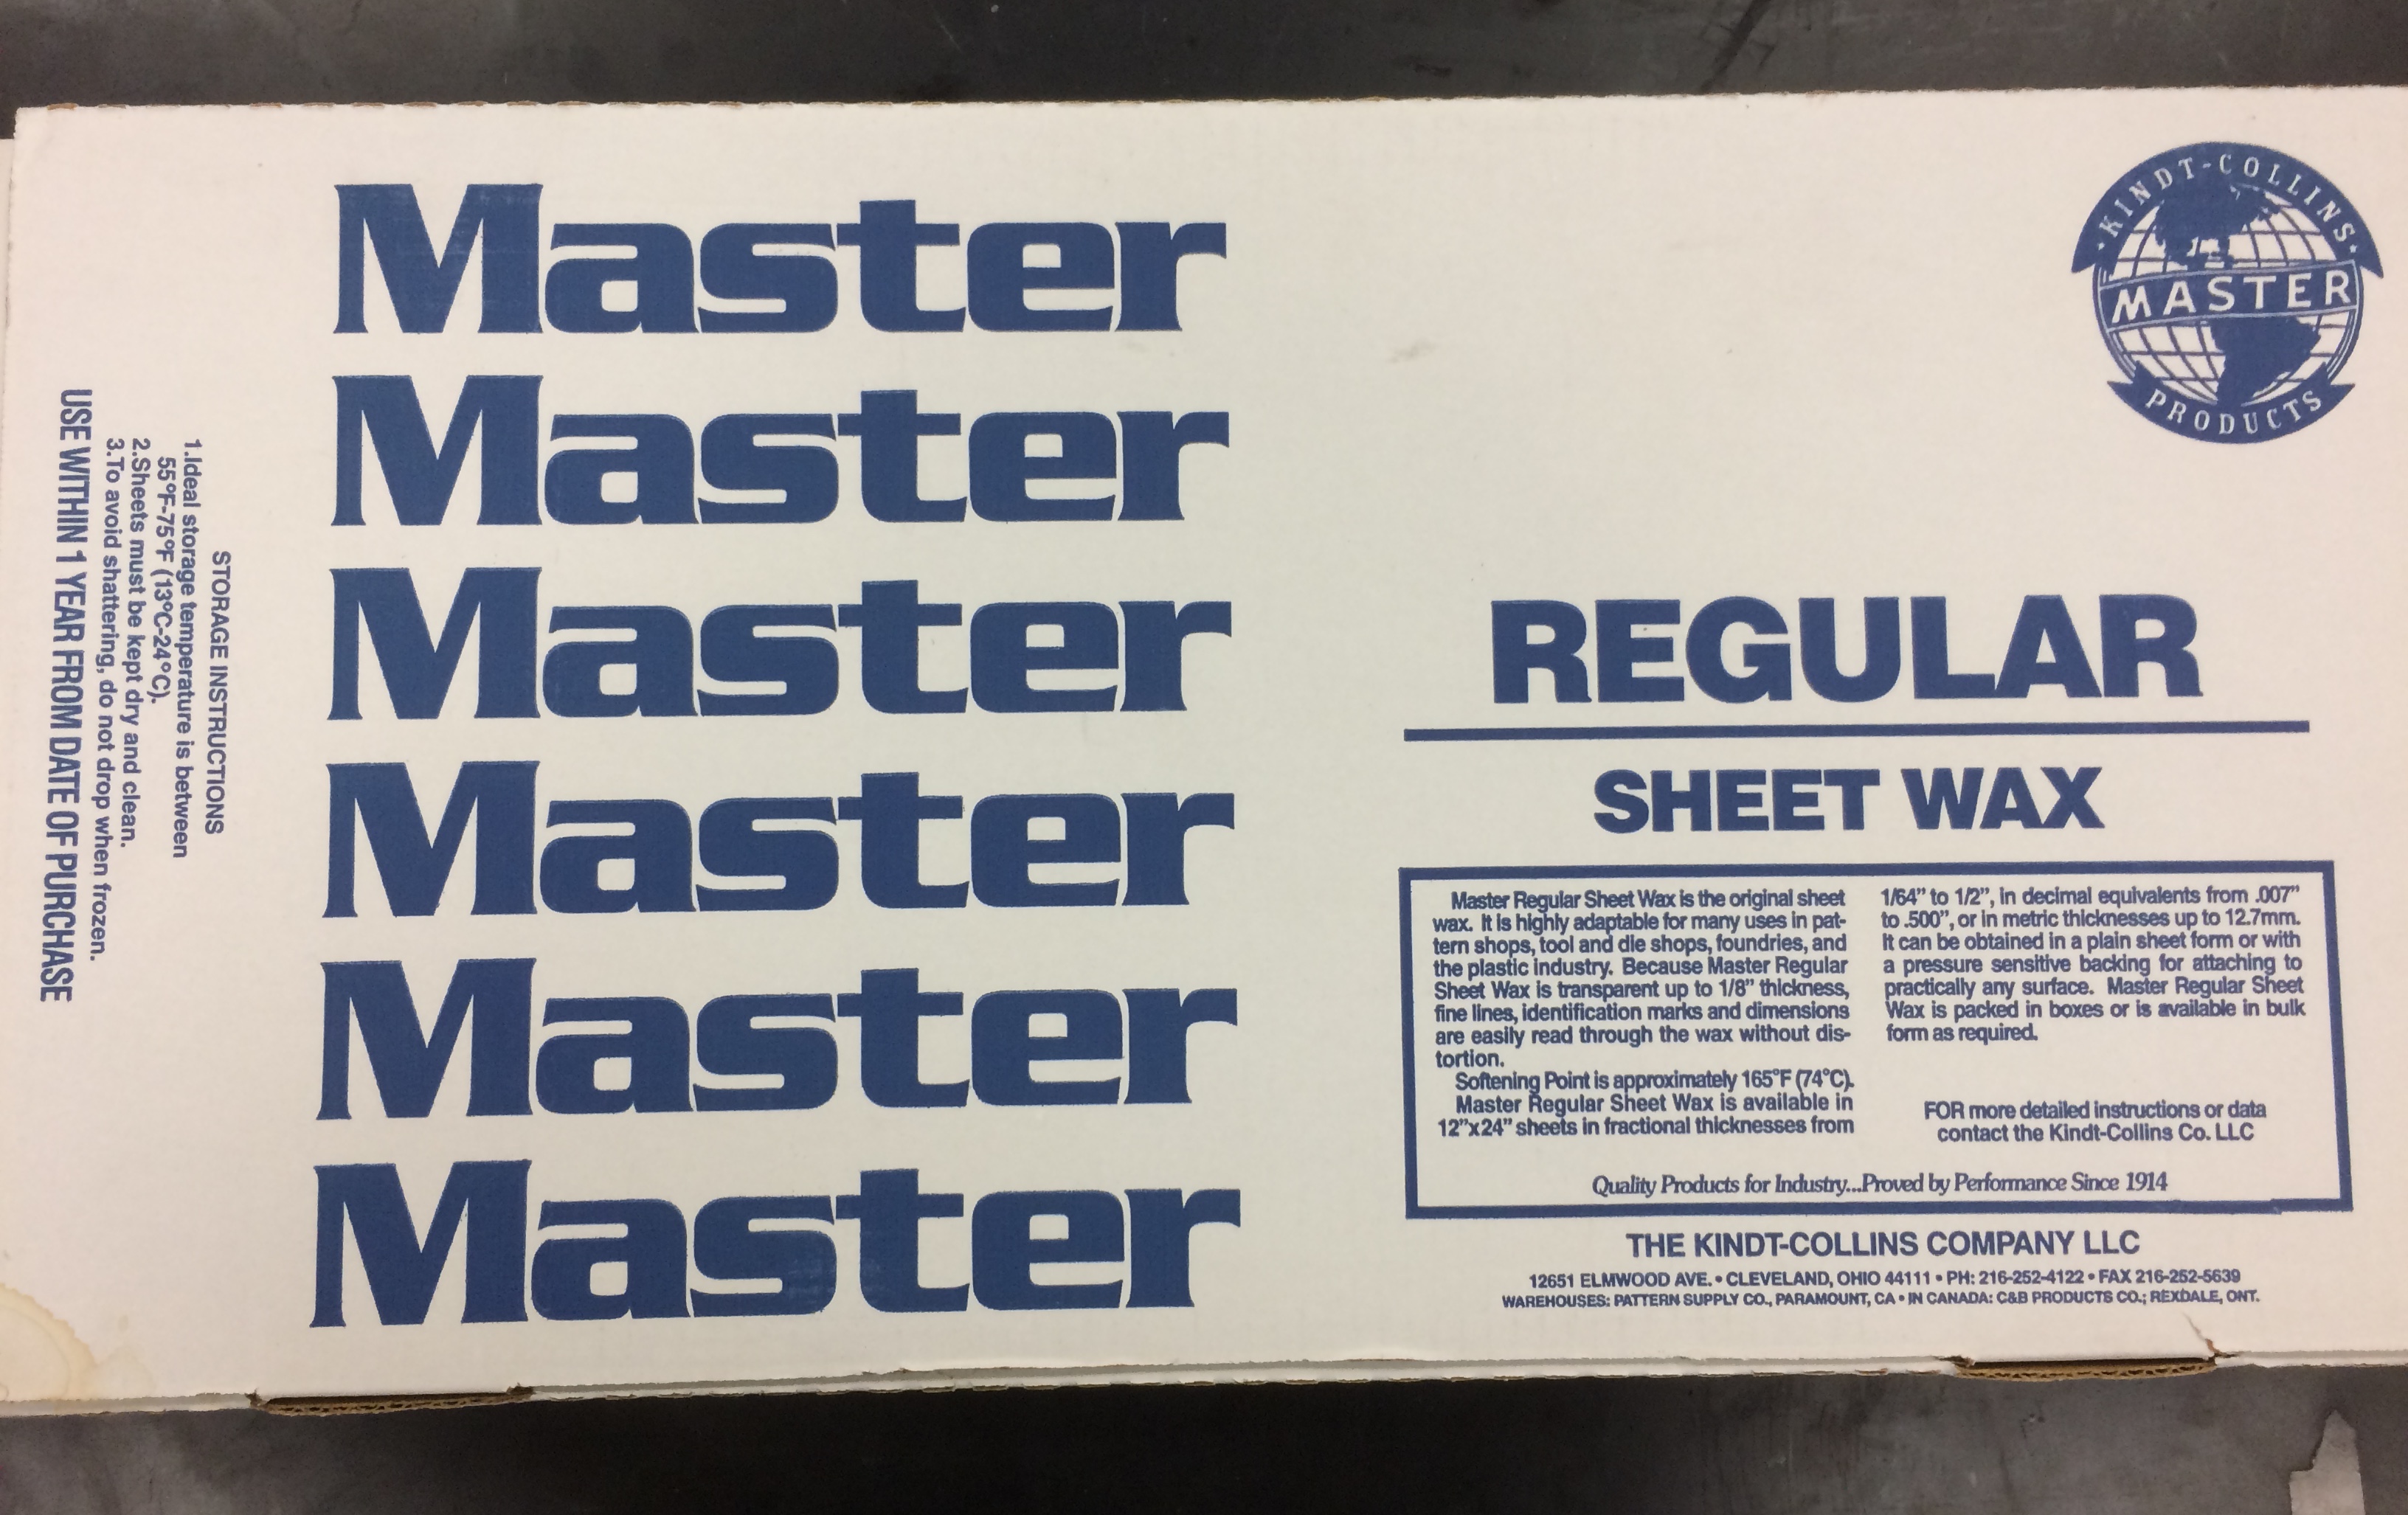
- If you get the stuff that comes with adhesive attached, you should heat it to 55 �C and peel the adhesive off at that temperature.
- Jason says: This 55 �C number is not arbitrary. I played around with a few different temperatures, and the adhesive was tough to remove at all of them. It peels right off at 55 �C.
- Leave the wax in the oven for about 15 mins for easiest peeling.
- Wipe both sides of your new wax down to remove any particles
- Completely melt the yellow wax in the oven at 100 �C. The heat can be adjusted (higher for more wax etc), just make sure to not burn the wax! If you stir the wax while heating it, degas for ~1min in the vacuum chamber once fully melted.
Preparing the dam
We use the aluminum tape to create a dam that contains the poured wax.
Before starting this step, make sure the surface of the block is completely clean of soap, old silicone, dust, etc. This can be as simple as an isopropanol rinse, or may require planing off the top layer and then thoroughly washing.
- Cut a strip of the aluminum tape that is the perimeter of your block plus one inch.
- Before peeling the backing, fold down the top third of the tape onto itself and press flat. You want it quite smooth, so press the folded-over section and crease flat with an implement (e.g. the handle of an x-acto knife). Then, peel out the protective film, and press the seam closed..
- Jason says: If you peel before folding, the tape has a tendency to stick to itself.
- The result should be fully aluminum on one side, and half exposed adhesive and half aluminum on the other.
- Beginning midway on a long edge, press the tape onto the sides of the wax block, so that the top of the adhesive portion is about 1/8" below the top of the blue wax, and the folded-over portion extends up forming a wall.
- Jason says: sticking the adhesive portion below the top of the blue wax is really important. Otherwise, the wax you pour can peel up from the blue wax once it has cooled, compromising the rigidity of the top wax layer.
- Proceed around the block by rolling the block along the tape; at each corner, you may need to adjust angle slightly to keep the above-wax part of the tape the same height. You may also find it helpful to use a popsicle stick or similar to crease the corners as you roll the block, to keep the corners sharp.
- Once the tape has been initially applied, firmly press the tape into contact along the block to ensure the adhesive is fully adhered.
Pouring the wax
For your planning convenience: The wax takes about 2 hours to cool.
- Locate a wood or aluminum sheet small enough to fit in the oven, but large enough to fit all of the wax blocks you are resurfacing.
- For each block, get:
- Two sheets of pop-up aluminum foil, or two regular sheets about 12x12 inches.
- A wood or cardboard piece to cover the top of the block and protect it from the foil. This piece should be a little larger than 4"x6".
- Wipe this piece down so that it does not introduce particles to your wax
- Go through the following procedures for each block.
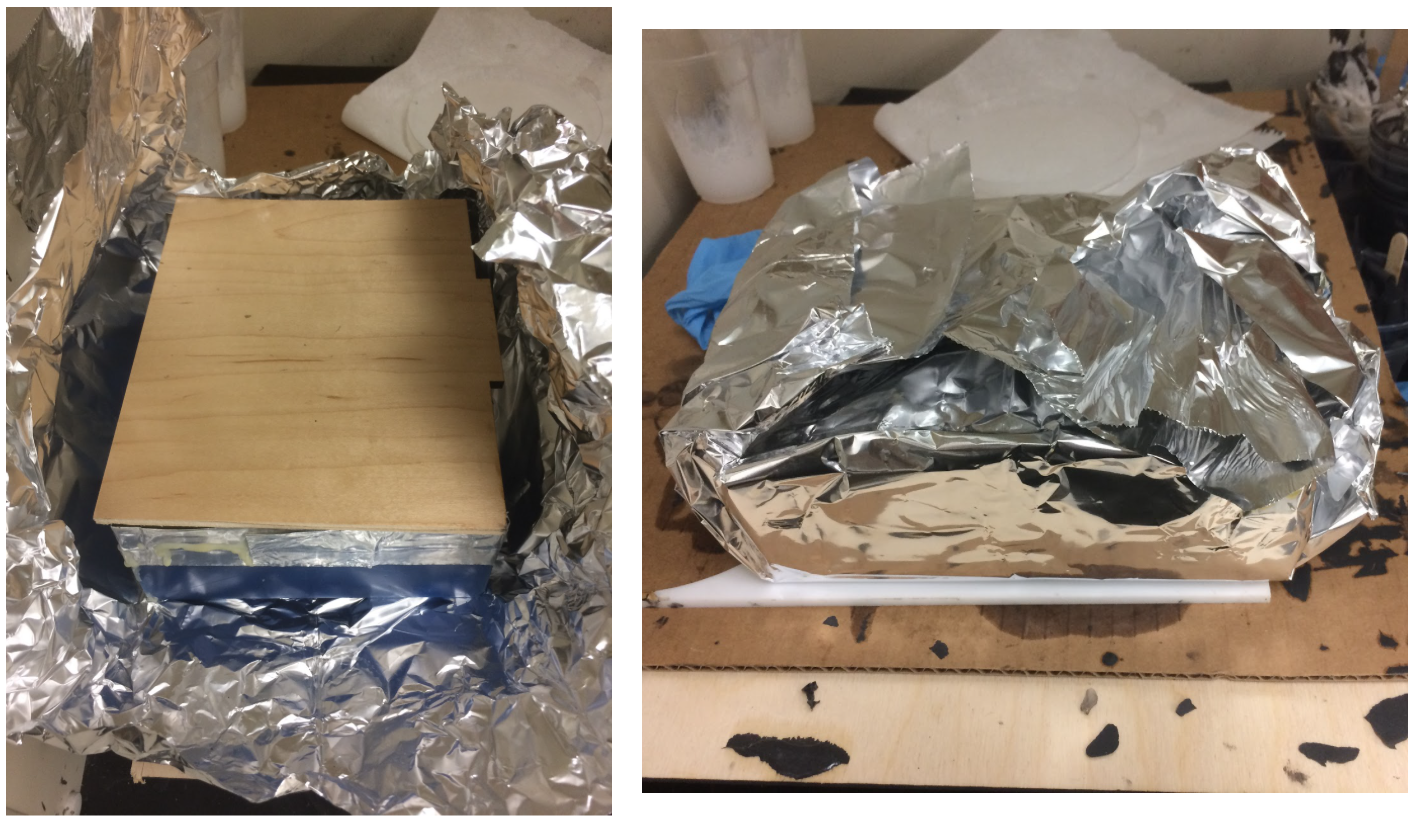
- Place the aluminum foil on the base plate.
- Place the wax block with dam on the aluminum foil
- Immediately before pouring the molten wax onto the block, heat the top of the wax block with a heat gun. If the surface is blue wax, you want to get to the point where it "sweats" and gets shiny just as it is starting to melt. If the old surface is the soft wax, heat with a heat gun until that layer is completely liquid.
- Along with cooling the block slowly, this is the most important aspect to preventing yellow wax delamination due to shrinkage. Make sure you nearly melt the blue wax, particularly around the edges of the block. You may need to bring the heat gun quite close.
- In order to get the whole block to this state, you'll need to keep moving the heat gun quite fast over the whole area. Concentrating heat in one location will melt that area more quickly, but allows the remaining areas to cool and solidify. Just remain patient, and eventually the whole block will be at the correct temperature.
- With one hand still applying the heat gun, carefully pour the liquid soft wax onto the block.
- Jason says: This is the trickiest part of preparing the molds. It might be a good idea to see if someone can help you out with either heating or pouring.
- Quickly cover the cooling wax with your plywood cover and wrap the whole assembly in the aluminum foil. Wrap again from the top with the second sheet of aluminum foil.
- At this point, we want to cool it slowly to avoid introducing unneeded residual stresses, so turn the oven off, and carefully place the base board with the wrapped wax block(s) in the oven to cool. Close the oven so the latch is hooked, but not clamped, leaving a small gap.
- Allow to cool overnight.
Milling the block flat
- Clamp the wax block in the machine, and put a 3/8" tool in the spindle.
- Select the wax facing program, #04443, from machine memory
- Because of shrinkage as the wax solidifies, the middle will likely be the lowest point. Jog by eye to the center, and then slowly jog down until contacting the wax. Step down about another 0.01" to ensure a fresh wax surface, and set this point as Z zero.
- Set the XY zero at the front-right corner of the wax block
- Aim the coolant hose at the bottom of the tool
- Ensure the coolant filter is in place in the bottom of the machine.
- Step through in single block mode at 5% rapids to ensure you have set the offsets correctly. Keep your hand on the feed hold button to avoid a crash in case of issues.
- Turn on the coolant.
- Run the remainder of the job to get a flat surface on the wax mold ready for micromachining.
- When done, thoroughly wash down the inside of the machine with the yellow coolant hose.
Materials and Vendors
| PN | Vendor | Item |
|---|---|---|
| 203125 | Freeman Supply | Sheet wax for indenting |
| 9389K21 | McMaster | Blue Machinist's Wax |
| B0047XXZ7Q | Amazon | Aluminum foil tape |
Page last modified on February 01, 2024, at 10:33 AM