SummerBlogs, Profiles.JasonTrinidad
Entries in reverse chronological order
Week 10
Thursday, Aug 31st
Last day at the lab! This has been a great summer. I've loved working alongside the extraordinarily kind, dedicated, hardworking, ultra-skilled human beings who make up the BDML. Thank you all! Special thanks to Mark, Arul, Capella, Amy and Elliot for showing me the ropes and for their endless support, I truly appreciate it.
But until I head out, I still have work to do! Today I'm going to cast a wax mold and machine a microadhesive mold for Capella.
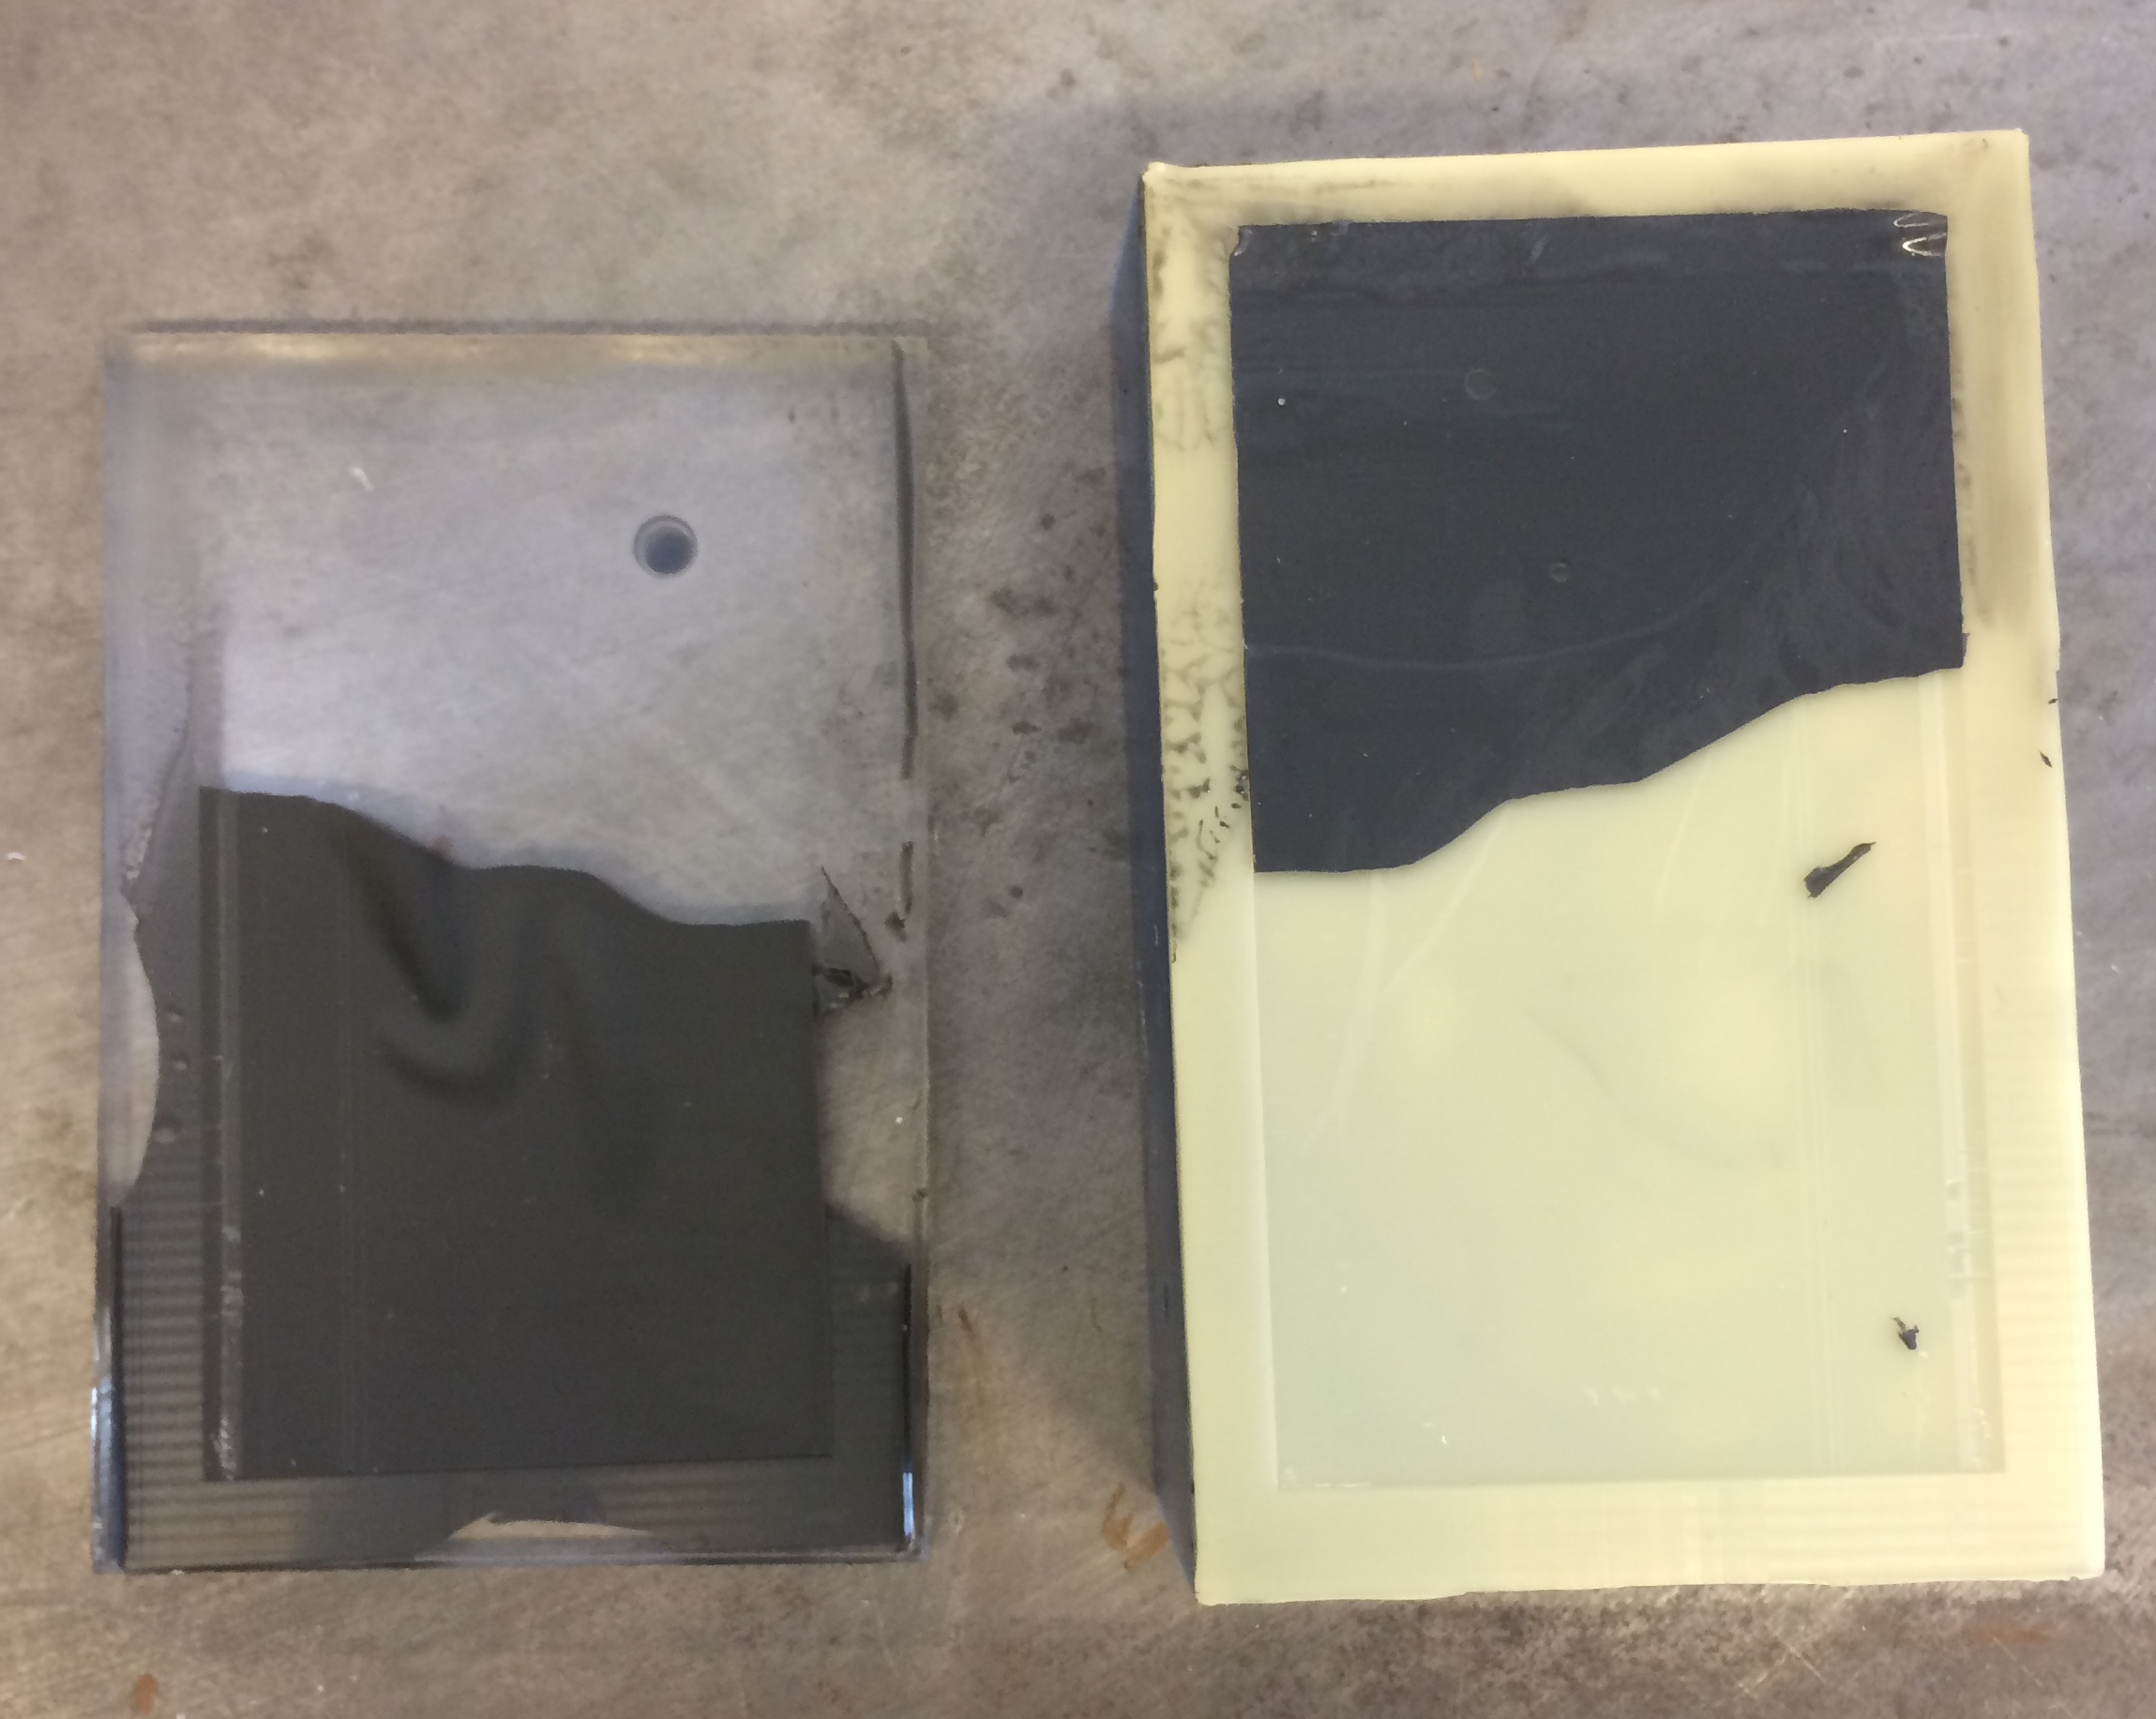
Edit: I forgot to upload a picture of my crowning achievement this summer:

One high temperature epoxy mold!
Wednesday, Aug 30th
A mistake I made yesterday means that I'm going to have to re-evaluate my goals for this week. I accidentally plunged the 3/8" tool through the corner of one of the wax blocks, which takes one of them out of commission. What I do next depends on whether Capella and Arul need me to replace this blue wax block. We'll see what they say!
Tuesday, Aug 29th
I'm going to have to hustle if I want to finish three epoxy molds. If I cast one adhesive tonight, then re-machine and cast again tomorrow I can at least cast the third epoxy mold on Thursday. Maybe then Arul can finish it up.
Today I've machined a mold for Capella and added a Dropbox link to the Creating A Daughter Mold Documentation, since for some reason my existing Onshape links weren't letting me download the files.
Today I will:
- Machine a second mold
- Heat cure the epoxy mold
- Prime fiberglass for tonight's cast
- Run some errands before I leave on Friday
Monday, Aug 28th
This is my last week of my stipend! I want to make sure that I deliver everything I'm currently involved in before I leave. This means:
- Complete three epoxy molds
- Finish installing the vent in Charm lab
- Finalize documentation on what I've worked on this summer
Week 9
Friday, Aug 25th
Poster presentation today! I'm excited to see and talk to other people about what they've been working on. I'm also going to install the UV laser duct in CHARM lab.
Thursday, Aug 24th
My last cast of PDMS turned out ok so I�m ready to cast the epoxy mold. First however, I have to follow Arul�s instructions to mix the part A of the epoxy, which has a bunch of filler at the bottom that needs to be blended into the rest of the solution.
For today:
- Figure out how to blend part A
- Degass epoxy
- Apply mold release
- Cast epoxy
- Print my poster
- Re-machine the wax mold
- Talk to Capella about force tester
Update: I was unable to blend part A with the methods I tried. I've bought a mixing tool and I'll try again on Monday. On the other hand, printing my poster was far more involved than I anticipated. It took longer than actually writing it!
Wednesday, Aug 22nd
Delivered Capella's fiberglass tile. There was a bit of drama where I couldn't find it, but it turns out that someone placed it in a stack of wood in TLTL. I found it though, so that will save me a lot of time!
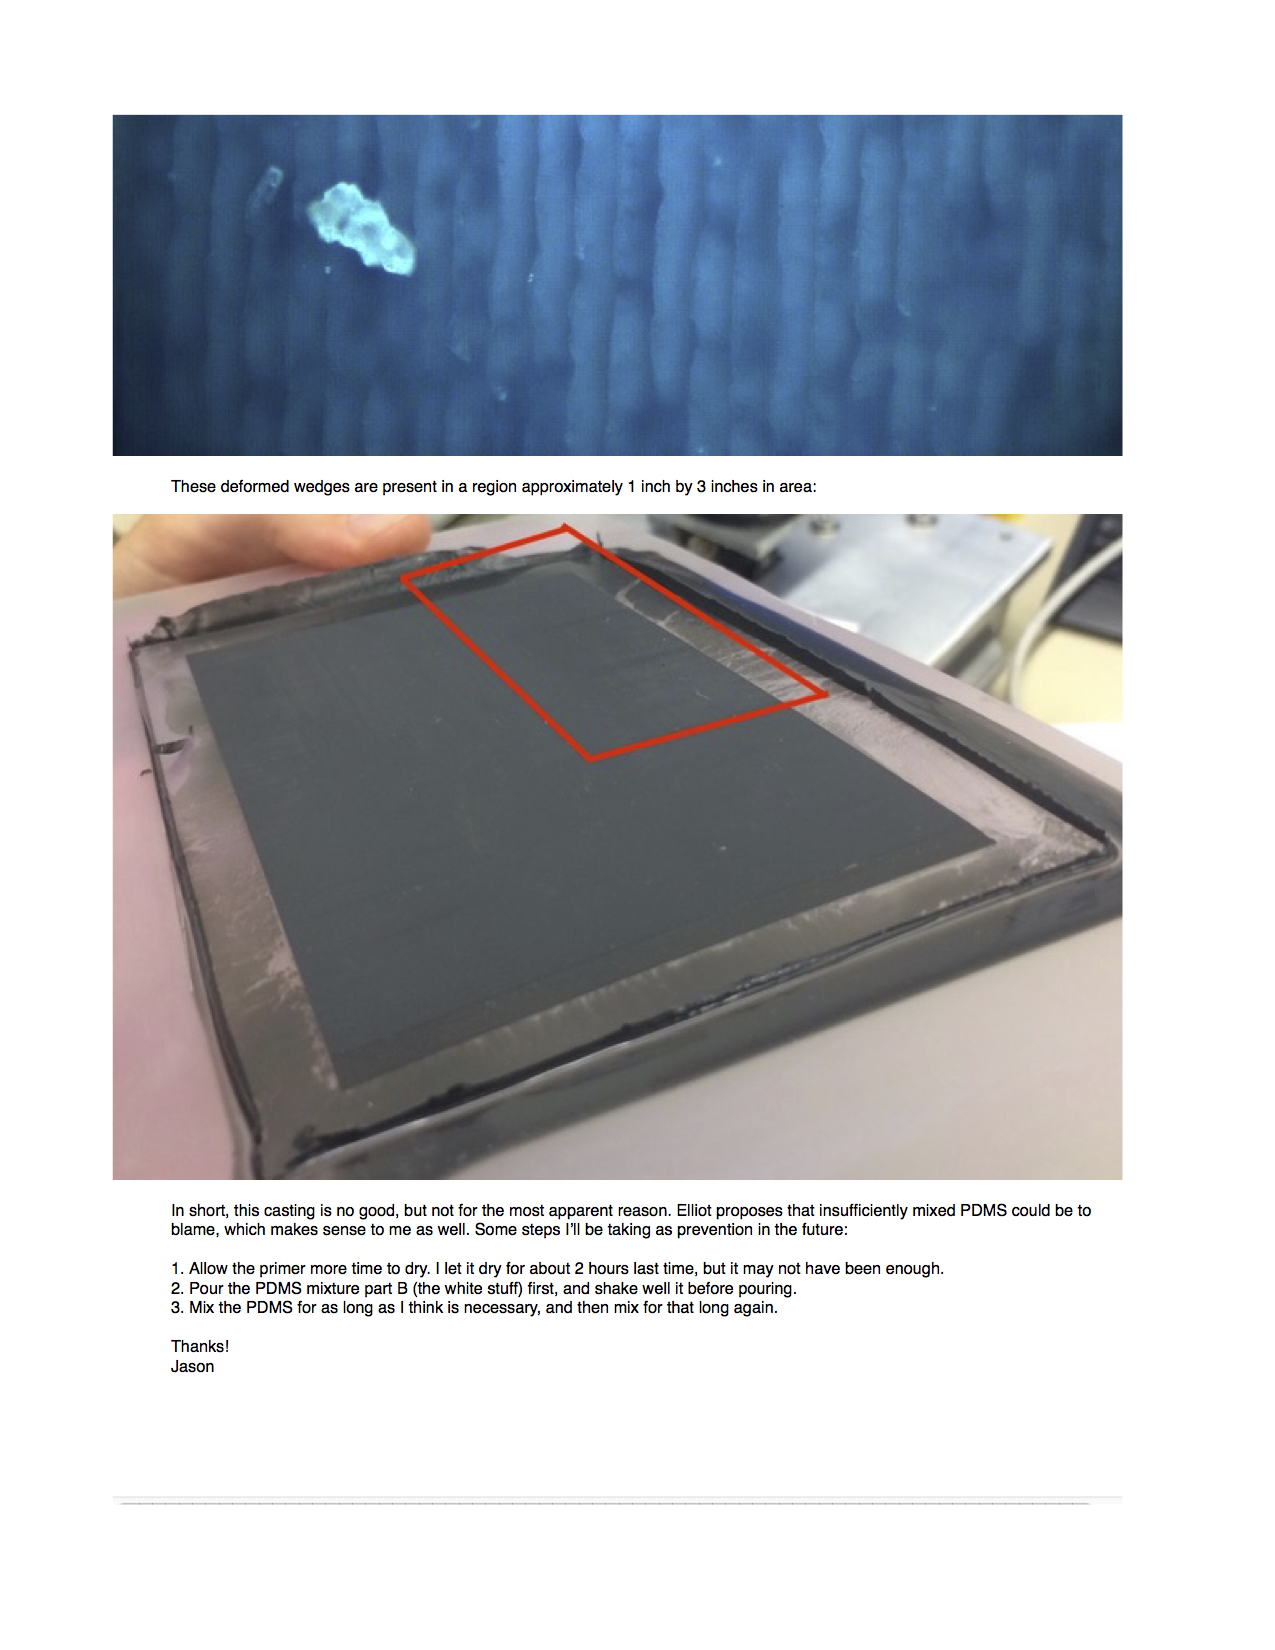
The wedges turned out to be interesting. We think that the most likely cause was poorly cured PDMS. I'll include the email I sent with details below.
Hopefully, that issue was resolved with the steps I took and my most recent adhesive cast came out fine. Ideally I can then cast an epoxy mold. Hopefully this time it'll work!
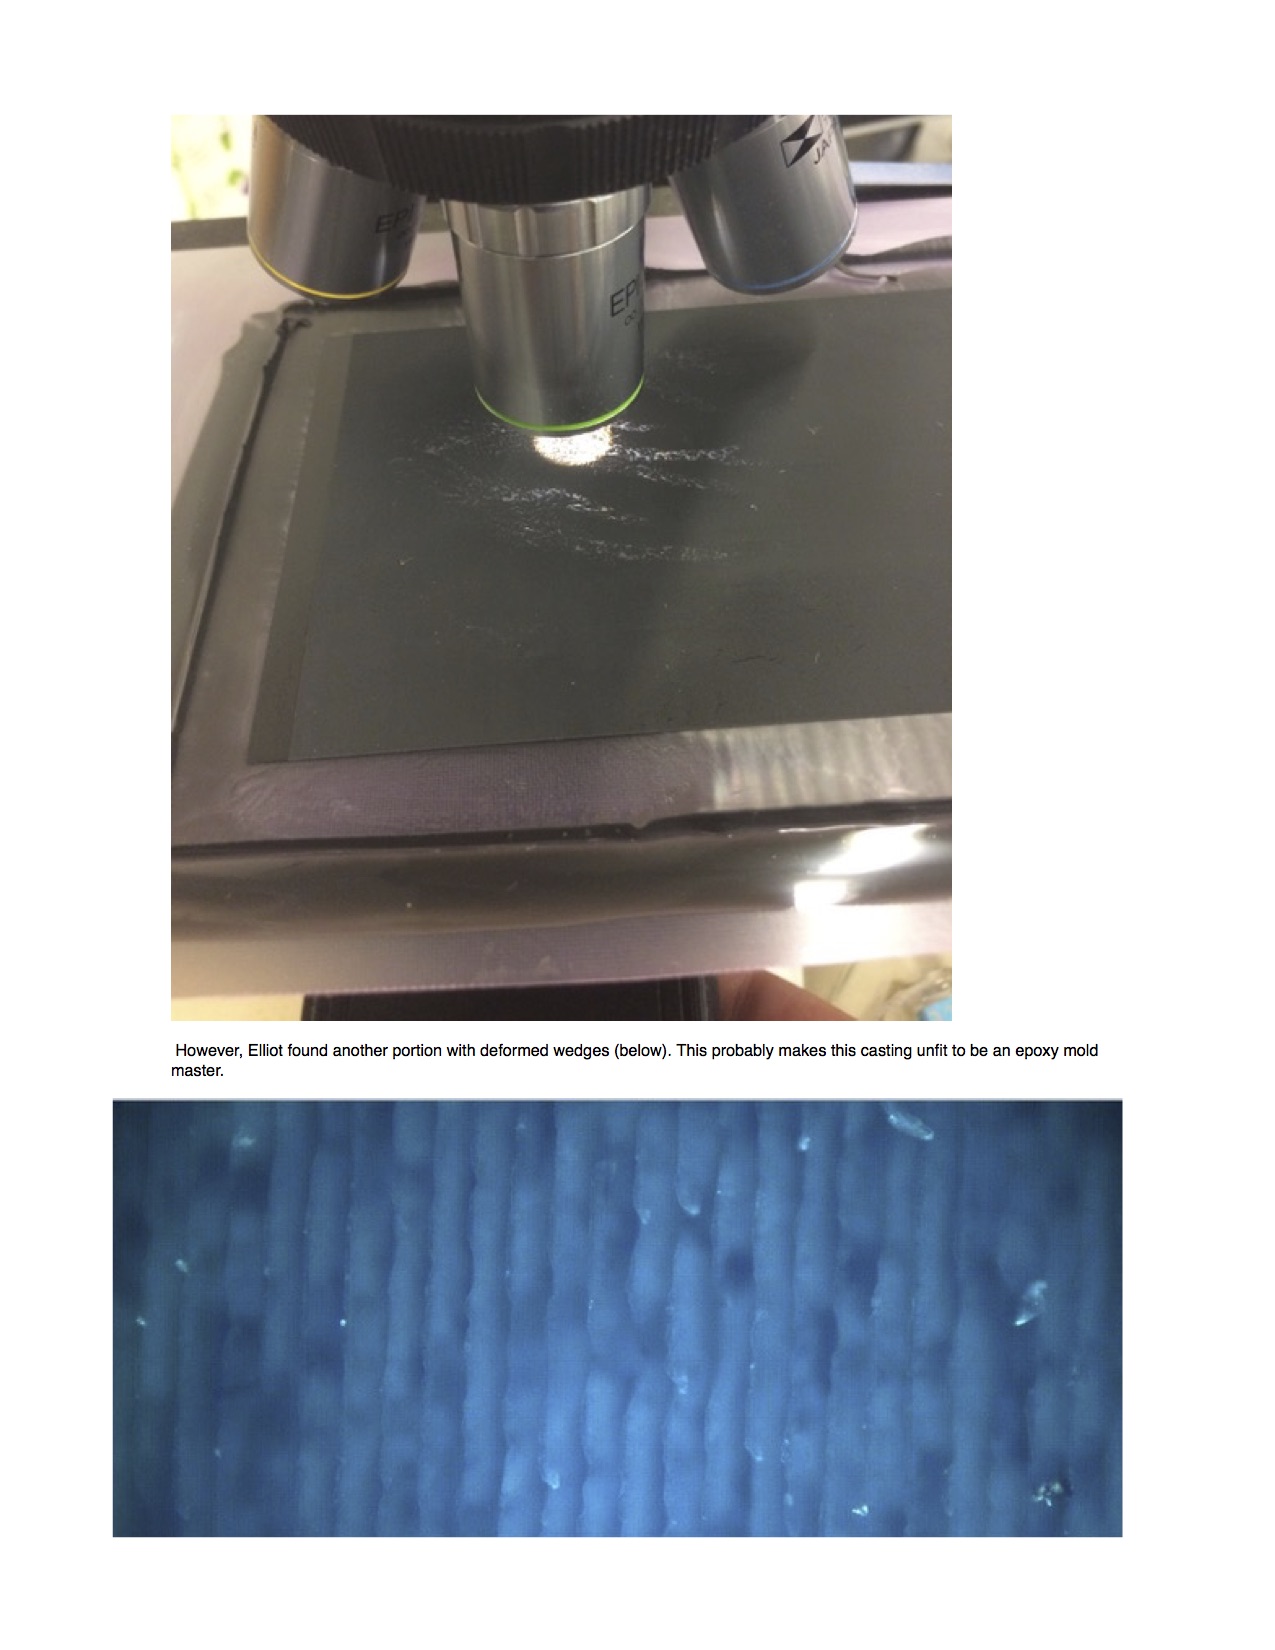
Details of the wedge inspection (apologies for the breaks):
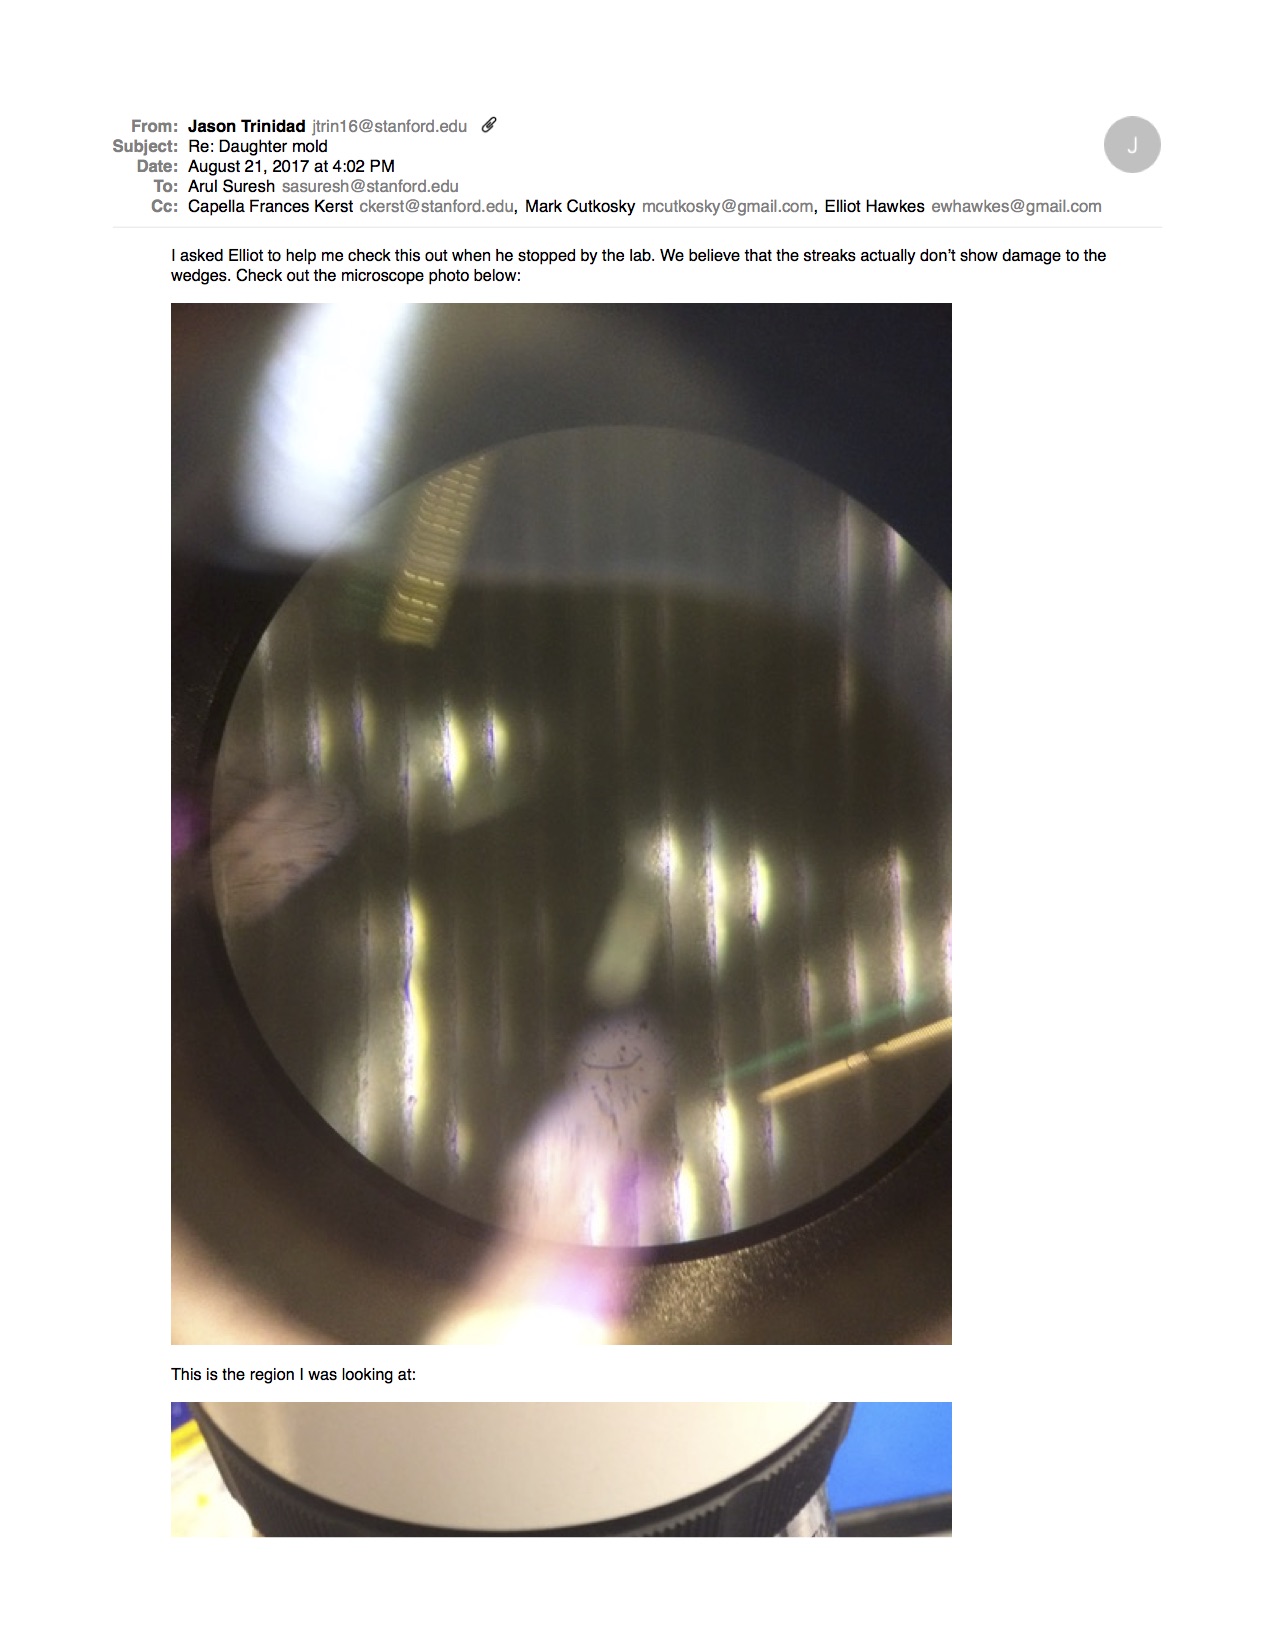
Monday, Aug 21st
Today I'm mostly re-cutting and re-casting. Nobody seemed to be able to tell what the issue was with my last cast from the photo, so I'm also going to take a look at that under the microscope.
Week 8
Friday, Aug 18th
I finished machining the second mold today, so that went well.
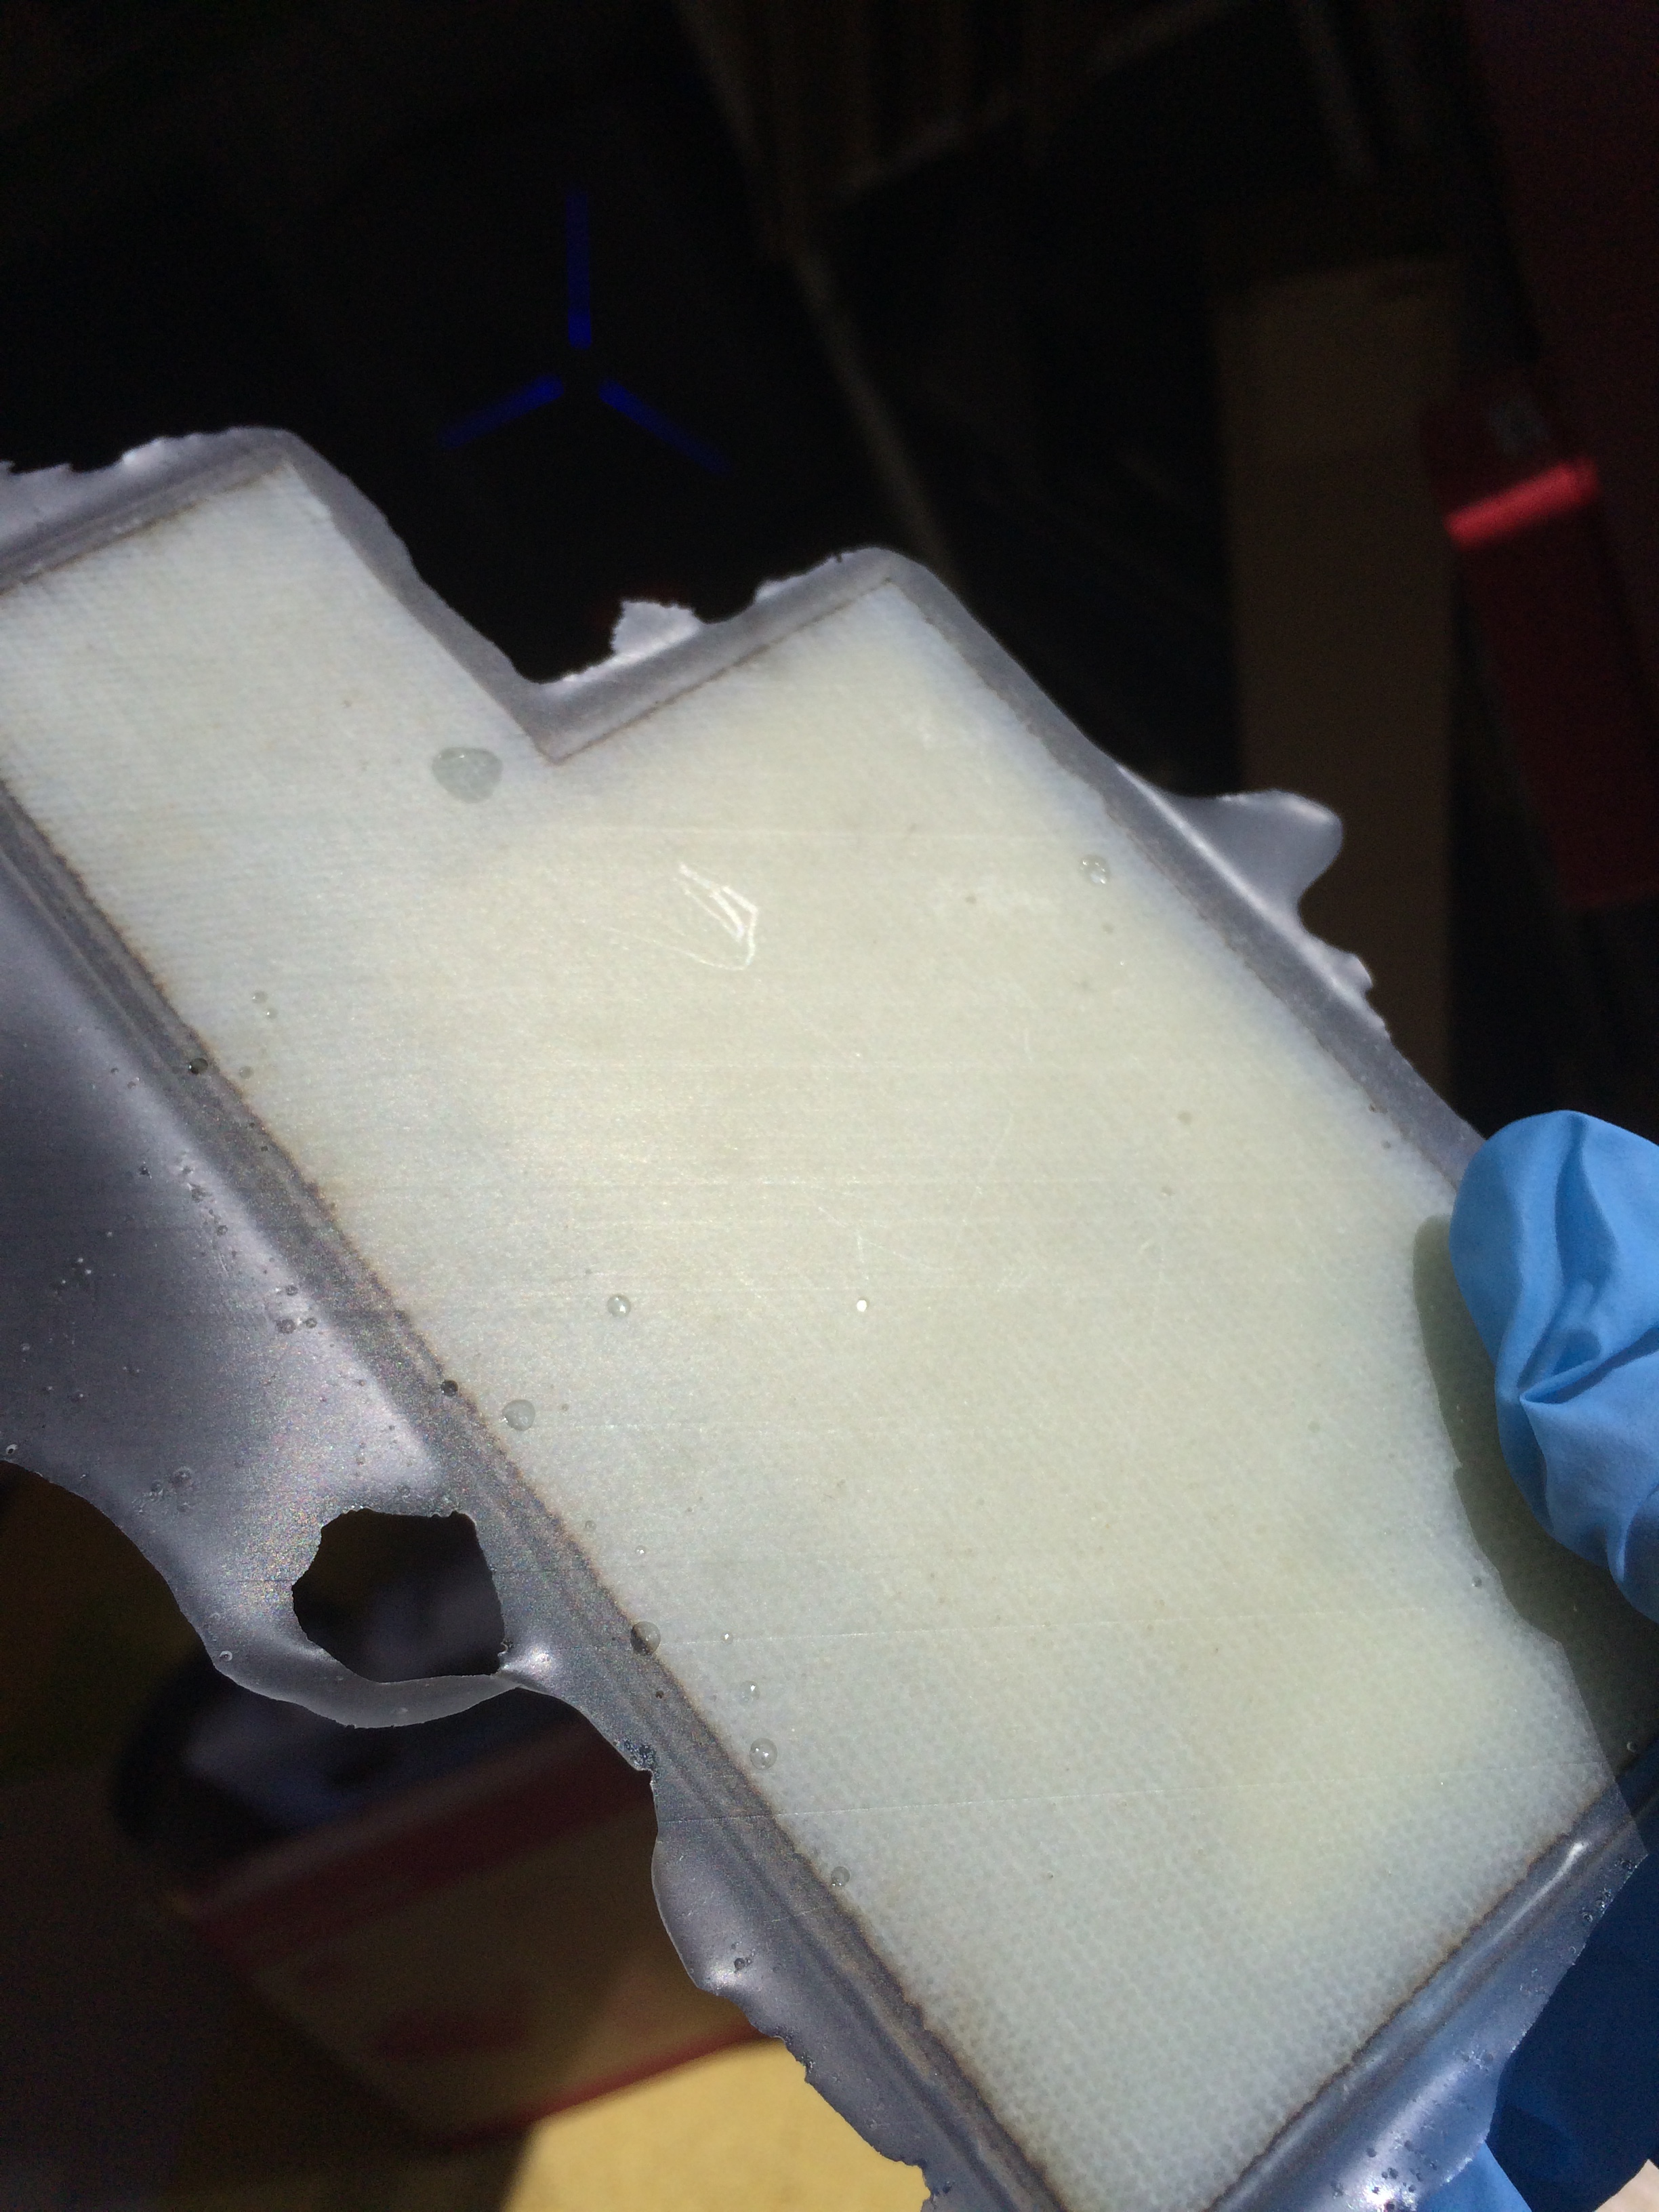
However, I found this when I de-molded the PDMS I cast yesterday:
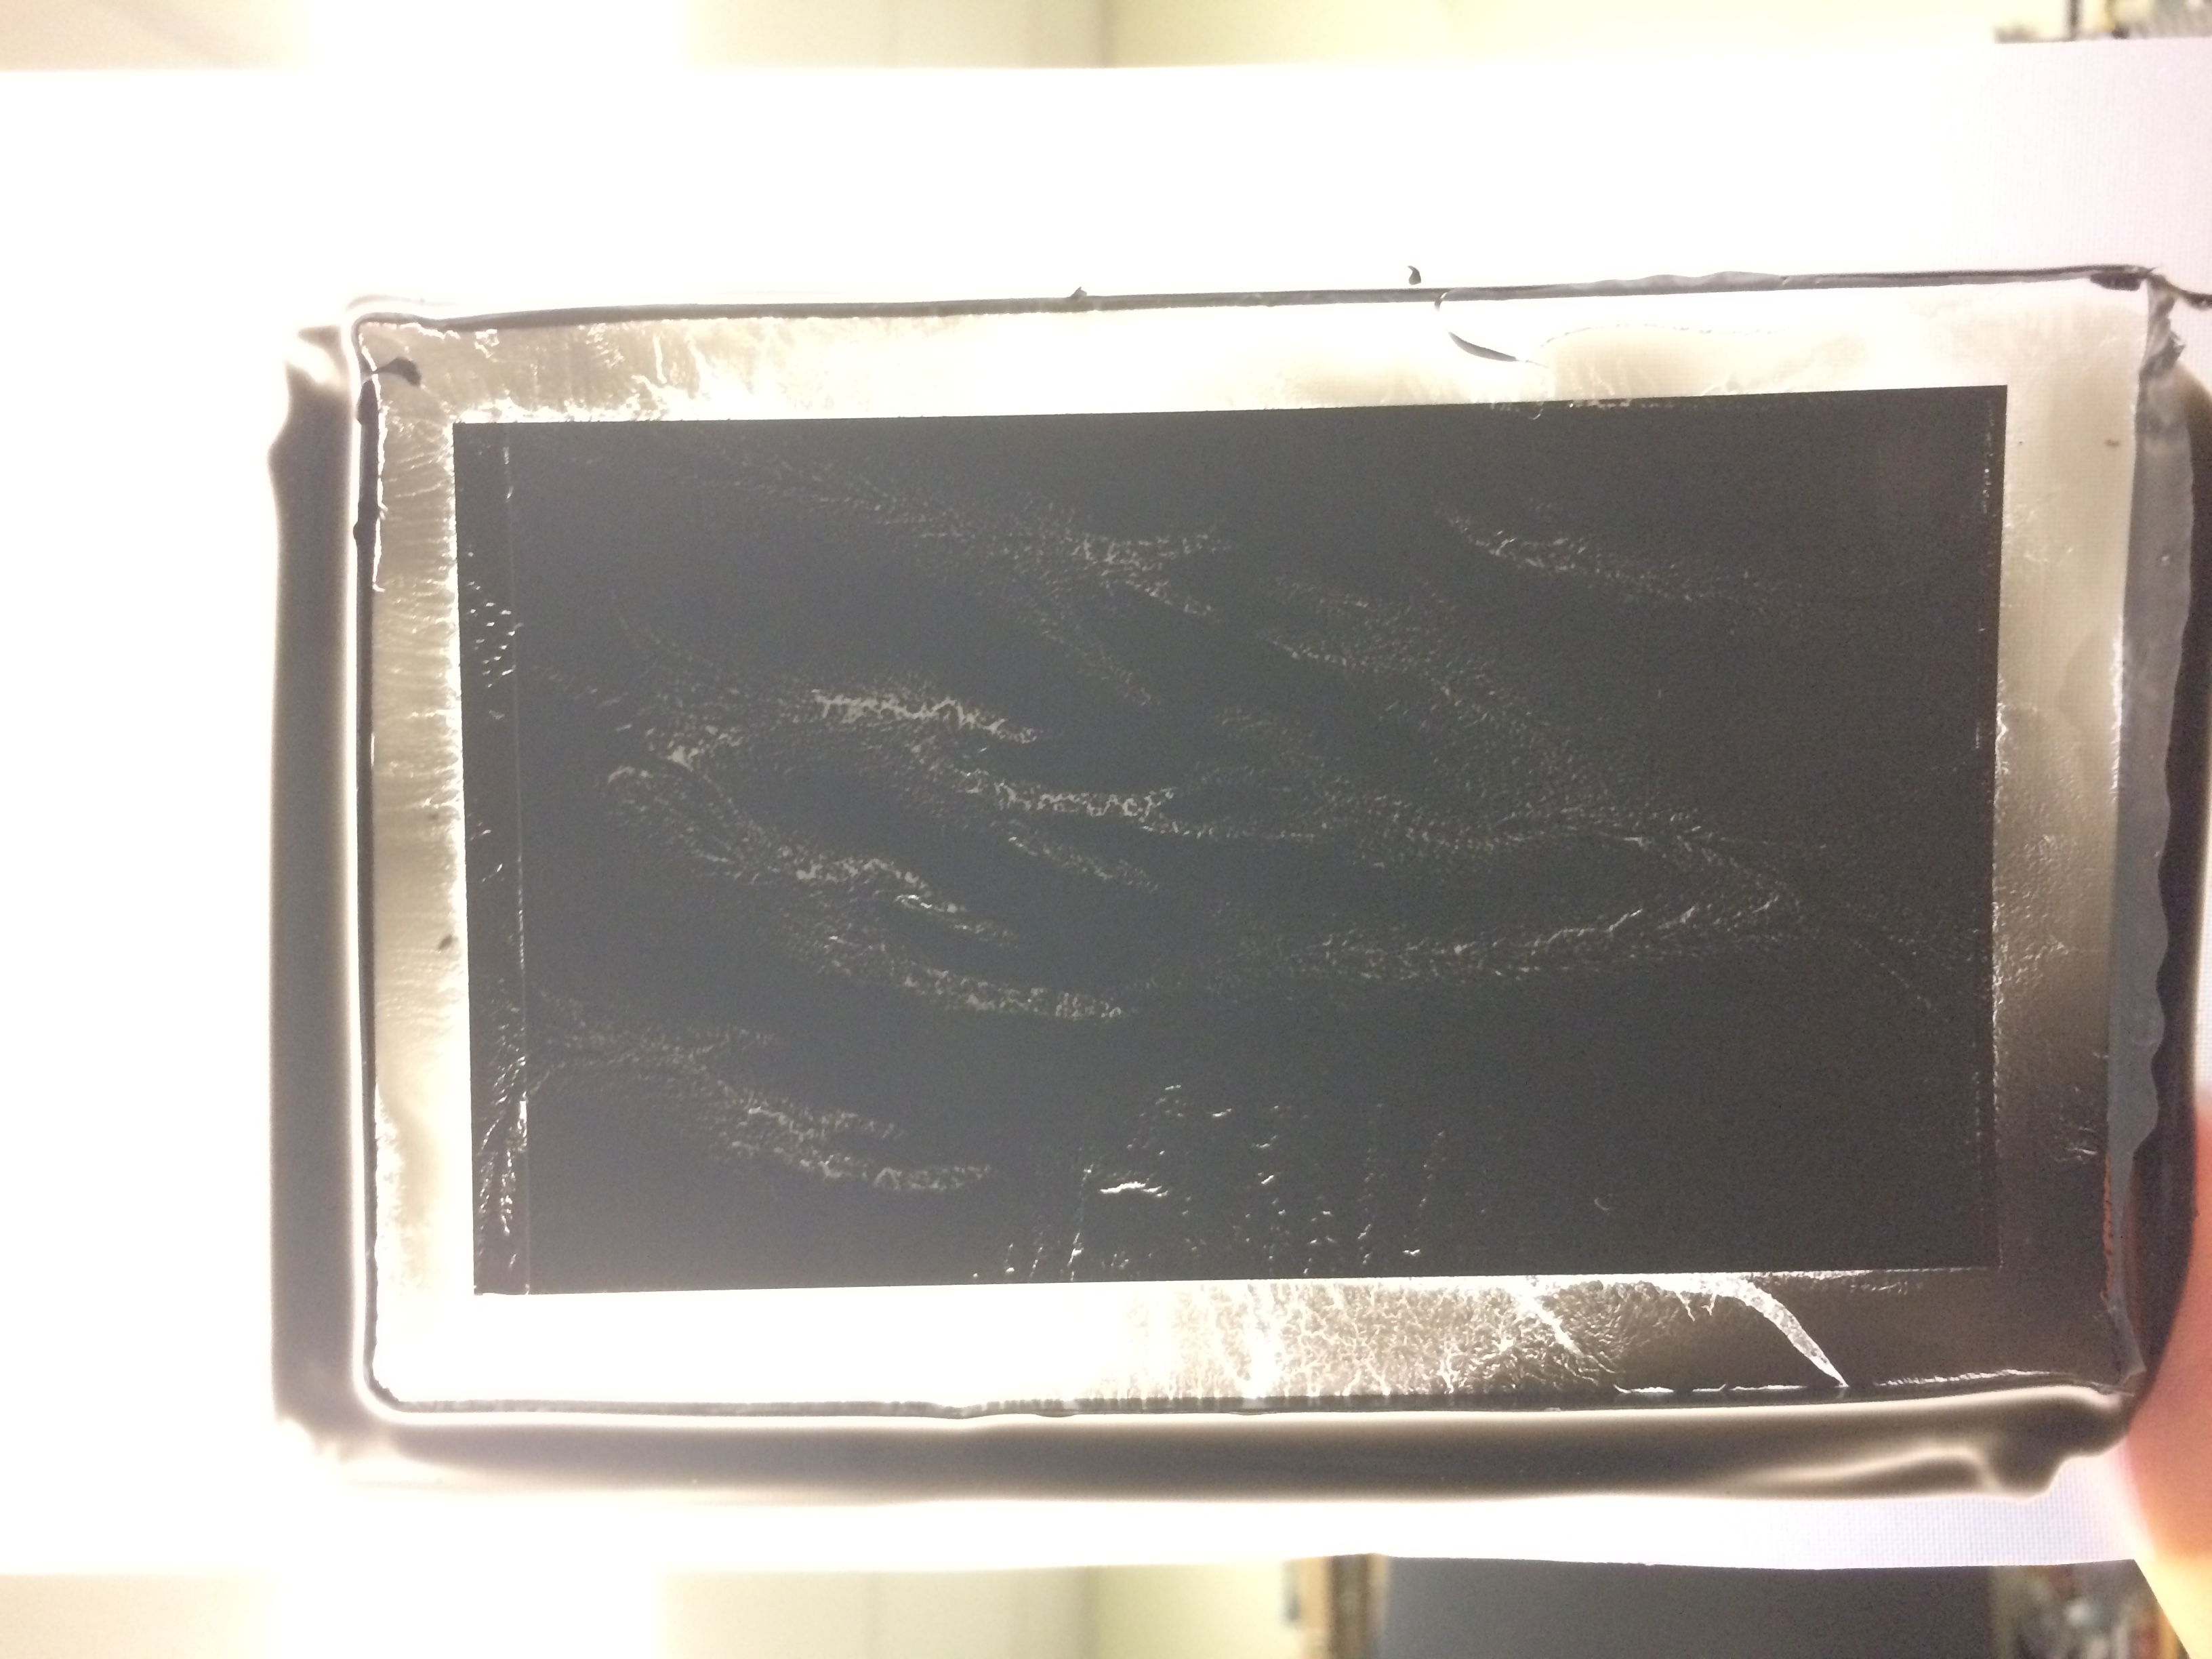
We'll see what the experts have to say about the cause.
Thursday, Aug 17th
Today will be busy:
- Prime fiberglass backing
- Cast PDMS
- Cut wax
- Remove adhesive from wax
- Melt wax
- Tape border onto wax block number 2
- Cast wax
Hopefully I can do this by lunch. Then,
- Face wax block number 2
- Machine microwedges
- Cut carbon rods for epoxy molds
- Order whatever materials might be needed for restoring the existing epoxy mold
- (If there's time) Change some stuff in documentation
Writing all this out I can see that this schedule is maybe a bit ambitious. Let's see if it works!
edit: Got everything except machining the microwedges. Not bad!
Wednesday, Aug 16th
I took a friend to the doctor this morning, so today was a shorter day. I was about to cast the PDMS for the master of the epoxy mold when I noticed that there was a patch of white streaks across the mold. Arul previously mentioned that a sign that a blade needs to be replaced are these white streaks, so I figured a whole patch of them is a sign that the adhesive isn't useable. I just replaced the blade yesterday, so I'm not sure what's going on there. Hopefully Arul has seen this before.

I also heard back from Home Depot. Somehow the materials I ordered for the UV laser vent got sent to Cincinnati, Ohio! I've re-ordered from Amazon. From the reviews, it seems like the failure rate of the vents on Amazon is higher than that of the one I ordered from Home Depot. (Usually bearing failure). But the vent isn't run super often, so hopefully it'll be fine. I guess we'll see!
Tuesday, Aug 15th
Nothing super remarkable to update on today. Today I:
- Checked on my refilled wax mold. I think I didn't manage to melt all of the remaining wax on the mold yesterday before filling, which caused the wax to solidify as two solids. So I re-did it this morning.
- I think it might be difficult to both melt down all of the remaining wax and pour the new wax without something solidifying too early. I'm thinking of adding a step to the process that includes re-melting everything down to the blue wax after pouring. That way everything is guaranteed to cool as a single solid.
- Faced down the other mold until it was level. (I think I had melted some of the blue wax during the previous casting, causing a dip. This limited the height of useable yellow wax.)
- Laser cut three sets of acrylic mold materials
- Replaced the lead foil on the blade fixture
- I thought that a rip in the lead foil was causing the blade to be a bit wavy when I measured it in the laser adjuster. However that doesn't seem to be the cause of the problem, it's still wavy. Within a thou tolerance though.
- Replaced and leveled the new blade
- Faced and machined the new wax mold
Monday, Aug 14th
Today I worked on machining the wax mold for the epoxy mold. Unfortunately, I must not have pressed the wax block all the way down in the vise when I put in the aluminum foil boat (used for catching the soap-based lubricant), because the blade dug too far down in the wax. This made the wax block basically unusable, so I've spent much of today re-making it. Thankfully I figured this out pretty well last time I had to refill the molds, so I think I'll get to machine again tomorrow.
Week 7
Tuesday, Aug 8th
So far today I have:
- Casted the epoxy mold (yay!)
- Edited the creating a daughter mold documentation to include all I've learned about casting
- Updated Drew on the router situation. He says that if they really need it, they'll send the part out. I'd still like to get it to work though...
The epoxy mold may not be perfect. I guessed at the amount of epoxy I needed, and it looks like I underestimated. So I may have to cast some more on top (technically, on the bottom). Now that I've gone through the process and learned the kinks, and especially now that we have a working laser cutter available, it might even be possible to just make a new one from scratch. We'll see what Arul et. al. think.
Monday, Aug 7th
I didn't get to implement Arul's feedback on Friday, so my goal is to cast the epoxy mold by the end of today. I'm also going to attempt to revert the update on the Carvey. If I can't do that (or if that doesn't work), I'm going to do my best to be able to control the router from my computer by the end of the day.
Week 6
Friday, Aug 4th
First things first: CHARM lab challenged us to an Ultimate Frisbee match on Wednesday. One of the girls was talking a lot of smack so we're going to have to do it for real.
Besides that, today was a pretty normal day. I worked on assembling some things for the epoxy mold and then realized that I was a bit confused about some of the specifics of the casting process. Arul got back to me and cleared it up. I also had some trouble getting the CNC router to cut toolpaths from CAM. I think an update I installed might have screwed up the tool probe setup they have there. The tool wasn't probing properly even when I ran a process that had worked yesterday. I'll try to revert it on Monday. Worst case scenario, apparently there are alternative softwares that can run the machine from my computer. The current controls don't allow me to hand jog the machine, but the other software does. Then I could just measure my own offsets with the toolsetter from BDML.
Thursday, Aug 3rd
Yesterday was pretty busy. I casted a mold for Arul and Elliot, prepared the backing for the daughter mold and then cast the mold I had prepared on Tuesday. Then I experimented with the CNC router they have in TLTL so I could get used to it in preparation for milling a chassis for SuperSCAMP. I was able to run a sketch I made in the device's editor, but I was unsuccessful at machining a shape from Solidworks. The machine's software only takes SVG files for whatever reason, and I think that my conversion resulted in a bunch of dots instead of a continuous line. However, the software also accepts gcode, so I'm going to give that a shot later today.
Today I:
- Removed, trimmed, and re-floated Capella's fiber glass tile.
- The small bubbles are gone, and the epoxy is no longer cloudy. I think I must have messed up the ratios when mixing the epoxy.
- Updating the PreparingMolds documentation and added pictures.
- De-molded Arul and Elliot's molds
- Ordered a "diamondlike" carbide endmill on McMaster, since the vendor for a diamond-cut router bit I ordered got back to me with an estimated delivery range of August 11-18.
- Attended a pretty interesting talk on soft sensors, artificial muscles robotics by Professor Park
- De-molded the fiberglass-backed adhesive for the daughter mold.
Tuesday, Aug 1st
The epoxy I cast yesterday came out a little cloudy and hasn't cured completely. The back also has some bubbles.
I'm not sure why this cast turned out so different from the others. I'm going to try casting on top of acetal instead of Teflon.
To do today:
- Ask Amy if I can use some of the thicker acetal
- (Possibly) Double stick thicker acetal to current acetal (the layer protecting the glass is not flat enough to cast on)
- Float the fiberglass
- Update hard backed tiles documentation
- De-mold both of Elliot's molds
- Machine wax mold for epoxy mold casting
- Machine Elliot and Arul's custom mold
- Meet with Drew about manufacturing a composite body for SuperSCAMP
Monday, July 31st
I didn't have time to write an update on Friday, but basically I helped out with Living Machines in the morning and attended a tour of some labs at Berkeley after. The tour was awesome! We got to see Salto, as well as hold a cockroach and touch a gecko. Super cool.
Today, Amy helped me cast two molds for Elliot using an acetal backing. I also (really) stuck down some acetal and Teflon sheets to a glass plate to try and create a better backing for Capella's fiberglass.
Hopefully this'll result in a flat, smooth surface for adhesive tiles. If this works, it can also serve as a test run for making backings for testing casts of Alex's 3D printed molds.
Week 5
Thursday, July 27th
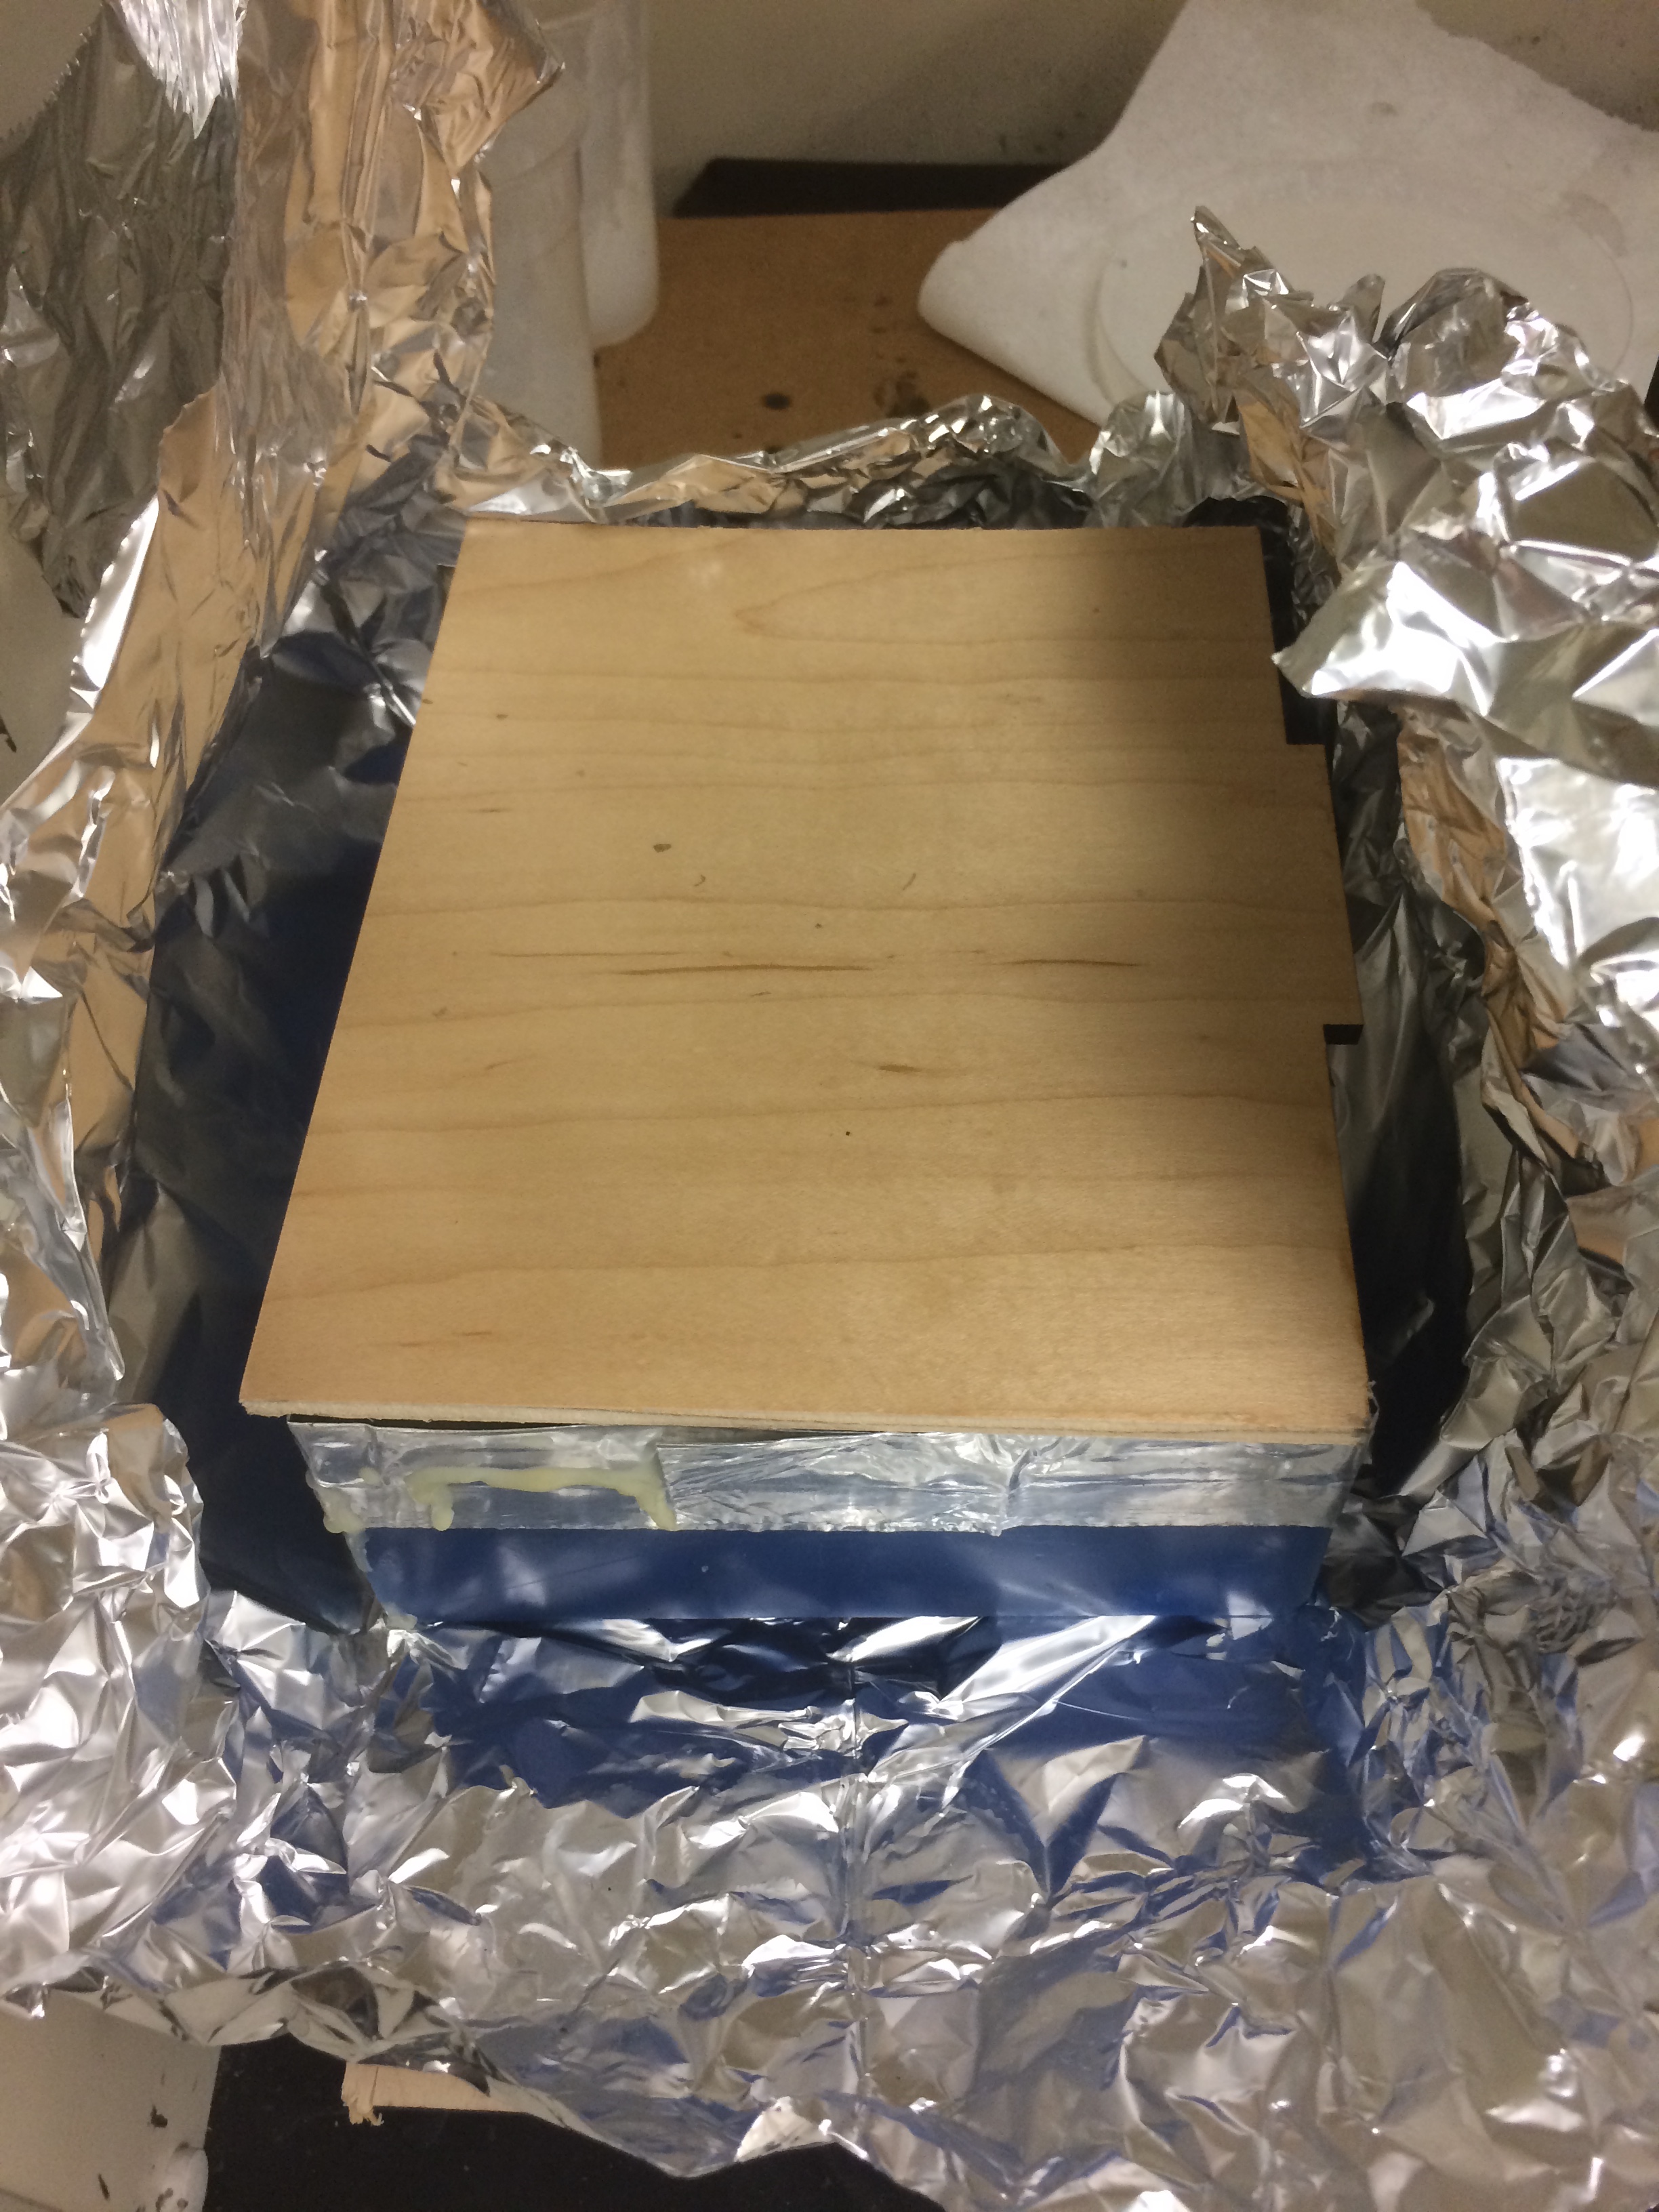
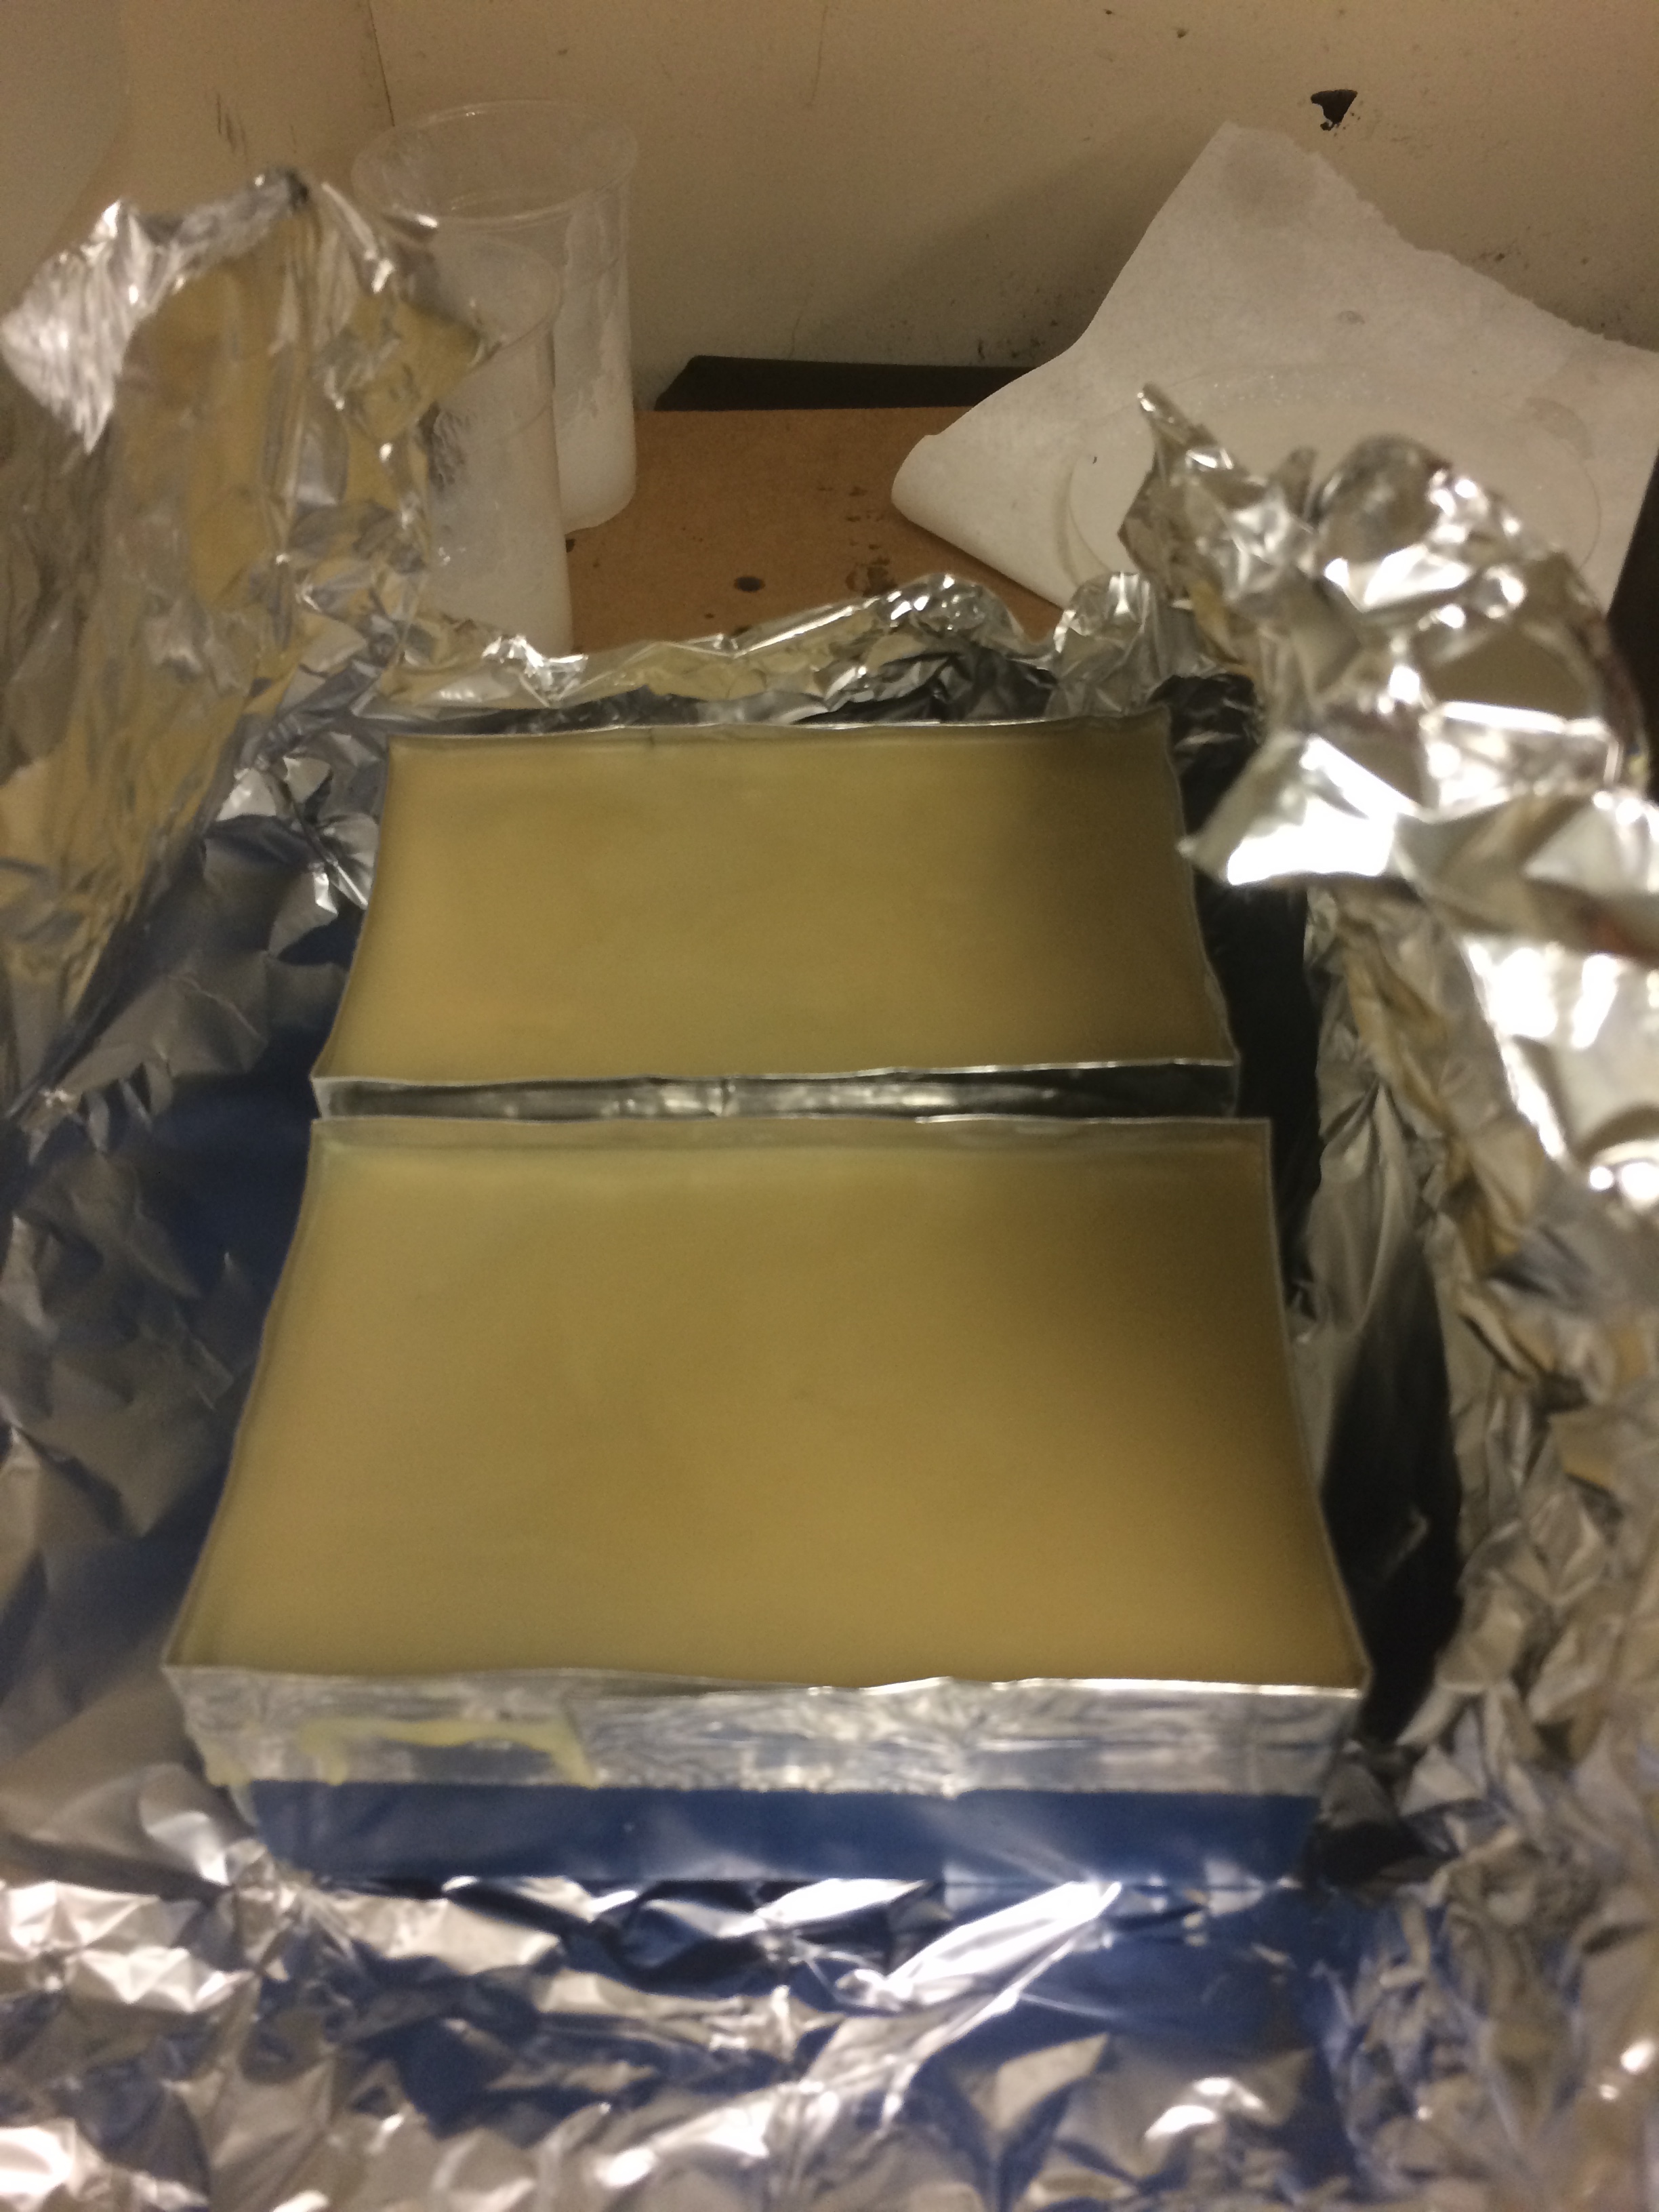
When I got to TLTL this morning, I unwrapped the blocks and found...
...that the foil had gotten into the wax. Oops. Thankfully, I had all day to fix it. I melted the wax down and tried again, but this time I put a piece of plywood over the blocks like this:
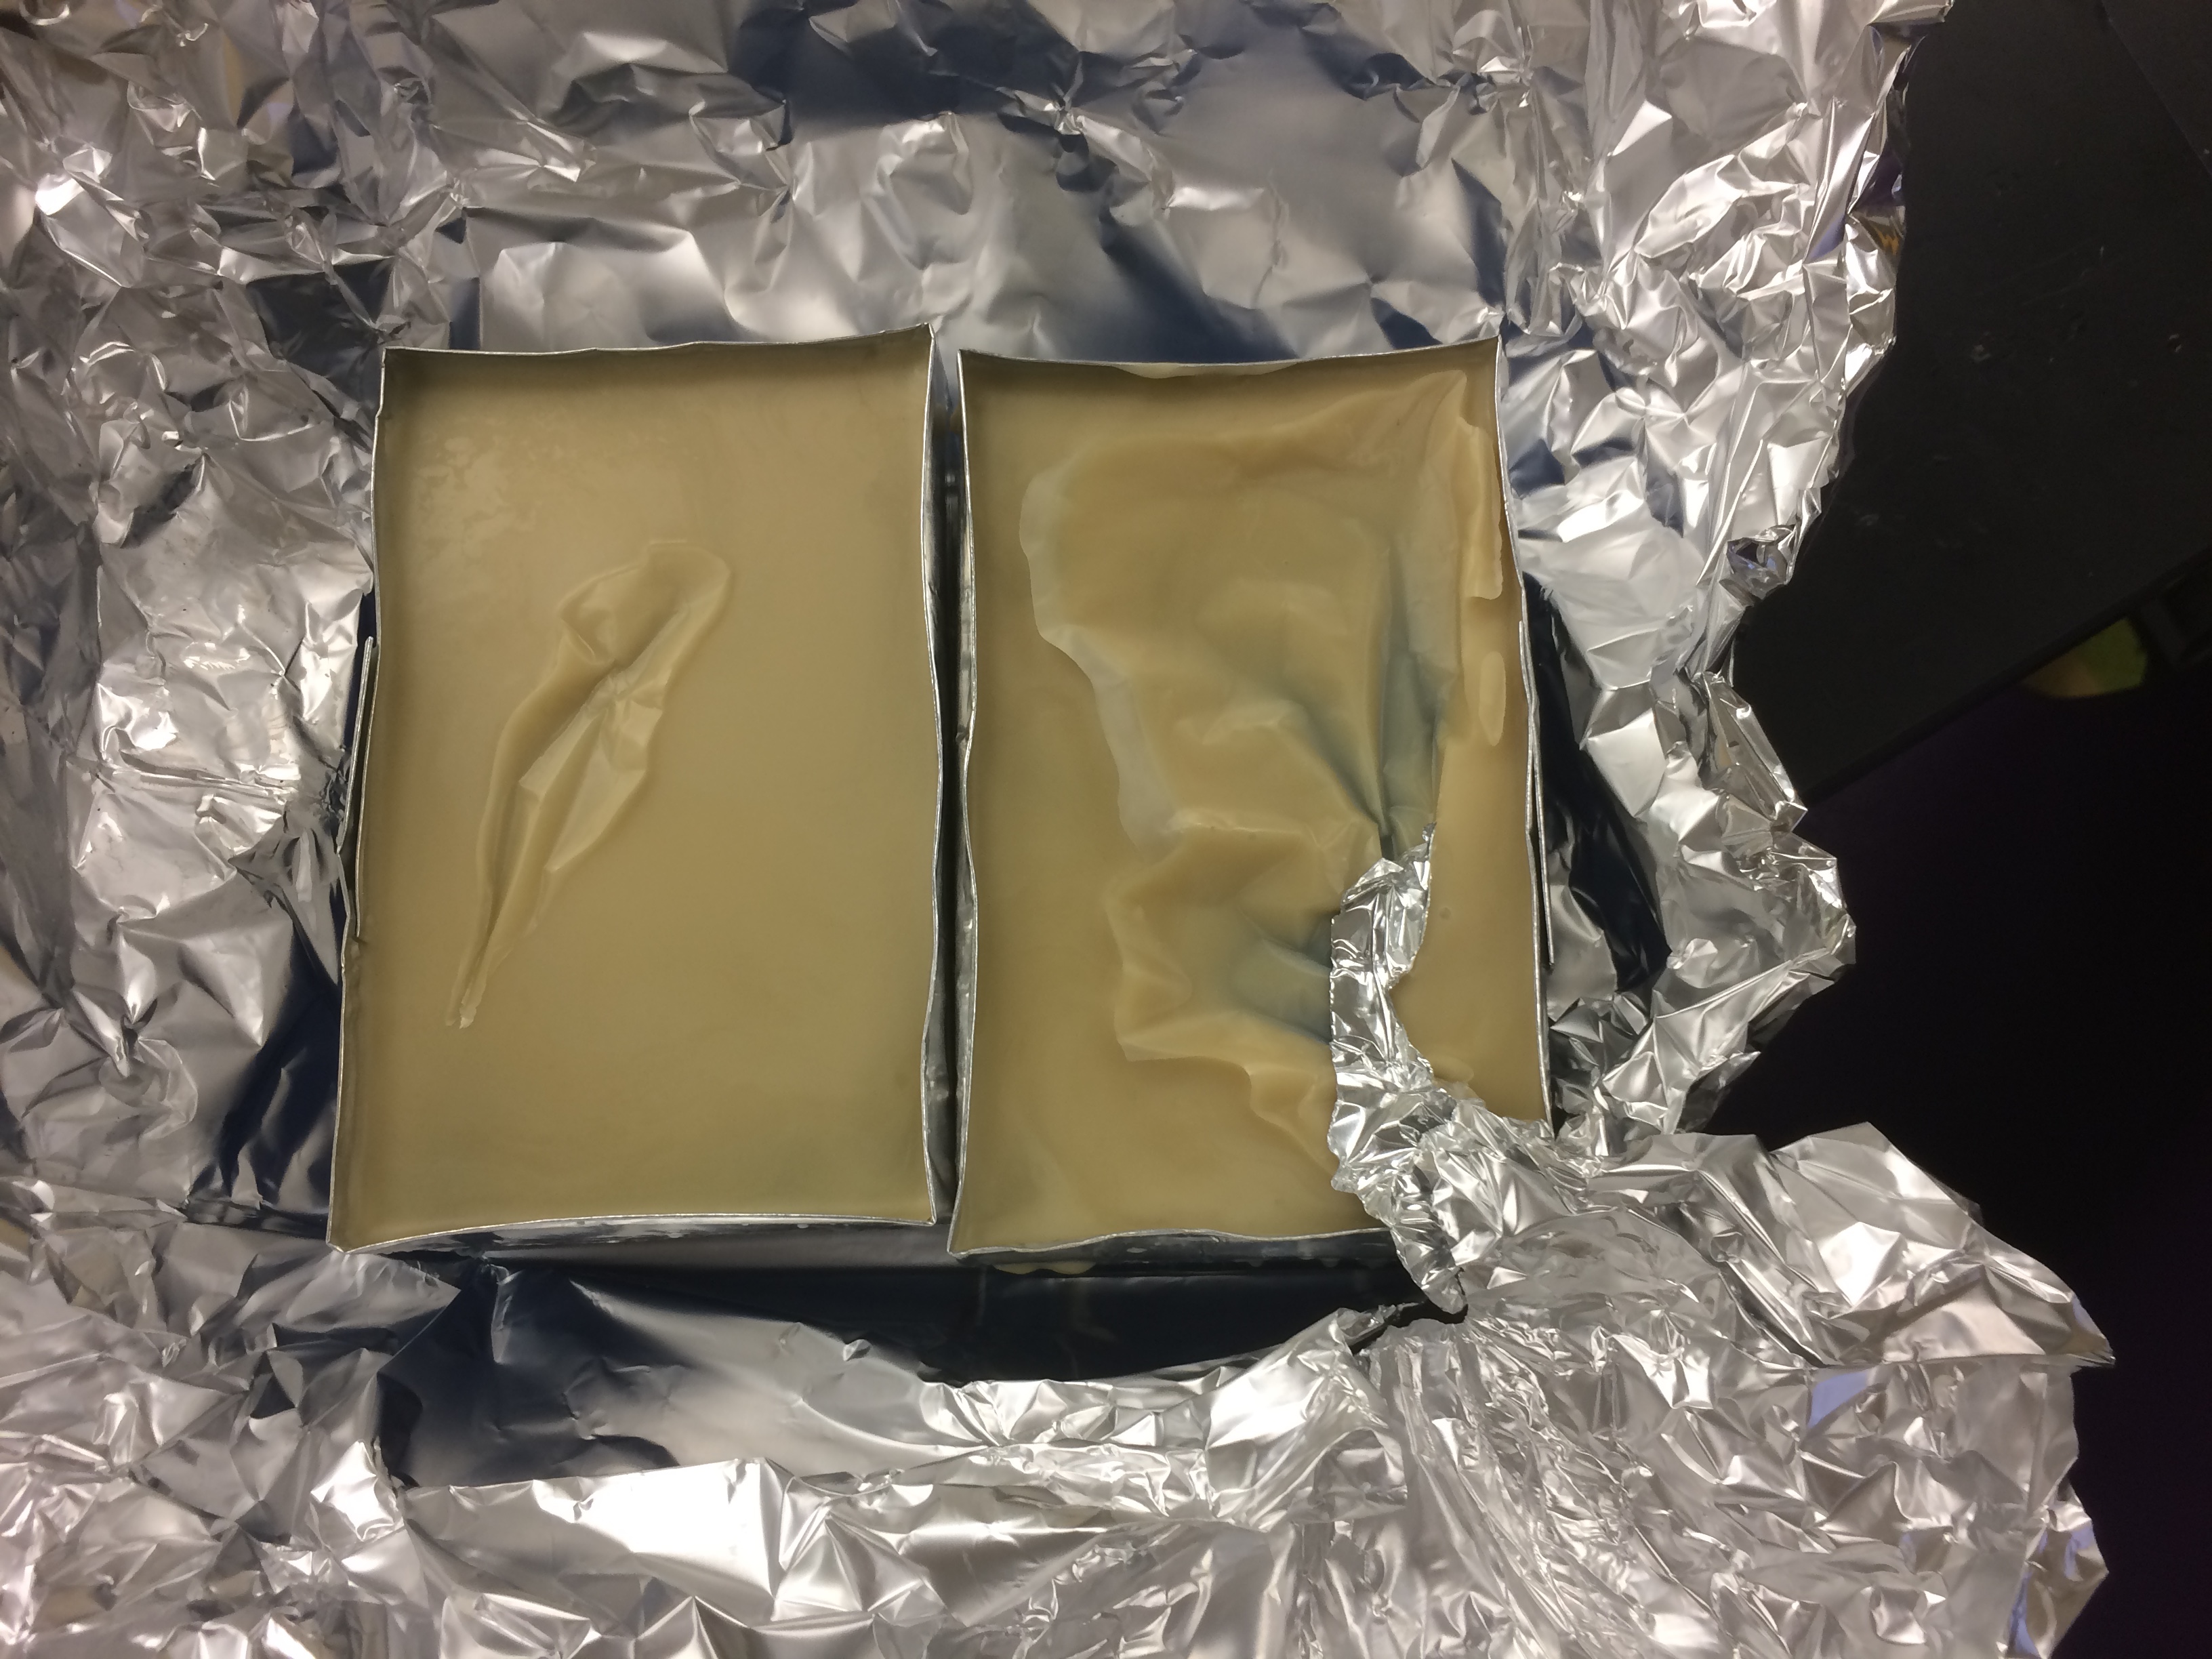
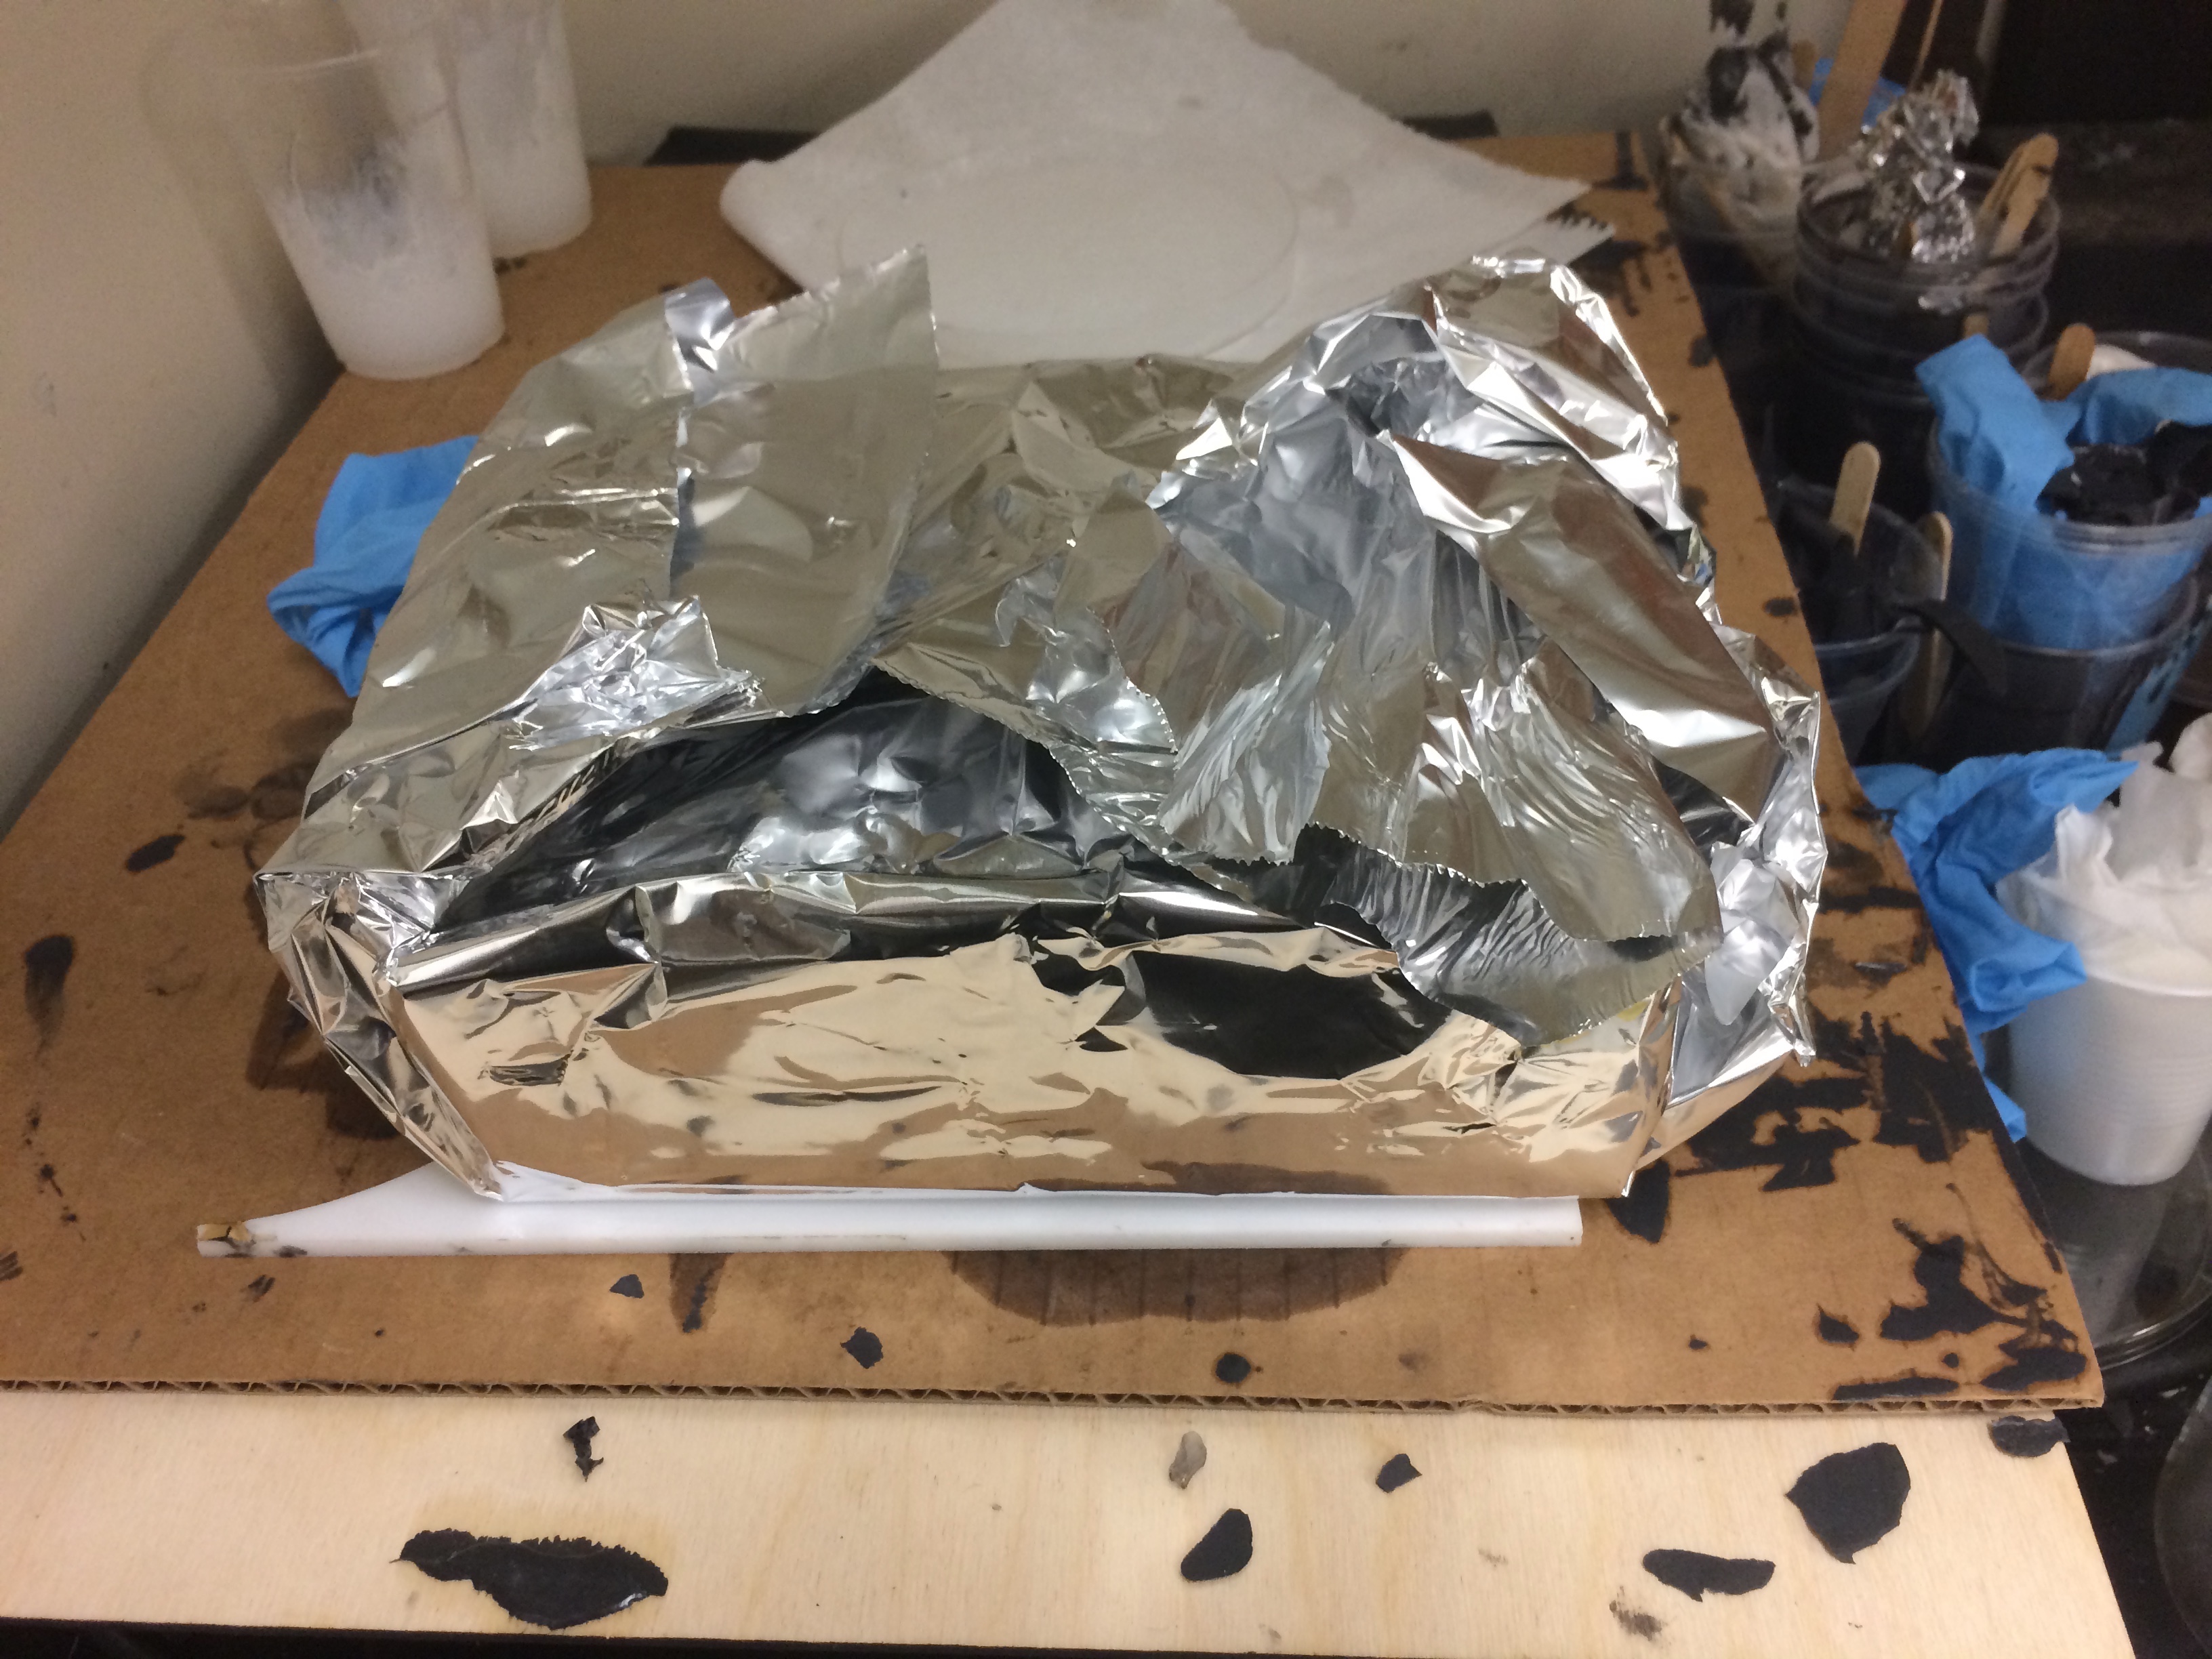
After lunch, unwrapped the foil again to find...
GREAT SUCCESS!
I just finished machining one of the blocks. Feels good! I think I'm going to machine the other one as well, and cast both of them once they dry. That way Elliot can ship out all three pieces of adhesive.
Wednesday, July 26th
The saga continues. It turns out that the oven rack is not even close to level, therefore my wax blocks did not turn out level. I also kept finding little particles in the wax, introduced at who knows what stage of this process. So I melted down all the yellow wax, poured it out, and basically started over. After pouring the wax, I wrapped both blocks in (a lot of) aluminum foil. Hopefully this will slow down the cooling enough to prevent cracking.
In other news, I put together a short list of lessons I've learned from working from and on wiki documentation. I'll paste it here. But first I want to thank Arul for his incredibly prompt and clear responses to requests for instructions. "Writing" documentation is a lot easier when I'm mostly copying and pasting.
Some things that I�ve found help with writing documentation:
- Write as I go
- Trying to remember every detail of what you did a couple days after you did it is tough, and you'll probably forget some insight you gained while working. Besides, ain�t nobody got time for that. Do it as you go and you�ll take at most an hour a day. Further, you�ll probably find things that don�t make sense when you re-read them the next day. Editing helps a lot with clarity.
- Document mistakes
- Try to include mistakes you�ve made in the form of specific instructions. After all, if you�ve made the mistake it�s likely that another beginner would as well.
- Try to plan on behalf of your reader
- The processes I've been working on recently involve a lot of time either baking or curing. If not planned for, we can get stuck with an unexpected "cure overnight" step. Noting steps that take a long time at the beginning of your doc can allow people to plan ahead. Also, sometimes stuff is in BDML when you're in TLTL, and vice versa. Having a list of required materials beforehand (and where to find them) can save a lot of time and hassle.
- Take pictures about every 10 mins
- Maybe even more frequently. It�s kind of hard to tell what pictures you�ll want in the documentation while you�re working. Better to take a bunch of pictures and take your pick while editing. This is probably where I could improve most.
- Make the instructions time-proof
- For example, the sheet wax we currently use has been discontinued by the manufacturer. We still have plenty, but Arul made sure to link the replacement future people would use in his documentation on preparing molds.
Writing docs seems to be pretty important to knowledge transfer. Also for practicing your writing as an engineer; I'd forgotten how prone I am to run-on sentences. Hopefully these will be useful to future adhesive-makers!
Tuesday, July 25th
I got the fixture up and running yesterday and machined Jiro's block. However, I'm still facing issues with my wax blocks. It seems like the wax I poured did not adhere very well. I think part of the reason was that the wax I heated with the torch cooled quickly, and it was difficult to keep the entire top layer melted like Arul mentioned in the documentation.
Another factor could be the silicone that has gotten underneath the wax during its use. When I heated the wax that still remained on the block in preparation for pouring, I think that the silicone prevented the wax from re-adhering to the block of blue machinist's wax. In practice, this meant that the new layer of wax was not rigid in certain places on the block, making these casts unsuitable for machining.
In an effort to re-cast, I pried off all of the loose wax on one mold, and melted off the other. I also removed all the silicone I could access. The prying off seemed to work best, even though I left some wax in the middle that had adhered well. I figured it didn't make sense to damage the machinist's wax trying to pry off wax that had adhered well anyways, and that I could melt it when I recast so that it would become part of the new block. I recast it, and left it in the oven overnight.
As of this morning, that strategy seems not to have worked very well. I'm going to melt it down and try again. Third try seems to be the charm for most of these things!
Monday, July 24th
Much to do today. I tried to replace the blade in the fixture this morning and accidentally ripped the foil, so I ran to the physics store to get some more. For today:
- Replace foil in fixture
- Replace and calibrate blade
- Machine Jiro's block
- Check on the blocks I cast on Friday
- (Depending on condition of blocks) Face blocks
- Edit documentation
- (Depending on condition of blocks) Machine normal adhesive mold
- Soak existing epoxy mold in hexane
I ordered acetal and teflon on Friday. Amy recommended I try casting Elliot's backing-less wedges on acetal, which apparently doesn't stick to PDMS. I'm also going to try floating Capella's fiberglass using a Teflon sheet to avoid the bubbles and wrinkles I was getting from the plastic wrap.
Week 4
Friday, July 21st
I forgot to write an update yesterday, so I'll just write that one today. Sometimes I feel like I don't have anything to write in the morning, when I usually update my blog. So I think I'm going to add an optional entry in the afternoon (and set a reminder for it).
Today will be spent manufacturing and machining wax molds. Yay! Elliot would like a cast of the adhesive made from Dragon Skin, I'm going to try and get that made today. So it goes:
- Cast the two blocks that are ready
- While those two blocks are cooling, retrieve and face the 3rd block
- Retrieve the two cooled blocks (after lunch)
- Machine one of the blocks
- While that block is being machined, make the tape skirt for the third block
- Head to TLTL, remove the adhesive for the third block
- Ideally, cast the third block
I would also like to have more pictures for this blog (and documentation), so I'm going to try and do that as well. Here we go!
edit: I forgot about lab meeting. Note to self: check your schedule before making fancy plans.
Thursday July 20th*
All of the wax molds have been reduced almost to their blocks. I asked Arul where the wax was kept, and I guess he ended up re-writing the documentation on preparing wax molds last night. Thanks Arul!
Arul also got back to me about prying off the glass slide on Wednesday. Basically I can take it a bit slower and check the progress of the slide when levering it off. I think essentially it works best when the glass plate comes off at a constant rate.
Most of the day was spent working on casting two wax blocks. (One suddenly appeared in the drawer, making a total of three. I have no idea where it came from!). Most of the process is straightforward, but removing the adhesive from the back of the original wax sheet takes forever. I'm also updating the documentation as I go.
Wednesday, July 19th
Capella's fiberglass did not turn out super smooth due to imperfections in the plastic wrap, so I may have to float them again. I'll have to ask here what she thinks when she gets here, but I think I could try floating it on teflon sheets instead.
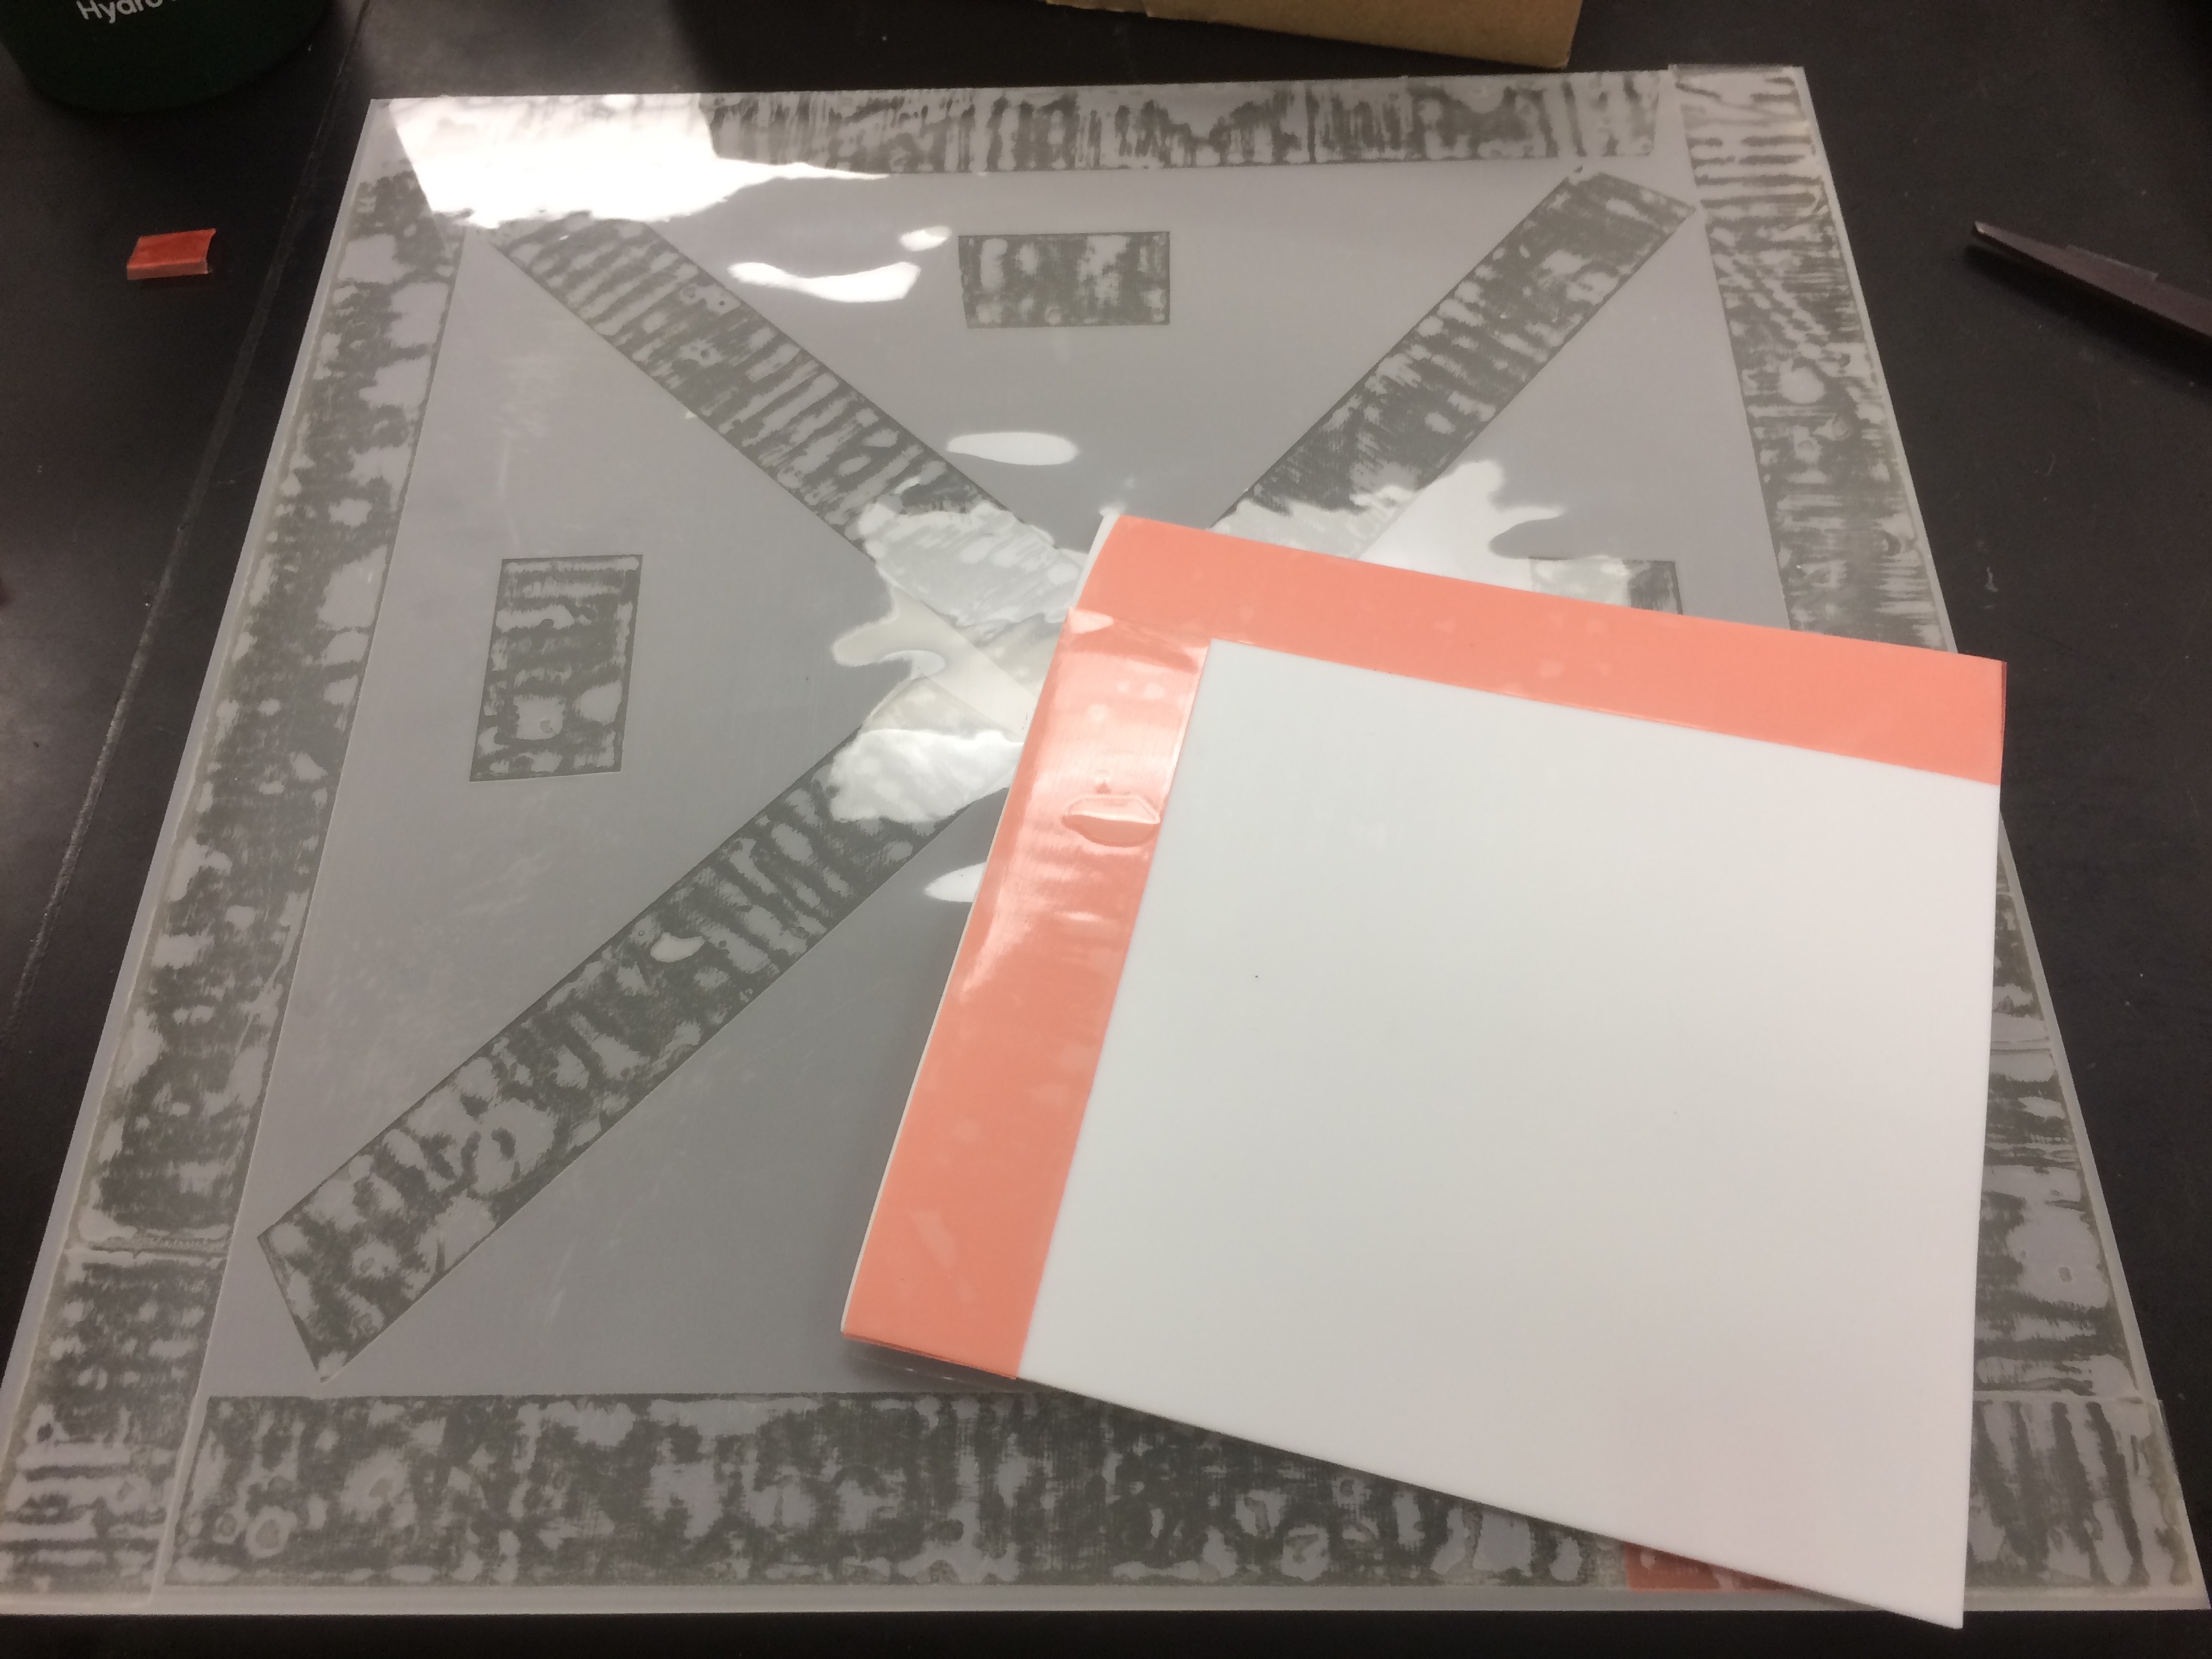
My latest PDMS cast for Elliot looked pretty good... until I tried to pry off the slide:
It seems like Arul's done this procedure before and succeeded, so I'm not sure what I could have done differently. We'll see what he advises.
In other news, we also decided to clean the existing epoxy mold and re-coat it in parylene. I'm going to attempt to remove the small particles of PDMS caught in the mold with Hexane. More on this tomorrow.
The wax molds are also running pretty low on wax, so I'm going to recast them soon as well.
Tuesday, July 18th
Looks like yesterday's entry didn't save, so I'll recap:
- I found some bubbles in my PDMS cast for the daughter molds, making it unsuitable for daughter mold usage. After speaking with Arul and Elliot, I'm going to make 3 traditional casts to alleviate the backlog for adhesives.
- Yesterday I finished aligning the blade and planing a wax block. I also floated Capella's fiberglass in epoxy
Today I will:
- Finish machining the wax block
- Float the other side of Capella's fiberglass
- Check for delivery of vent materials
- Make my first cast on the freshly machined block
Week 3
Friday, July 14th
Looking back at this week, I'm noticing that I've run into a fair amount of road blocks in my work. Many of these seem to come from insufficient planning on my part; cure times and laser cutting times in particular have thrown wrenches into my scheduling. With that in mind, I'm going to start using the time I use to write my blog to be a bit more thorough when figuring out my to-dos. In particular, I'm going to double check both material (e.g. epoxy, solder mask) and documentation instructions for more specific daily to-dos. Hopefully those will help me avoid the kinds of delays I've faced this week.
For today:
- Find teflon sheets in BDML for laminating Capella's fiberglass
- Laminate the fiberglass
- Work on tuning the ESC's for SuperSCAMP
- De-mold the mold I cast yesterday
Thursday, July 13th
Updates:
- Vent materials should get here early next week
- After hours of cutting, the laser has not yet manage to break through Capella's fiberglass. Hopefully a couple more passes will do it.
- I forgot that a newly cut wax mold needs to dry overnight, so I couldn't cast it yesterday. I'm heading over to TLTL and casting it after posting this
For today:
- Finish cutting the fiberglass
- Cast the new mold
- Float the fiberglass in epoxy
- See if I can help with SuperSCAMP
Wednesday, July 12th
Yesterday was a bit hectic and I forgot to post, so I'll just describe here what I did yesterday and what I'm doing today.
Yesterday (Tuesday) morning, I made progress on a couple things I've been helping out on. The first is the UV laser vent. After some measuring and input from Mark and Arul, I decided to go with replacing the current fans with a 210 CFM, 4" in-line exhaust fan. The second was that I found fiberglass for Capella!
Andrew and I took a trip to AeroMicro in Santa Clara, where we bought some square carbon fiber tubes. On our way back, we stopped at Home Depot, but unfortunately the blower I wanted was not in stock.
After I got back from the trip, I headed to the TLTL and started laser cutting Capella's fiberglass. Even after about an hour of cutting, the laser didn't manage to cut through the whole thing, so I'll be going back today. I also de-molded the adhesive I had cast for the daughter mold, but I noticed right away that the aluminum foam was no longer centered over the wax block. The resulting adhesive was uneven, with one side of the PDMS having been pressed away from the wax, and the other still containing a layer of PDMS.
I did check whether the foam was centered over the block when I first placed the fiberglass backing onto the PDMS. However, the fiberglass was initially sliding around on top of the PDMS. This meant that, when repositioned it, there was PDMS on the underside of the fiberglass, blocking my view of the alignment between the aluminum foam and the block. That's probably when I failed to correctly center the aluminum foam. So, I'll have to cast it again. I'd still like to have fresh microwedges for the daughter mold, so I think I'm going to proceed with casting Capella's hard backed tiles with the existing mold, and machine a new one for the daughter mold.
So for today:
- Order vent materials
- Machine a new microwedge mold
- Bring the solder mask to TLTL to stick the aluminum foam to the fiberglass
- Continue cutting Capella's fiberglass
- Cast the newly machined block
- Float Capella's fiberglass backing in epoxy
Monday, July 10th
Still adjusting to how Alessandro designs controls. It seems like the methods I used in my dynamic systems class are very different from how experienced engineers design controls.
On the other hand, with Capella's help, I managed to cast my mold this morning. I also sanded the carbon rods for the support structure a bit, and the structure now fits together a lot better. It also looks like I'll be helping Capella put together some hard-backed adhesive tiles.
The fan on the UV laser also seems to be struggling. I'll be working on replacing that as well.
Week 2
Friday, July 7th
I managed to laser cut my acrylic pieces yesterday! I had to use 1/8" acrylic and run the cut twice, but eventually I was able to snap my pieces out. I'll sand down whatever burrs are left from cracking the pieces off of the stock, and hopefully these pieces will work fine.
I was not successful in creating a PD controller yesterday. Turns out that designing a controller is very different in practice than it was in class. Alessandro has been very patient and helpful, and hopefully I can finish today.
For today:
- Learn to de-mold with Capella
- Cast the mold I made last Friday
- Finish PD controller
- Get a better idea of what has to be finished before MAST
- Start on the next thing to do
Thursday, July 6th
First things first: laser cutting yesterday was unsuccessful. The TLTL laser cutter is apparently not strong enough to cut through .2" thick clear acrylic, even after repeated cuts. However, yesterday I realized that I was being unreasonably conservative about the thickness of these parts, and so today I'll just go back and cut them out of 1/8" thick acrylic. At least I figured out some of the laser cutter's quirks, so it should be a quick cut. Ideally the whole thing won't take me longer than 30 mins.
But the main event for today will be to create a PD altitude controller model from scratch! I think that the model itself will turn out to be pretty simple. Unfortunately, I only really have a passing familiarity with how to do this, so today's probably going to involve some googling.
So, for today:
- Attempt the controller model
- Find 1/8" piece of acrylic
- Ask Alex or Matt to let me in to TLTL
- Show my work on the model to Alessandro
Wednesday, July 5th
I've found a new project! I just finished speaking with Alessandro, who is working on the controls for the new SuperSCAMP. We've decided to work together to create the altitude control system for the new robot. This will involve mounting the sensor hardware, figuring how to read the signals from those sensors, and creating the altitude PD controls. I'm excited to get started!
Today I plan to:
- Work through the SuperSCAMP controls documentation
- Familiarize myself with the sensor datasheet
- (Hopefully) Laser cut the acrylic pieces I need for the daughter mold
- (Hopefully) Cast the wax mold I made on Friday
- Meet with Alessandro to address any questions I have on the documentation
Monday, July 3rd
I was unable to get access to TLTL today to laser cut daughter mold parts and cast the mold I made on Friday. Instead, today I cut the carbon fiber rods I needed and worked on the Creating Daughter Molds wiki page (here, yay documentation!), and started the process to get TLTL access.
Week 1
Friday, June 30th
Late start today since I had to take my car to the mechanic this morning.
Mold machining yesterday was somewhat unsuccessful, so I decided to give it another shot today. The blade was perfectly aligned, but I wonder if I didn't leave enough blade sticking out of the fixture. I guess we'll see.
I also forgot to machine runners for overflow before machining the wedges. Oops. I've decided to just make the epoxy mold with this block anyways, since Arul mentioned that the runners were optional. If I make a second mold I'll machine the runners for sure.
Finished all my CAD yesterday, so I should be good to go for the laser cutter.
Not a bad first week!
Thursday, June 29th
Much to do today! After speaking with Arul (via email), I�ve cleared up the next couple steps for creating daughter molds for the gecko adhesives. I�m writing up my progress in more detail here. Today I plan to:
- Create drawings to laser cut the acrylic walls that will hold in the epoxy during casting, as well as to cut acrylic end plates that will form part of the mold�s support structure.
- Insert a brand new microtome blade in the fixture (I want this mold as sharp as possible!)
- Face and micromachine an adhesive mold in the wax block
- Laser cut the walls and end plates
Wednesday, June 28th
- Learned to mix, cast, and spread silicone onto a wax mold with Capella this morning
- Helped Drew move some transmissions for the ME112 transmission disassembly lab to D'Arbeloff Lab.
- Reading through Arul's email on creating daughter molds for gecko adhesives. I'll probably have more updates on this later
- Thinking about ways to be able to quickly and accurately fixture razor blades for micromachining. Some questions came up, including:
- Are the edges of the razor blade reliably square?
- Do we expect these blades to remain in use in the future?
- Is there anything else we'd want from a new fixture?
Tuesday, June 27th
Looks like the wedges I machined yesterday might have been a little funky. The highest surface on the mold shows marks that look like they came from an endmill. This could be evidence that one of the planing operations didn't remove enough material. Capella says she's going to cast some PDMS in it anyways and see how it turns out.
Also, a little bit more clarification today on what my role will be over the summer. It looks like I might get a chance to work on building a quadrotor with Drew. Pretty excited about that! Maybe I can get to apply some of the controls topics I learned last quarter.
Monday, June 26th*
First day! It seems like the gecko adhesives are in very high demand. I spent some time showing Peggy and Kat how to mount a blade in the blade mount today, and realized that it�s a pretty big bottleneck in the process. It would be interesting to try to streamline that process, maybe by having something that accepts the blade and uses the clamping force produced when re-assembling the mount to align it against precisely manufactured guides.
4:00PM: Finished machining some wedges for Capella. Hopefully they're up to scratch!
_*posted 6/27