new web: http://bdml.stanford.edu/pmwiki
TWiki > Rise Web>TWikiUsers > GregKatz > GregsSummerBlog>WeekFive (12 Aug 2008, GregKatz? )
-- GregKatz? - 12 Aug 2008
Monday, July 21
- Tried to take electrically conductive pdms out of the dps stalk mold, but it didn't cure because of the vytaflex polyurethane top piece. It looks like it won't be useful for making electrically conductive dry adhesive.
- Tried to clean dps mold. Put tap blue in the mold to try and get the pdms out.
- Made frames for electroadhesion tests with laser CAMM
- Played with the frames I already had for electroadhesion testing.
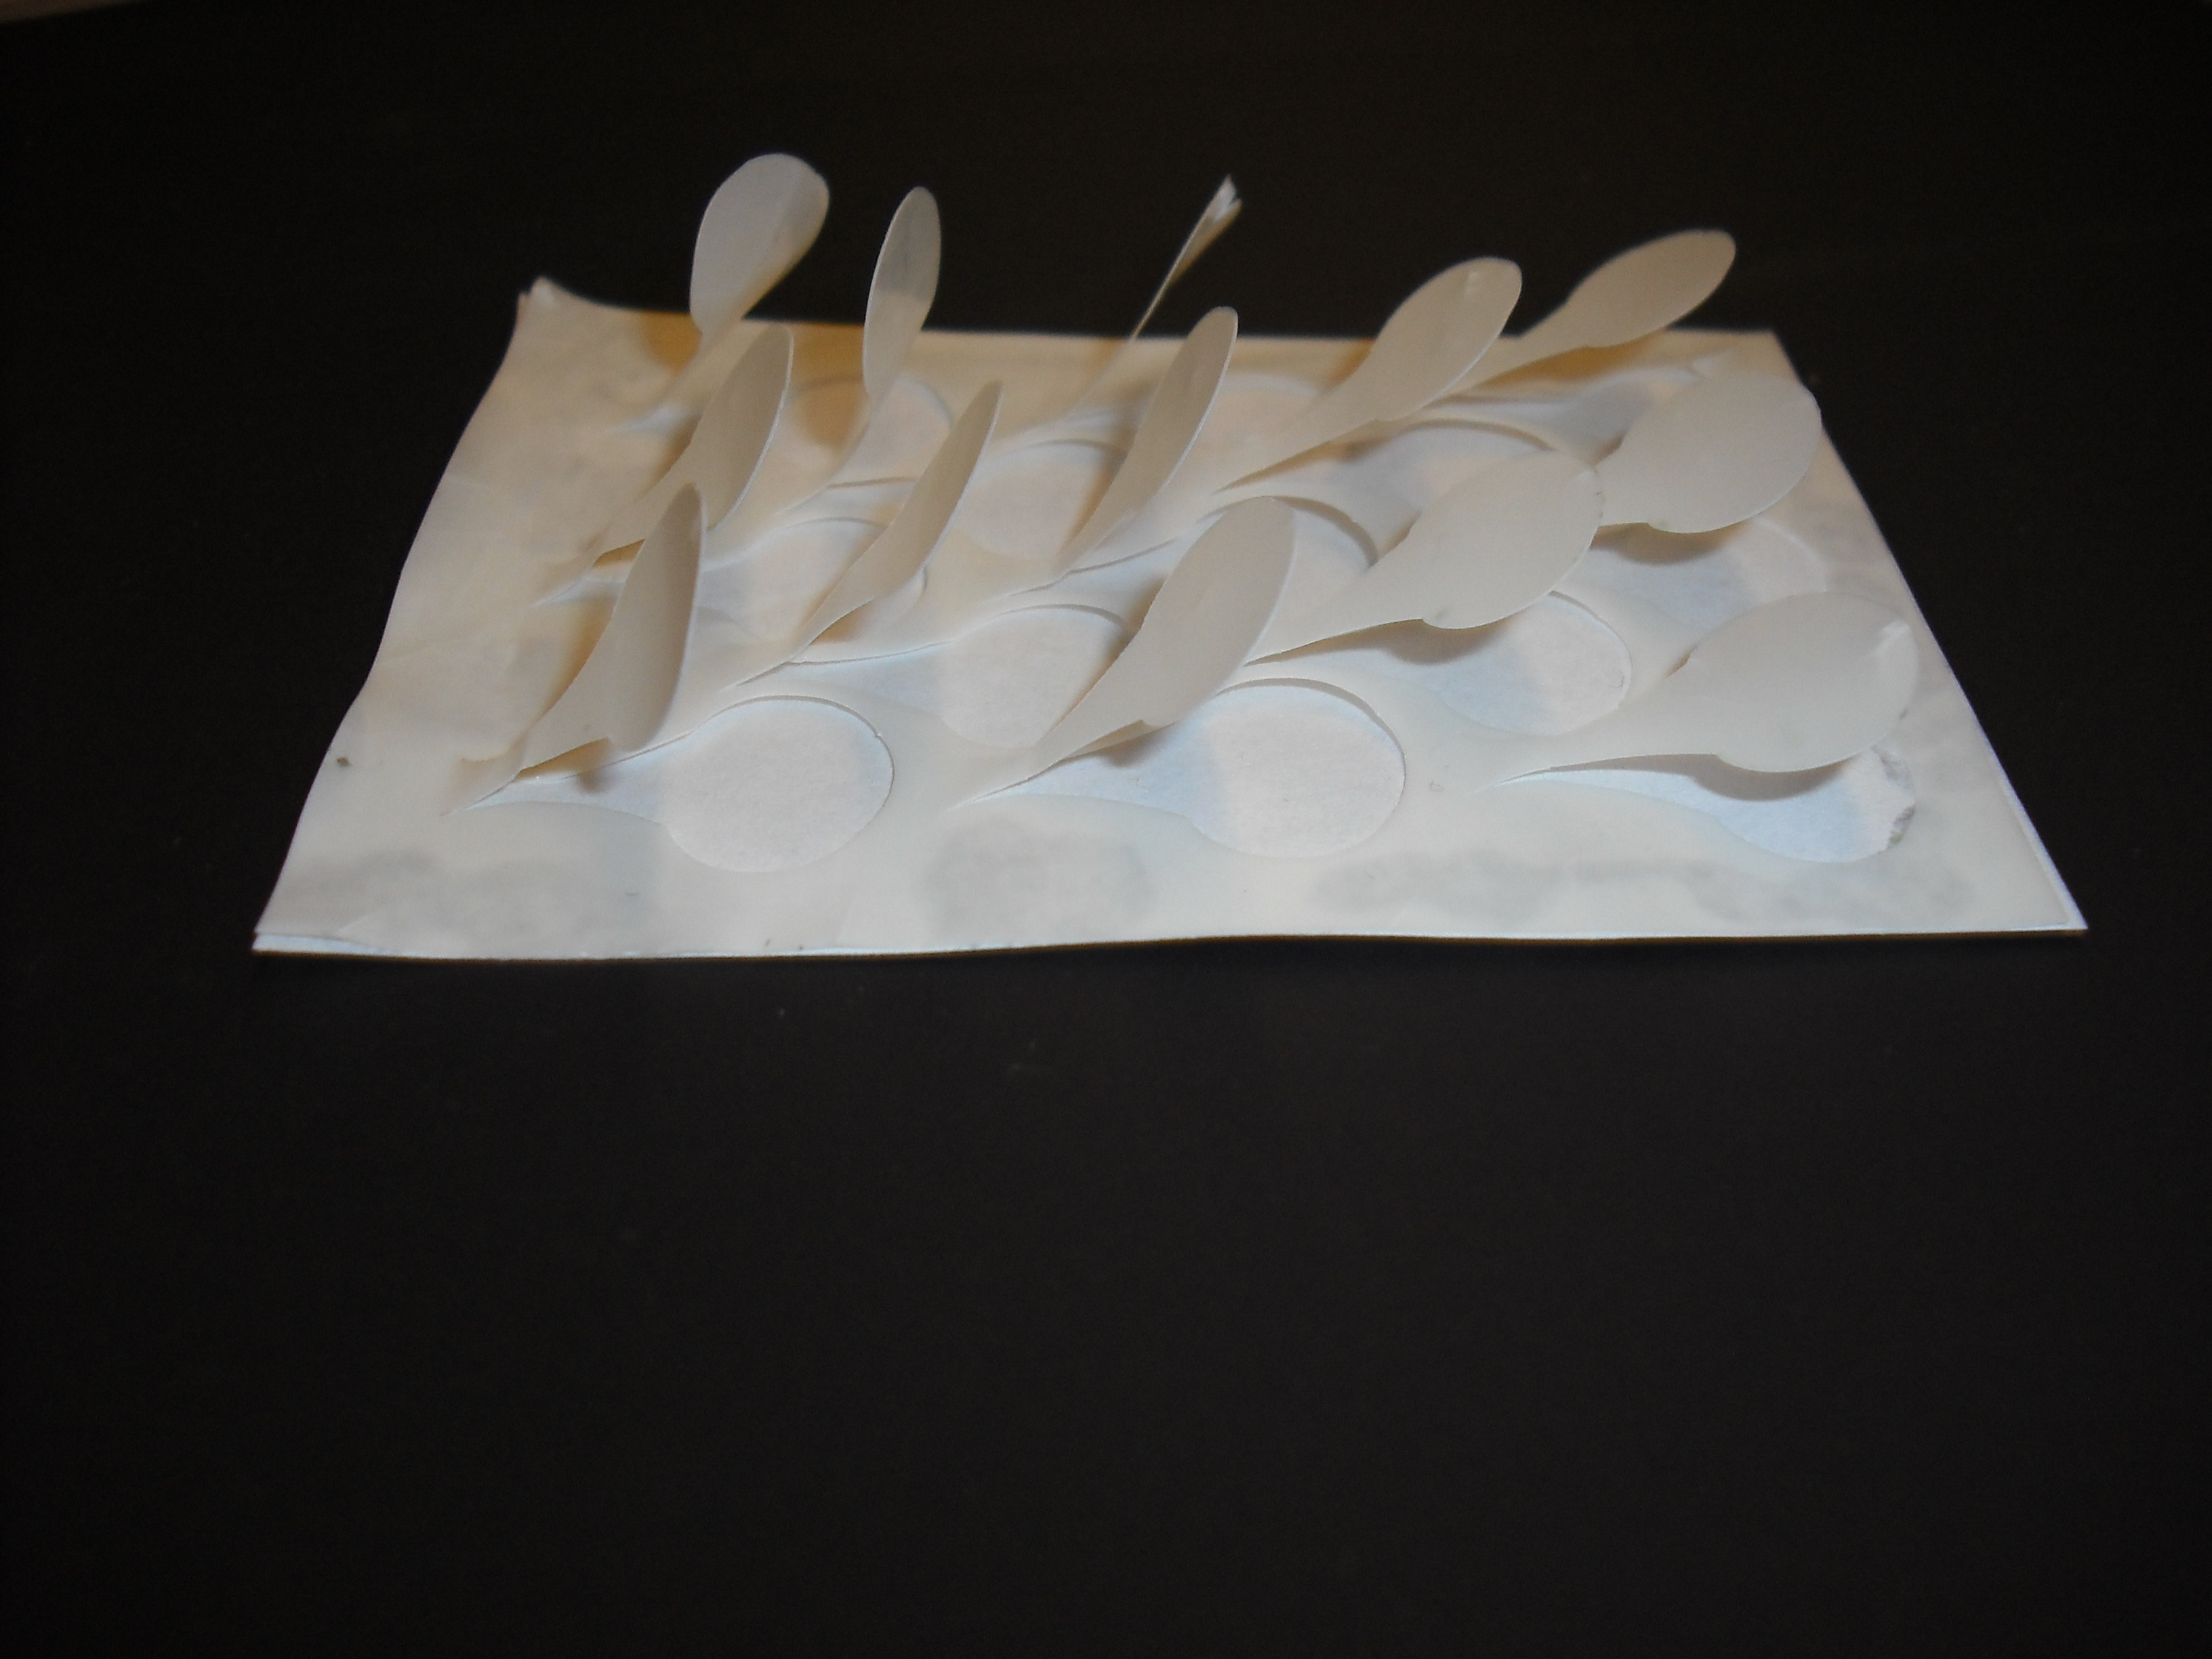
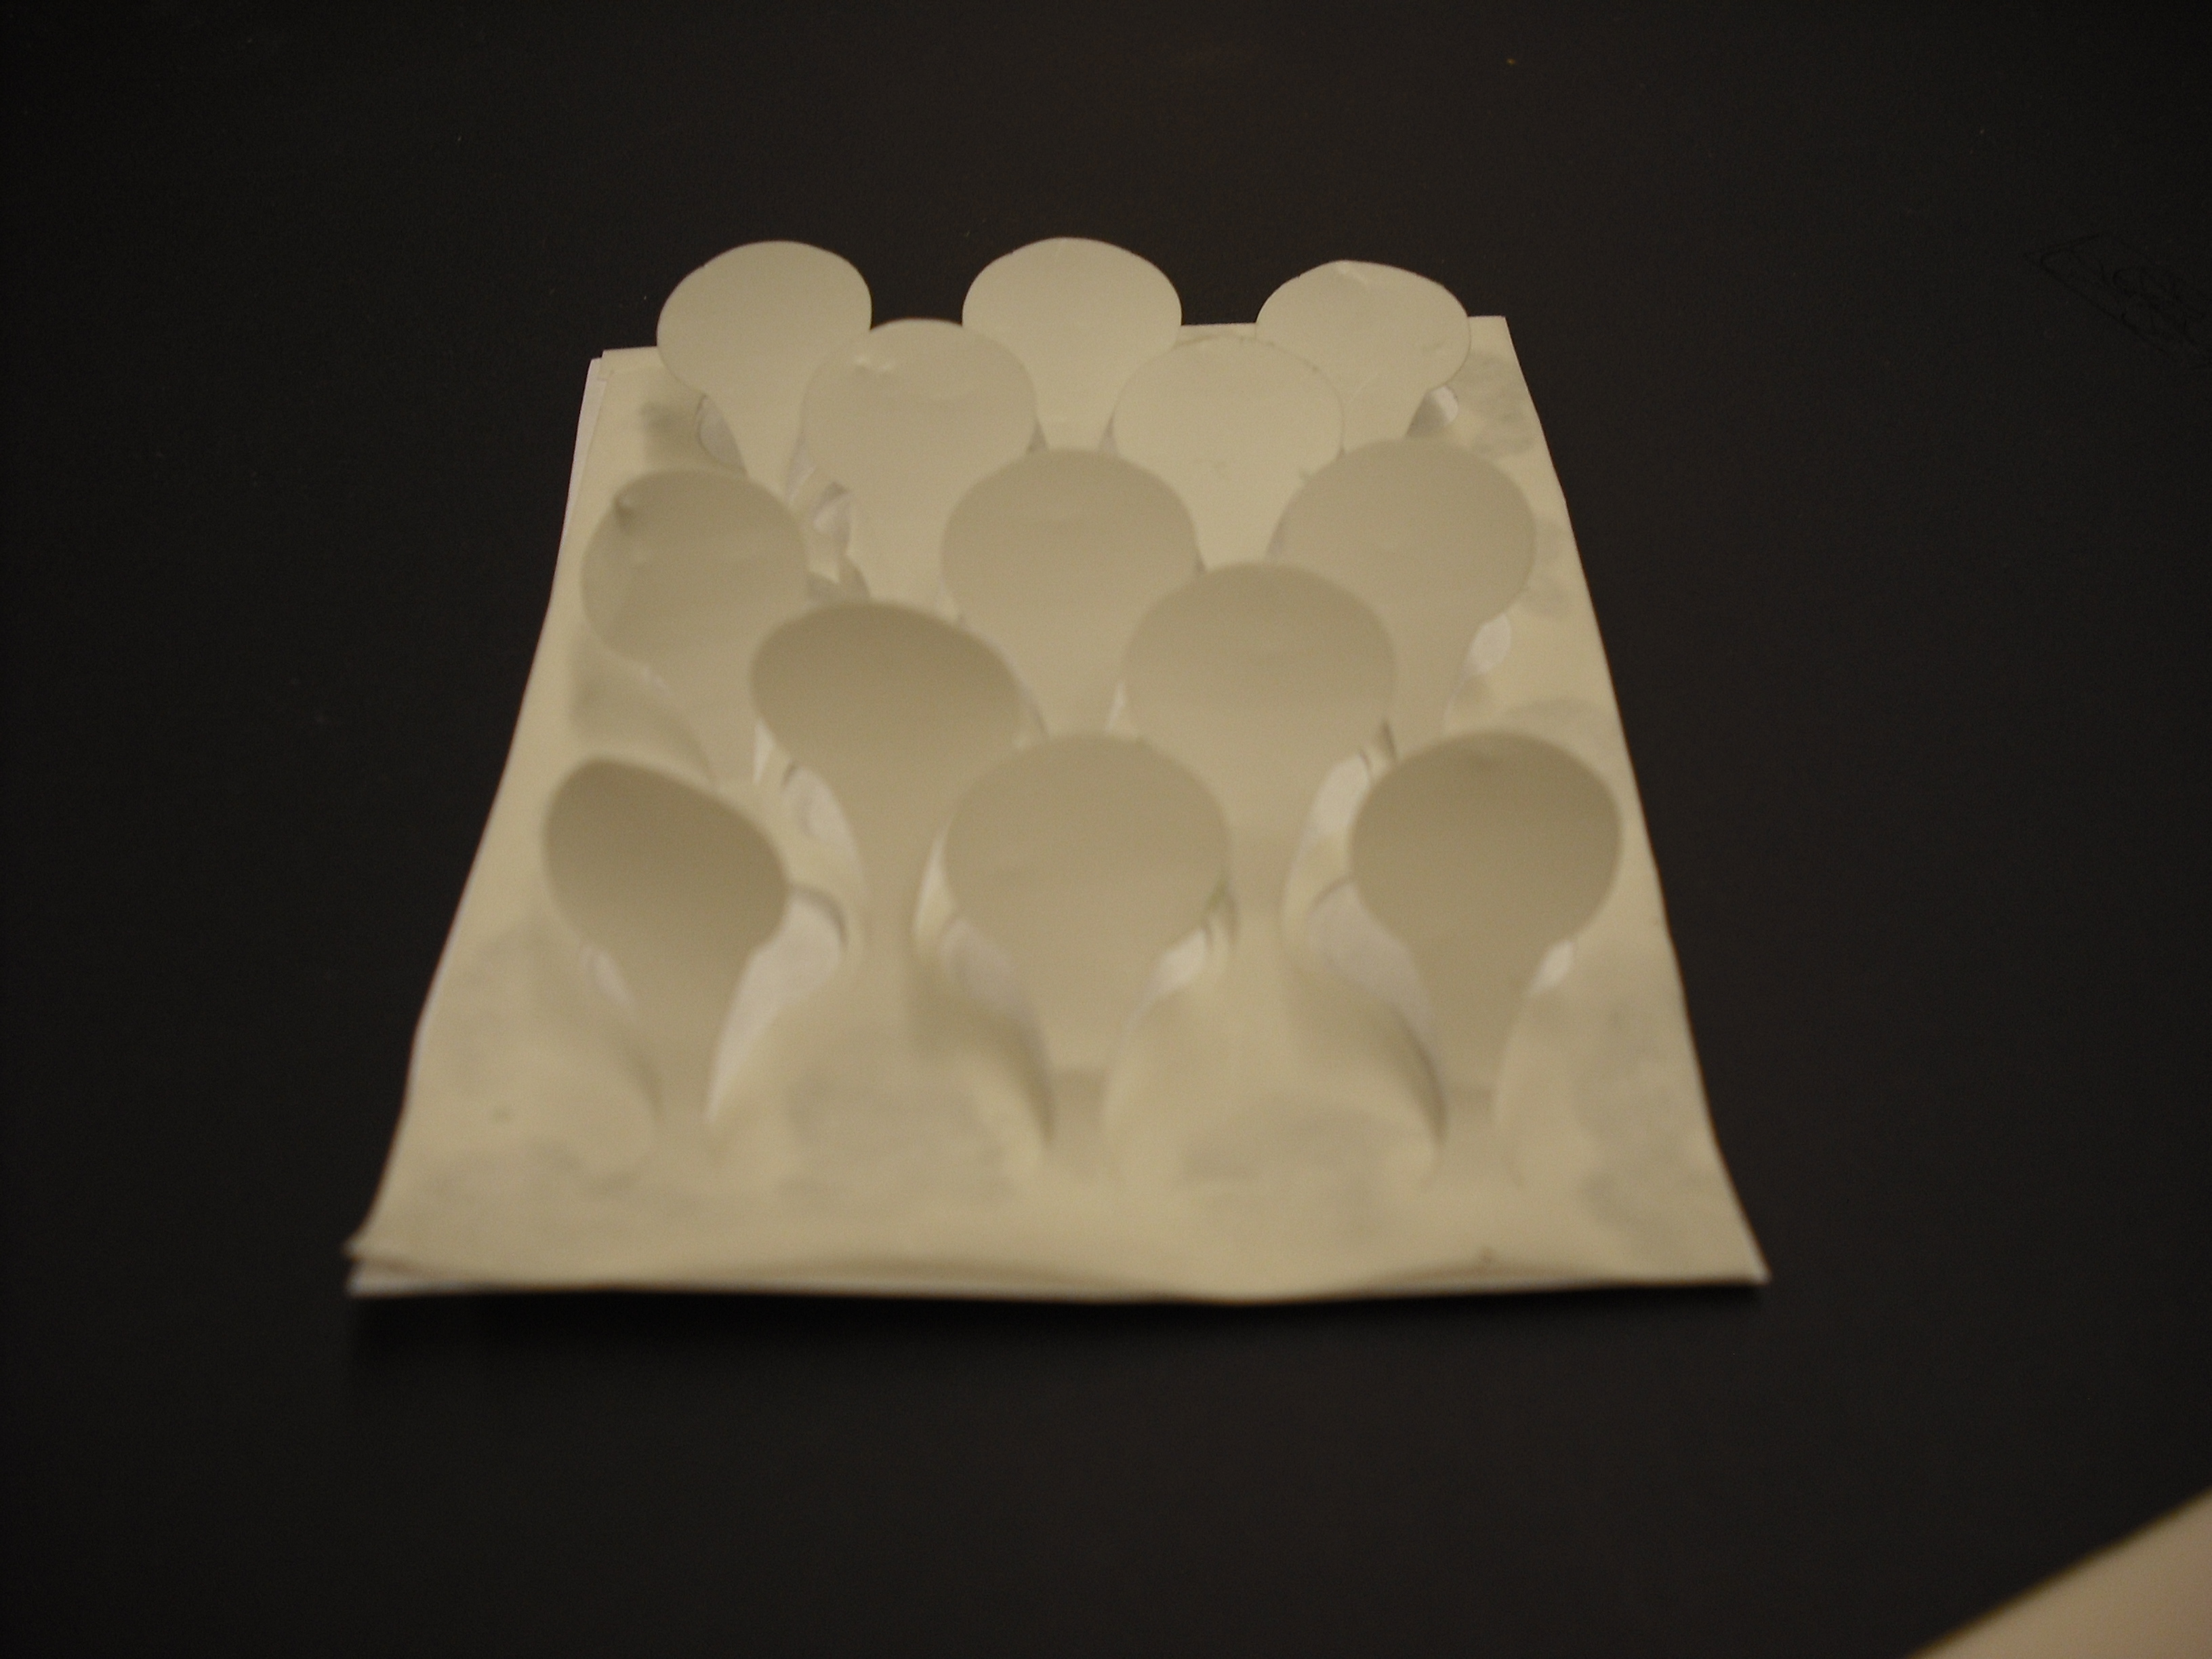
- Tried to calibrate the vinyl cutter to cut plastic but not bunch up. It was difficult. Finally got it to work decently well with .005" abs. The problem is that when you peel the abs off from the sticky vinyl it deforms uncontrollably. Also when popping the spoons out they deform uncontrollably as well. Found that .017" PETG was too thick to cut. So was 1/32" polystyrene.
| .005" abs spoons done on vinyl cutter and "popped out" by hand | |
|---|---|
 |
 |
- Ordered more plastics now that I know how thin it needs to be. Ordered PVC, polycarbonate, and polyethylene to try new materials.
Tuesday, July 22
- Built first generation of electroadhesion testing frame for use with Noe's test platform. Used a film of mylar as the backing on a square frame. Used carbon doped silicone epoxy to attach the carbon sprayed microwedge samples the mylar. Removed most of the aluminum from the mylar except to make a lead for each sample. The biggest difficulty was in getting the two samples to be aligned both in terms of the wedges facing the same way and more importantly being totally flat. When I try to put the frame against a piece of glass one of the samples adheres much more strongly than the other just because of the way it curves. The curvature in the stress of the mylar and also from the epoxy process are both uncontrolled variables.
- Dps mold didn't come out clean, though the tap blue did help. So I tried putting tap blue in again to clean it out again.
Wednesday, July 23
- Continued working on cleaning out dps mold of the uncured electrically conductive pdms. Still having difficulty. The second attempt with TAP blue still didn't fully grab all of the old silicone. Also was having trouble keeping the tap blue stalks from breaking in the mold.
- Played with electroadhesion frame set-up.
- Met with Noe, Aaron, and Dan to talk about our plan for testing microwedges with electroadhesive on the test platform. We looked at the frame set up I had made and discussed how it could be improved. We think that a rigid backing for the sample is important for getting a good flat contact between wedges and the glass plate. We think that the samples should be held in place as tightly as possible but as little material as possible to encourage compliance in the normal direction, some amount of gimbal, but as little extension as possible. We really want to make sure that the force we measure is the actual force on the sample and not force absorbed by the film backing. Also decided that it will be better to use just one sample and one dummy that actually makes no contact with the glass plate but only acts as an electrode. This is one less variable to worry about in data collection. Also with a metal rigid backing layer we don't need to spray the backs of the samples.
- Tried two carbon doped sylgard castings, but when they came out they were not electrically conductive. I tried using only 1% carbon by weight, but that was not nearly enough to make the overall sample conductive. Earlier I tried 10% carbon by weight and that was quite conductive.
- Looked at carbon doped sylgard samples under the new microscope. They look promising because they are not too granular. There is hope that the mixture can faithfully reproduce features at the micro scale. One issue was clumping of the carbon. I plan to try using the ultrasonic vibrator to break up those clumps.
- Began work on next generation of frame set-up for electroadhesion testing.
Thursday, July 24
- Worked on putting together frame for electroadhesion frame. Now I am using steel coil as a rigid backing and also am only using one sample. In addition, we are trying to use as little mylar as possible to encourage compliance in normal but also keep it very taught to discourage stretch in shear. Unfortunately when I epoxied the steel coil to the mylar it interfered with the electric connection so I have to use the conductive epoxy.
- Tried 5 more recipes for carbon doped sylgard. First two I tried did not have hexane. They were very thick and had to be smeared on rather than poured. At 2000rpm they were a reasonable thickness but not at all smooth backing. Also tried two different carbon percentages. Seems that about 3.3% works well or 1 part per 30. That had about 200-1500 kOhms resistance across 4 inches. Then I tried two samples with hexane. Found that with a lot of hexane there are two issues. First is that you can't spin them too thin because they evaporate. Second is that they don't cure as well. They either take longer to cure or sort of stay sticky for at least a couple days (or forever maybe?). All of these had large carbon clumping so it seems the ultrasonic vibration is necessary. After gaining experience with those quantities I made a batch of sylgard with carbon mixed into each of the parts and vibrated them ultrasonically. After vibration they were too thick to get out of the bottle on to the wafer so I had to add hexanes again. I probably used too much. The hexane made the mixture very very liquid. I needed to use a lot to get enough material out of the bottles. This one didn't cure in the oven after the normal 11 minutes. I let it stay in the oven for another 15 minutes but it still didn't cure. After waiting overnight it still hasn't cured. It is sort of solidish but comes off on fingers when touched lightly. So I made a new mix with more quantity of sylgard and carbon but less hexane. I will try casting tomorrow.
- Made bbq fliers and bought supplies!
Friday, July 25
- Checked on carbon doped sylgard. Vibrated latest mixture.
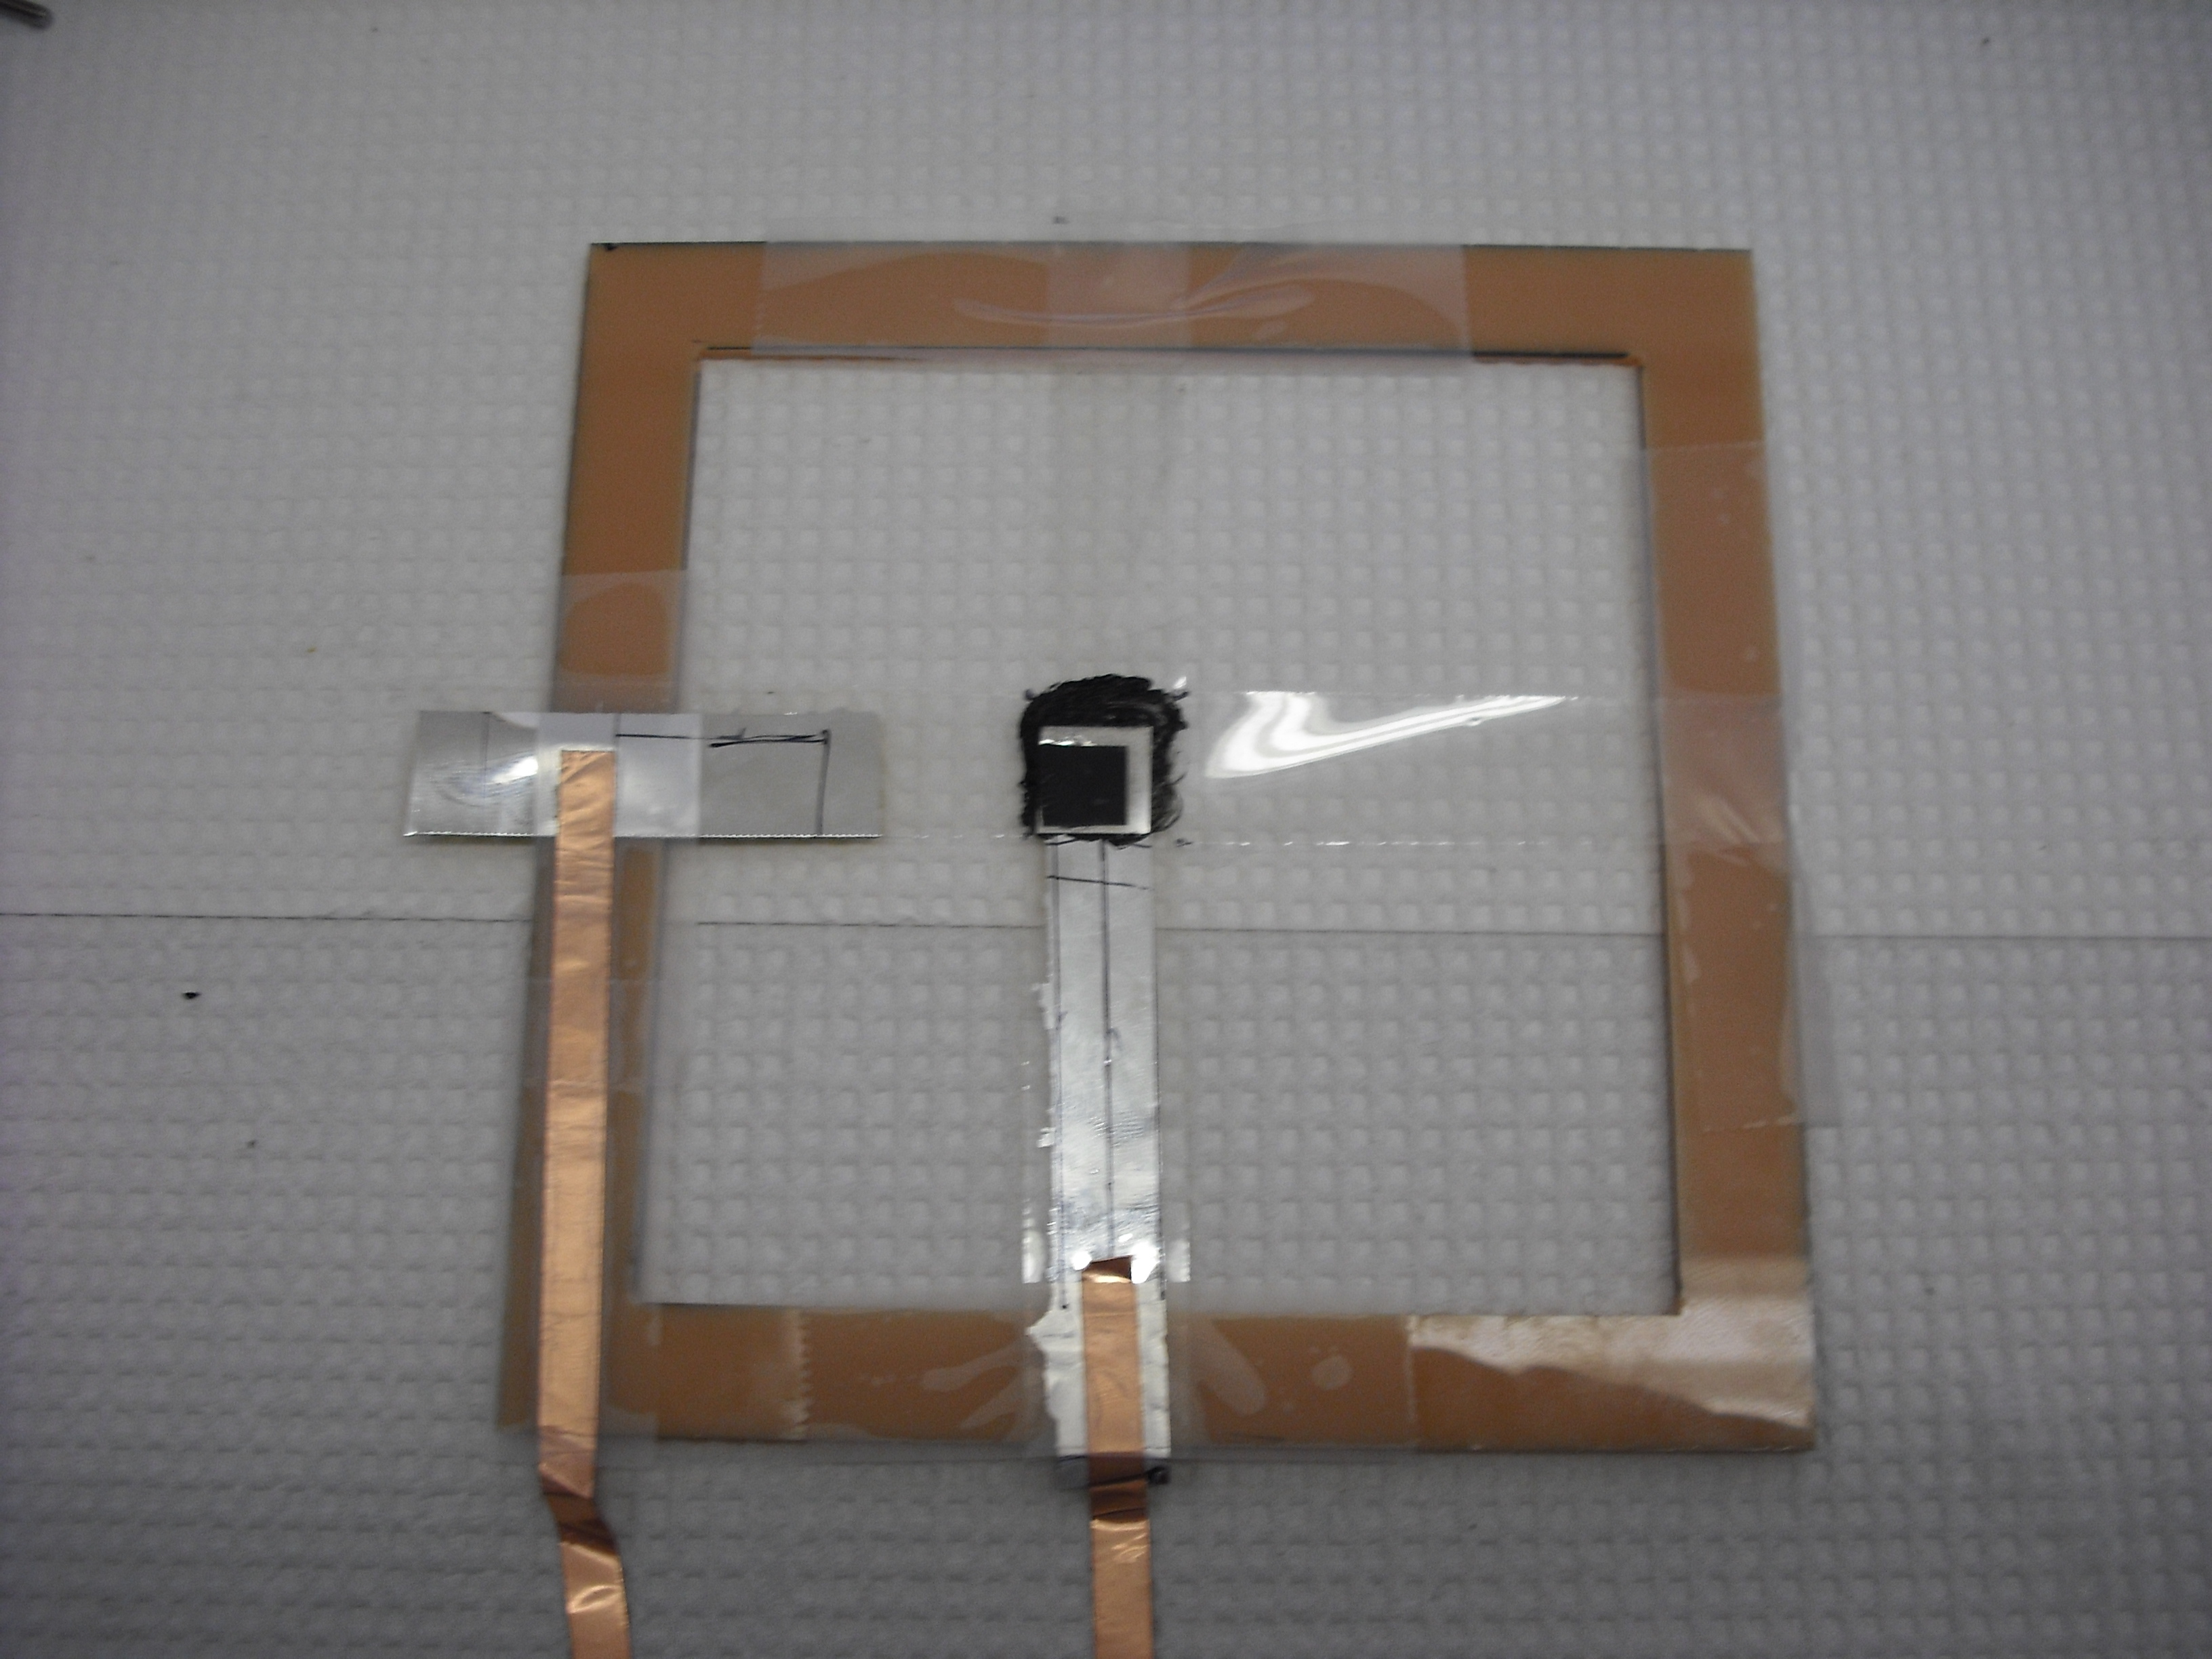
- Worked on new design for electroadhesion testing. Used carbon doped silicone epoxy to put together latest version of the test frame. This frame has only one sample instead of two for simplicity. Using only one sample really helps to narrow down problems of alignment both of the directions of the wedges and in the plane of the sample that is presented to the attachment surface. Also the design is now simplified to have just four mylar "strings" that are tight in shear but allow movement in normal direction. By mylar "strings" I mean that the attachment of the sample to the frame is supported by the plus sign shape of mylar in tension. Another change is that now I am using a spring steel as a backing to offer a flat rigid surface to gimble. This really helps with the conformation of the wedges to the adhesion surface.
| Single sample, steel backing and "string" support | |
|---|---|
 |
|
- Hosted bbq
- Lab meeting
- Talked to Aaron about new materials for making daughter molds for more durability and versatility. Hopefully one of these materials will allow us to cast polyurethane microwedges.
Ideas, requests, problems regarding TWiki? Send feedback