new web: http://bdml.stanford.edu/pmwiki
TWiki > Rise Web>TWikiUsers > MattSpenko>MicrohairIntegration (10 Oct 2005, MarkCutkosky)
-- MattSpenko? - 22 Sep 2005
 See also StanfordDryAdhesives? for older work from Miguel Piedrahita.
In the end we learned that it is difficult to bond the micro-hairs with a foot that has already been manufactured, and it is much easier to build the foot up from scratch. We also learned that trying to create a very thin layer of 72DC polyurethane is very unrepeatable, and that the final solution will most likely begin with a thick layer of 72DC that will be machined down to the desired thickness.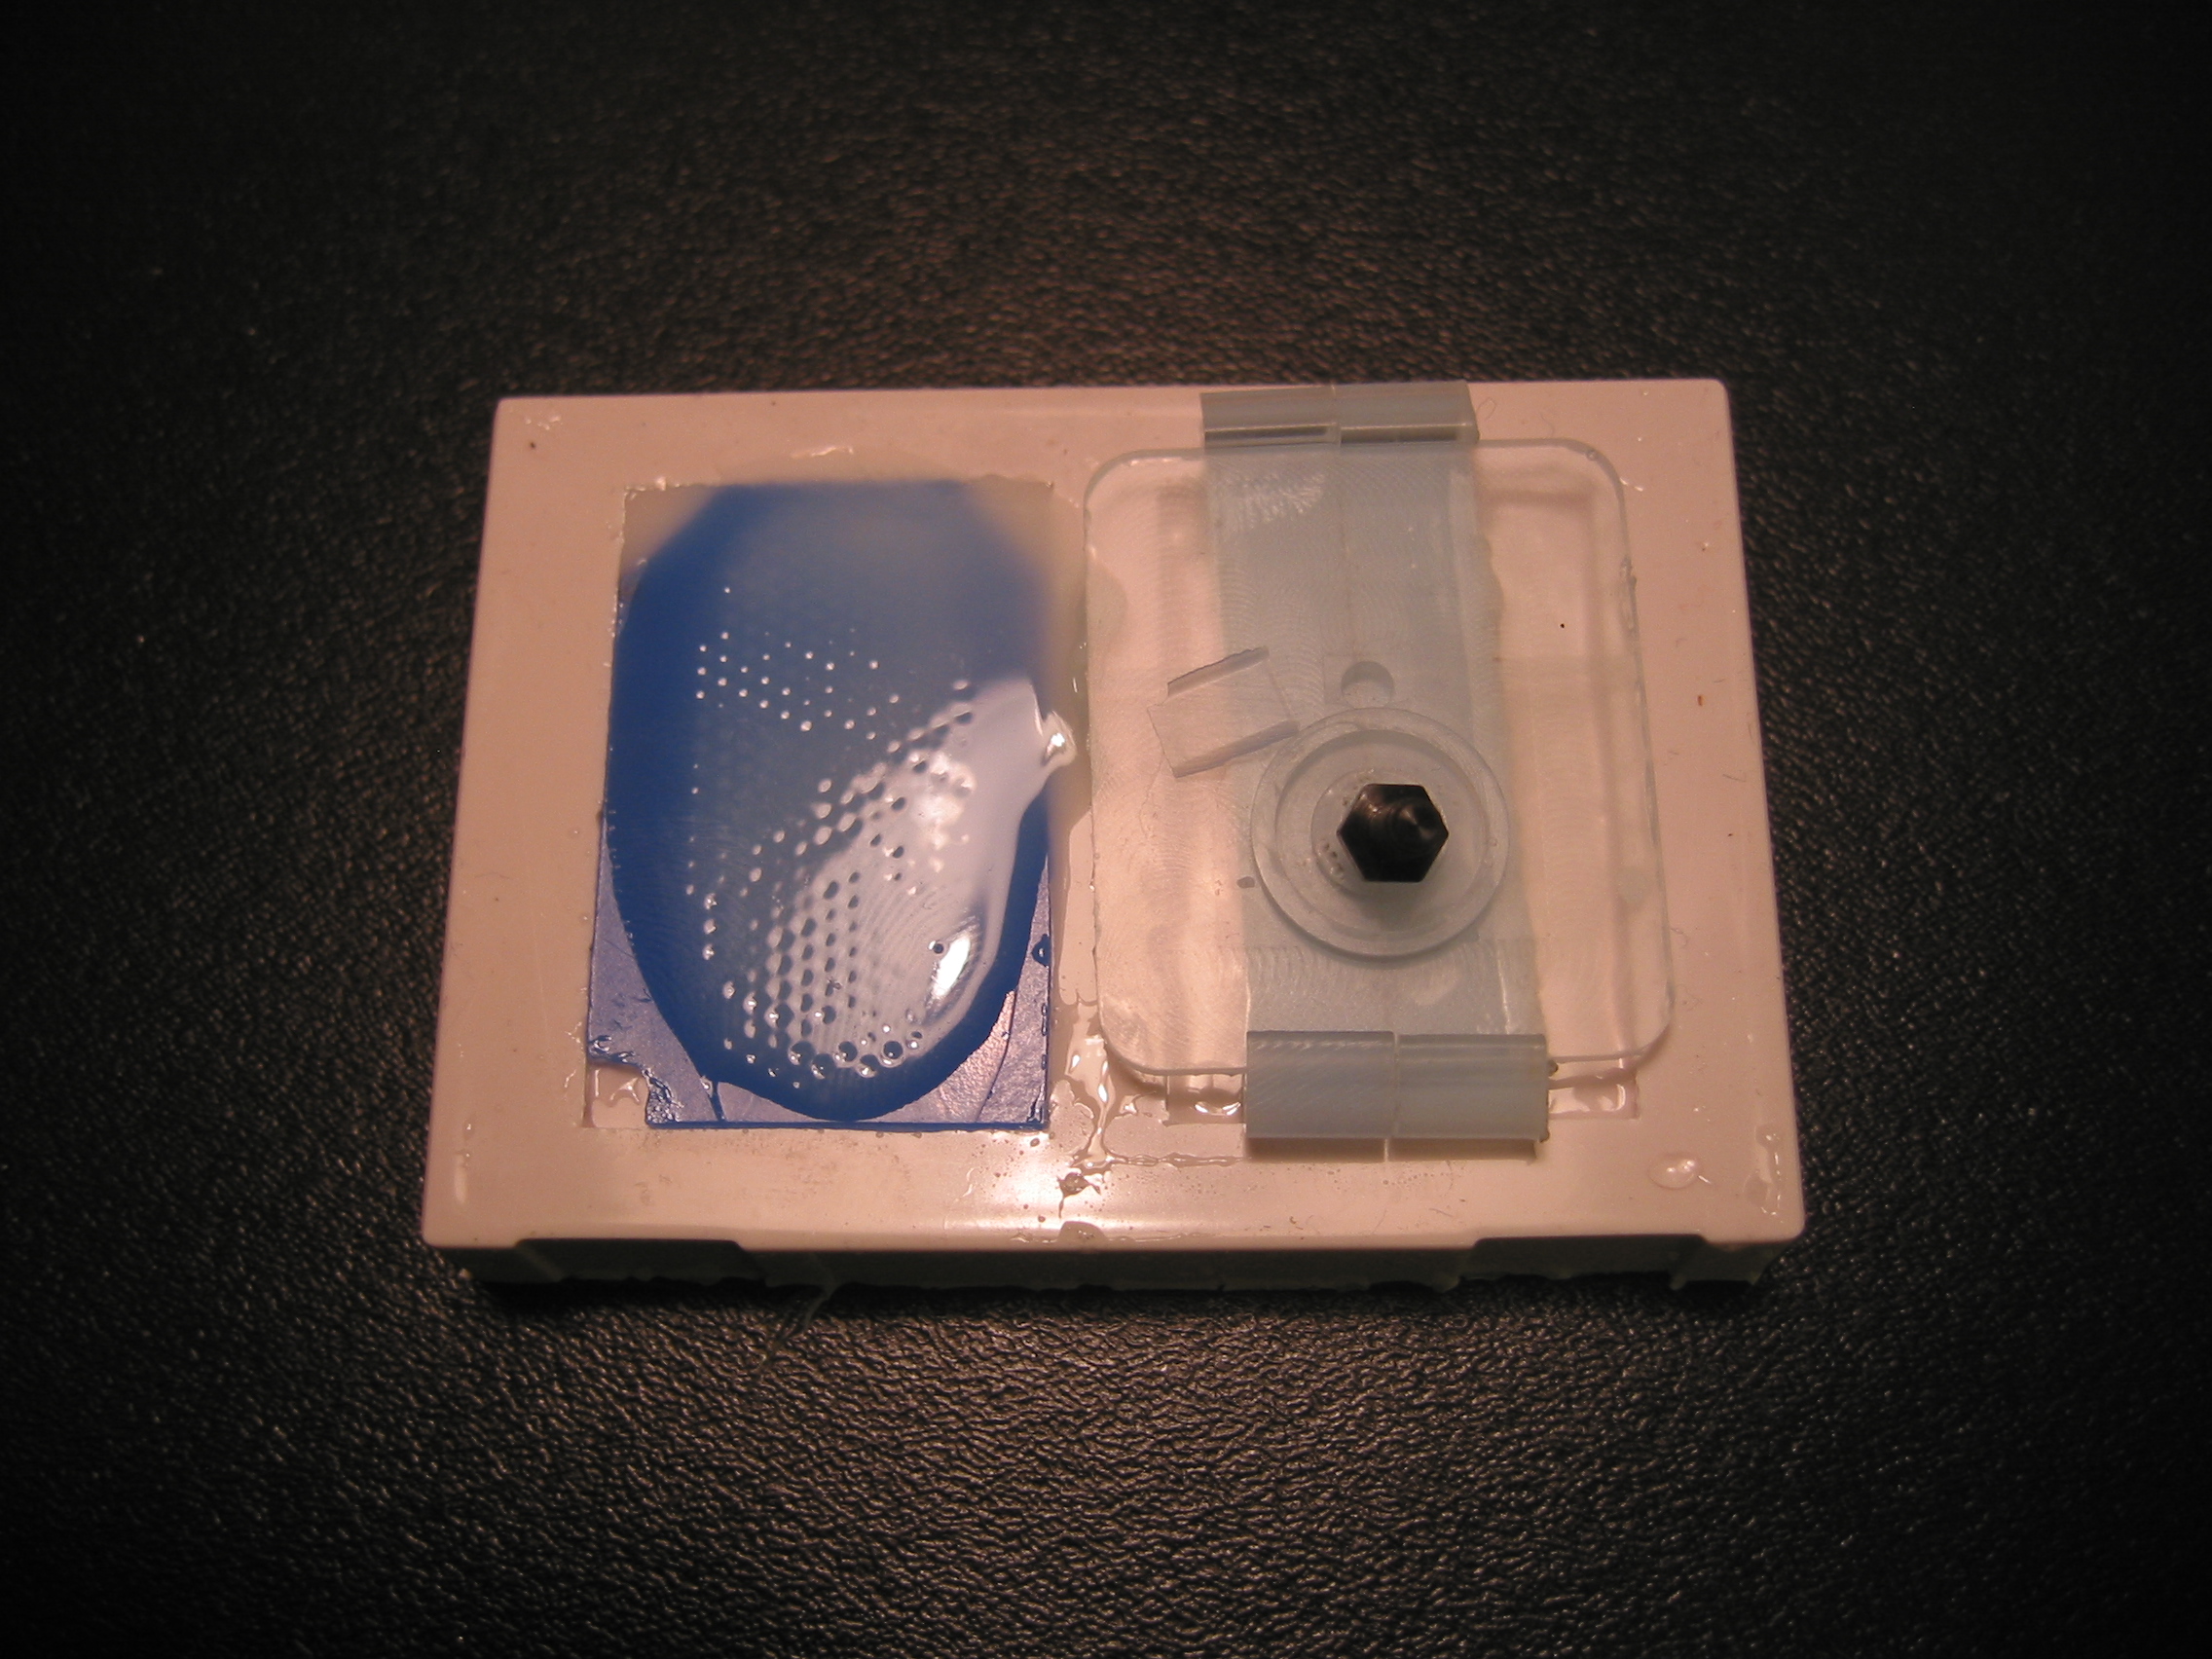
Manufacturing Steps:
1) Pour 72DC into mold
2) Degas
3) Wipe out
4) Put foot into silicon mold
Results: The 72DC layer is too thin. It easily falls apart
1) Pour 72DC into mold
2) Degas
3) Wipe out
4) Put wax filter into silicon mold
5) Pour in 20A
Results: The 72DC layer is too thick. I can't get the macro-hairs out of the wax filter
The goal was to get a thicker 72DC structure so that it would be more robust and adhere better to the lamellar structures Manufacturing Steps:
1) Pour 72DC into mold
2) Degas
3) Put foot into silicon mold
4) Degas
Results: Way too many bubbles. The second degas process is not necessary and it causes too many bubbles to form
Trial 2b - attach micro-hairs to a flat foot
The goal was to get as simple of a foot as possible. This one has no independent suspension like the lamellar or macro-hair feet have. It is simply attaching the 72DC micro-hairs to a 72DC flat plate.
Manufacturing Steps:
1) Pour 72DC into mold
2) Degas
3) Put foot into silicon mold
4) Degas
Results: Same as above - too many bubbles
Trial 3a - attach micro-hairs to soft macro-hairs
This was the second try to get this process to work. The first trial resulted in too thick of a 72DC layer.
Manufacturing Steps:
1) Pour 72DC into mold
2) Degas
3) Wipe out really well 3) Put foot into silicon mold
4) Degas
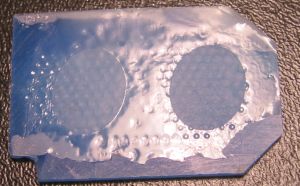
Results: The second degassing step caused the 20A to bubble resulting in the wax filter rising up off the silicone mold. This caused the 20A to flow under the wax filter. I tried to fix it afterwards, but the damage was done. However, this only occurred on half of the toe. The other half had a nice smooth and thin layer of 72DC underneath the 20A hairs, and they were relatively easy to pull out from the wax filter. So, the technique worked (sort of). Next trial with this method will skip the second degas step, and I think it should then work

Trial 3b - attach micro-hairs flat hard piece
This was the third try to get this process to work.
Manufacturing Steps:
1) Pour 72DC into mold
2) Degas
3) Wipe out really well 3) Put foot into silicon mold
4) Degas
Results: Fewer bubbles but still too many
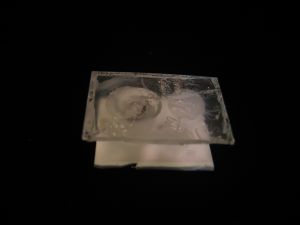
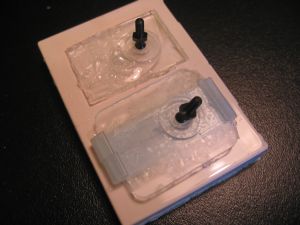
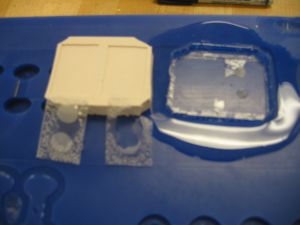
Trial 4a - Embed the silicone mold into the wax block
In this process we actually embed the silicone mold into the wax block. Trial A creates a cavity inside the wax block. The silicone mold is then placed inside the block.
Manufacturing Steps:
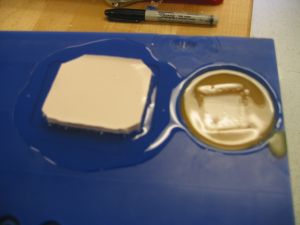
1) Create a cavity inside the wax block that is larger and deeper than the silicone mold 2) Place the silicone mold inside the cavity 3) Place a small block (the material that the block is made out of doesn't matter, we used a plastic coated with mold release) on top of the silicone mold. The block should cover the micro-hair patch.
4) Fill the rest of the space with yellow wax and let cool. Be sure not to cover the top of the block
5) Remove the block by pulling upward. Try not to disturb the wax. This worked best with a block that had a slight taper to it.
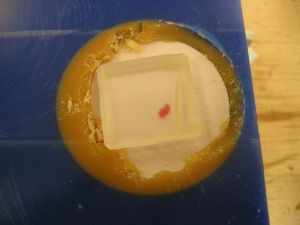
6) Fill the empty space with 72DC and degas.
7) Plane the piece when the 72 DC is set.
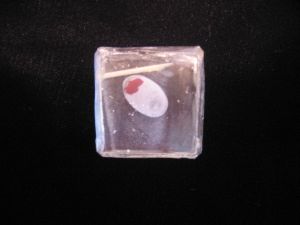
8) Remove the 72DC piece.
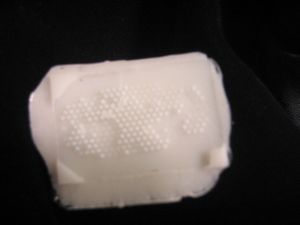
Results: You now have a thick piece of 72DC polyurethane that has micro-hairs on the bottom. This was our first really good result, but there is one big limitation to the procedure. There is no suspension built into the design. This contrasts with Trial 1b and 3a. But at least it works.
Trial 4b - Upside down mold
Manufacturing Step:
1) Mill out a narrow (1-4 mm) rectangular space into the wax block
2) Fill with 72DC and degas
3) Place the silicone mold upside down over this area degas for a long time (at least 30 minutes). The hope is to get all air out of the polyurethane and then once the air is let back into the chamber, the polyurethane will be drawn up into the hair chambers
4) Place weights on top of the silicone mold
Results: Lots of air bubbles and unevenness in the polyurethane.
Trial 5 - One more time with macro-hair suspensions
Manufacturing Steps:
1) Same as 3a except I skipped the second degassing step.
Results: Better, but still not very good. The 72 DC layer was maybe a little to thick. This resulted in difficulties pulling the 72DC through the macro-hairs. Only maybe 50% of the macro-hairs remained intact and only maybe 5 macro-hairs had any of the 72DC material on them. The final conclusion is that the procedure is not consistent enough to be used at in its current state.
Future Plans
We want to expand on the macro-hair suspension and the method described in trial 4a. Need to talk to Berkeley about creating some slightly different molds.
We have learned from these trials and have come up with two procedures that might work. There are at least two issues that I see arriving. The first is that we need to know an exact height of the silicone mold that is placed inside the wax block. Both of these procedures have aspects of trial 4a in them. For trial 4a, it didn't matter what the height of the block was, but when we make the micro-hairs very thin, it will matter. The second issues deals with experimental procedure 1 only. In this procedure we are making a filter that has a(n?) hierarchical structure. This requires a macro-filter to be placed on top of the micro-filter. Unfortunately Berkeley has had trouble keeping the micro-filter attached to a surface without the polyimide (or nickel in another one of their procedures) seeping between the micro- and in our case macro-filters.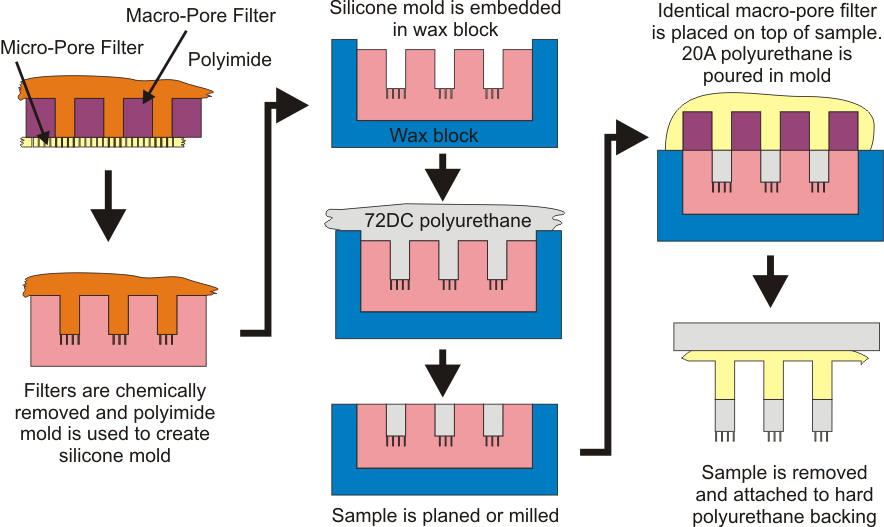
Micro-hair Integration with the SDM Process
SangbaeKim and I visited Ron Fearing's Lab at Berkeley to learn more information about their fabrication process. One of the key items to take care of is the integration of their polymer hairs with our SDM fabrication. So far we have tried 8 different techniques to do this. The results are outlined below. These are ordered according to the date the experiments were performed. The latest experiments are at the bottom of the page.In the end we learned that it is difficult to bond the micro-hairs with a foot that has already been manufactured, and it is much easier to build the foot up from scratch. We also learned that trying to create a very thin layer of 72DC polyurethane is very unrepeatable, and that the final solution will most likely begin with a thick layer of 72DC that will be machined down to the desired thickness.
Trial 1a - attach micro-hairs to lamellar structure on foot
Manufacturing Steps:
1) Pour 72DC into mold
2) Degas
3) Wipe out
4) Put foot into silicon mold
Results: The 72DC layer is too thin. It easily falls apart
Trial 1b - attach micro-hairs to SangbaeKim's compliant feet with macro-hairs (GeckoFootApril05? ).
Manufacturing Steps:1) Pour 72DC into mold
2) Degas
3) Wipe out
4) Put wax filter into silicon mold
5) Pour in 20A
Results: The 72DC layer is too thick. I can't get the macro-hairs out of the wax filter
Trial 2a - attach micro-hairs to lamellar structure on foot
The goal was to get a thicker 72DC structure so that it would be more robust and adhere better to the lamellar structures Manufacturing Steps:
1) Pour 72DC into mold
2) Degas
3) Put foot into silicon mold
4) Degas
Results: Way too many bubbles. The second degas process is not necessary and it causes too many bubbles to form
Trial 2b - attach micro-hairs to a flat foot
The goal was to get as simple of a foot as possible. This one has no independent suspension like the lamellar or macro-hair feet have. It is simply attaching the 72DC micro-hairs to a 72DC flat plate.
Manufacturing Steps: 1) Pour 72DC into mold
2) Degas
3) Put foot into silicon mold
4) Degas
Results: Same as above - too many bubbles
Trial 3a - attach micro-hairs to soft macro-hairs
This was the second try to get this process to work. The first trial resulted in too thick of a 72DC layer. Manufacturing Steps:
1) Pour 72DC into mold
2) Degas
3) Wipe out really well 3) Put foot into silicon mold
4) Degas
Results: The second degassing step caused the 20A to bubble resulting in the wax filter rising up off the silicone mold. This caused the 20A to flow under the wax filter. I tried to fix it afterwards, but the damage was done. However, this only occurred on half of the toe. The other half had a nice smooth and thin layer of 72DC underneath the 20A hairs, and they were relatively easy to pull out from the wax filter. So, the technique worked (sort of). Next trial with this method will skip the second degas step, and I think it should then work
Trial 3b - attach micro-hairs flat hard piece
This was the third try to get this process to work. Manufacturing Steps:
1) Pour 72DC into mold
2) Degas
3) Wipe out really well 3) Put foot into silicon mold
4) Degas
Results: Fewer bubbles but still too many
Trial 4a - Embed the silicone mold into the wax block
In this process we actually embed the silicone mold into the wax block. Trial A creates a cavity inside the wax block. The silicone mold is then placed inside the block. Manufacturing Steps:
1) Create a cavity inside the wax block that is larger and deeper than the silicone mold 2) Place the silicone mold inside the cavity 3) Place a small block (the material that the block is made out of doesn't matter, we used a plastic coated with mold release) on top of the silicone mold. The block should cover the micro-hair patch.
4) Fill the rest of the space with yellow wax and let cool. Be sure not to cover the top of the block
5) Remove the block by pulling upward. Try not to disturb the wax. This worked best with a block that had a slight taper to it.
6) Fill the empty space with 72DC and degas.
7) Plane the piece when the 72 DC is set.
8) Remove the 72DC piece.
Results: You now have a thick piece of 72DC polyurethane that has micro-hairs on the bottom. This was our first really good result, but there is one big limitation to the procedure. There is no suspension built into the design. This contrasts with Trial 1b and 3a. But at least it works.
Trial 4b - Upside down mold
Manufacturing Step: 1) Mill out a narrow (1-4 mm) rectangular space into the wax block
2) Fill with 72DC and degas
3) Place the silicone mold upside down over this area degas for a long time (at least 30 minutes). The hope is to get all air out of the polyurethane and then once the air is let back into the chamber, the polyurethane will be drawn up into the hair chambers
4) Place weights on top of the silicone mold
Results: Lots of air bubbles and unevenness in the polyurethane.
Trial 5 - One more time with macro-hair suspensions
Manufacturing Steps: 1) Same as 3a except I skipped the second degassing step.
Results: Better, but still not very good. The 72 DC layer was maybe a little to thick. This resulted in difficulties pulling the 72DC through the macro-hairs. Only maybe 50% of the macro-hairs remained intact and only maybe 5 macro-hairs had any of the 72DC material on them. The final conclusion is that the procedure is not consistent enough to be used at in its current state.
Future Plans
We want to expand on the macro-hair suspension and the method described in trial 4a. Need to talk to Berkeley about creating some slightly different molds. We have learned from these trials and have come up with two procedures that might work. There are at least two issues that I see arriving. The first is that we need to know an exact height of the silicone mold that is placed inside the wax block. Both of these procedures have aspects of trial 4a in them. For trial 4a, it didn't matter what the height of the block was, but when we make the micro-hairs very thin, it will matter. The second issues deals with experimental procedure 1 only. In this procedure we are making a filter that has a(n?) hierarchical structure. This requires a macro-filter to be placed on top of the micro-filter. Unfortunately Berkeley has had trouble keeping the micro-filter attached to a surface without the polyimide (or nickel in another one of their procedures) seeping between the micro- and in our case macro-filters.
Experimental Procedure 1
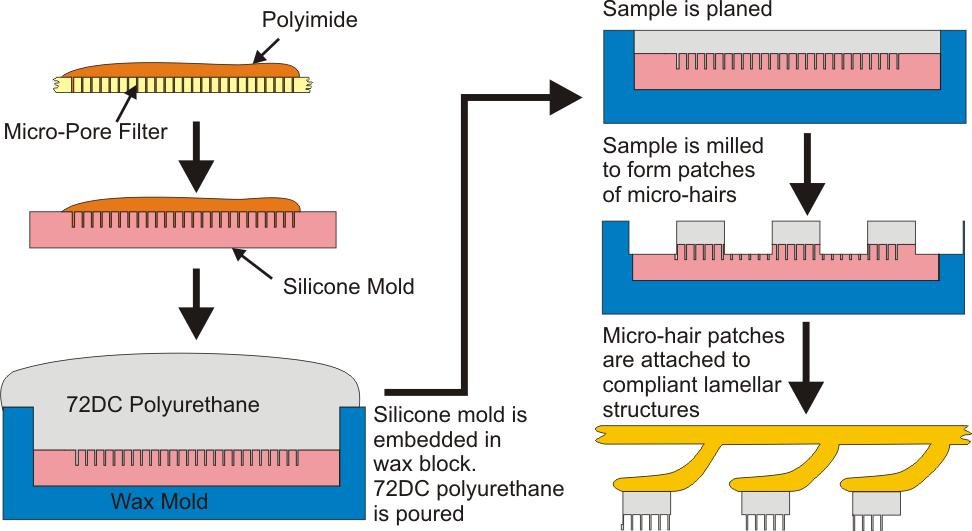
Experimental Procedure 2
Ideas, requests, problems regarding TWiki? Send feedback