Summer Blog 2024
Week 6
July 29:
Today we ran some tests to draw up a direct comparison between whisker signals in water vs air. So, we selected 5 objects to test in air.
Week 5
July 26:
We ran more tests all day today. 20/20 underwater tests completed.
July 25:
We also saw that when the tank was filled with water, the objects plugged into the base would float and detach from the base due to the buoyant force. This, of course, is a problem as we need the objects to be fixed relative to the robot. And so, to fix this, we improvised and changed the base design to include a slot at the bottom where magnets can slide in. Then, we fixed nuts onto the supported plug on the objects. Now, when the objects are plugged into the base, they remain fixed as the magnetic attraction is stronger than the buoyant force.
And so, we began testing. We were getting good readings with the whiskers. However, after approximately 5/20 objects tested, the base has detached from the surface of the tank. This is because the objects were tightly fit into the base and when trying to pull them out, the base came off. And so, we troubleshooted this by using stronger adhesives to hold the base down and also decreasing the tight-fit of the objects into the base.
The fact that the base came off meant that we could not reattach the base to the exact same position it was previously with an error of a few mm. So, we started testing for all objects again.
July 24:
I set up the datasheet for the tests we want to conduct. Controlled data includes: distance from the base to the whisker array, side no. of object, hole no. in base, and Z height travel of whisker to object. After filling the tank with water to a desirable height, we began some preliminary testing. Lowering the whiskers into the water, we realized that the temperature was affecting the whiskers more than we had anticipated. The ambient temperature was hotter than the temperature of the water, causing the FBG signals to be unstable. I re-programmed the robot to stay in the water for 30 minutes, adding pauses before and after robot motion, to stabilize the signals.
July 22-23:
I continued to edit the CAD files for all the objects and made a number of trips to the Product Realization Labs to get multiple 3D prints for our objects going simultaneously. Hao and I also began to set up our testing environment. We fixed the base to the bottom of the tank.
Week 4
July 19:
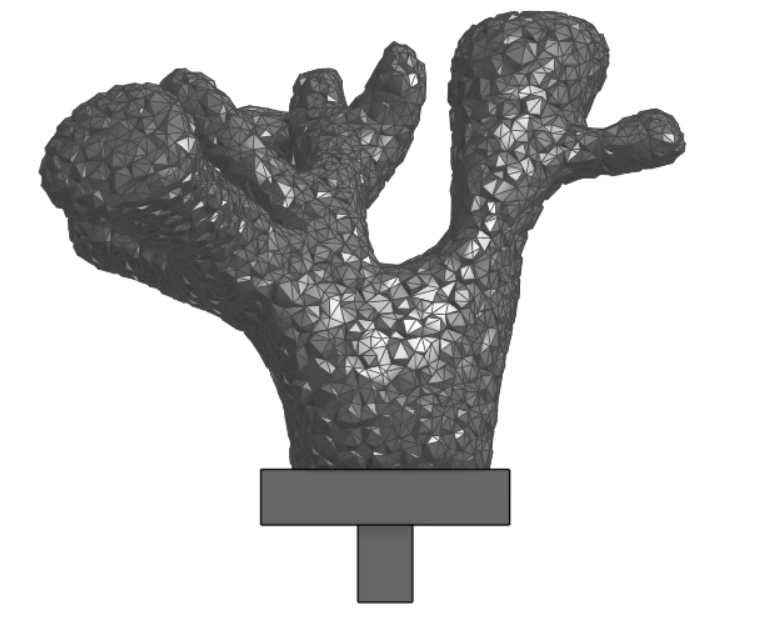
Today I edited the CAD models for the 20 objects we want to test. This included scaling the objects so that they fit in the water tank, and adding supports to them so that they can plug into the printed base.
July 17-18:
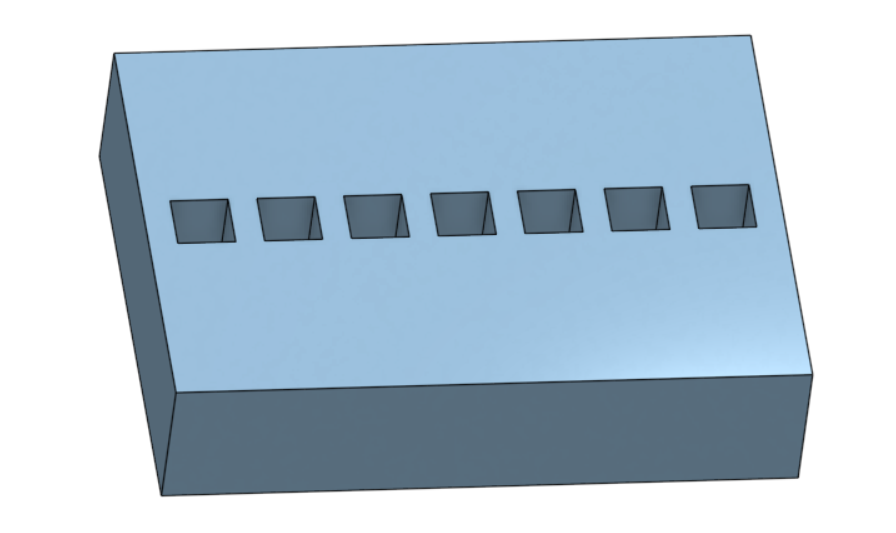
I CADed a support base for the objects so that they can always be in a fixed position in the reference frame. I also edited a bunch of the CAD models so that they include an extrusion that can then be plugged into the support base. In a series, of trips to the PRL, Hao and I started a number of prints for the objects we will test.
Additionally, the silicone sealant we had applied to line the acrylic tank had cured and so, to end the day, we filled the tank with water and left it outside to see if it holds and is waterproof. We will check back in 24 hrs or perhaps longer.
July 17:
I ran some underwater tests with Hao. A plastic tub we had in the lab was filled with water and a 3D printed coffee can from YCB Objects was submerged in it. We got some great results!
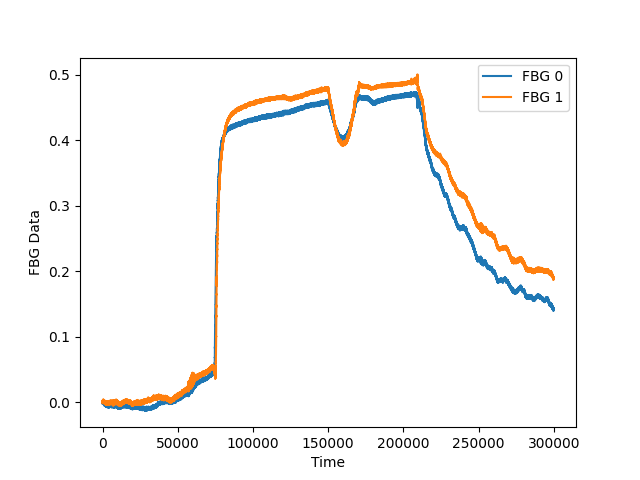
This graph shows the whisker making contact with the surface of the coffee can underwater. Initially, the sensors do not show much data as the whiskers are lowered (expected) but there is a sudden spike in the readings. This is likely because of the temperature difference between ambient temperature and the cold water. We can then see that the reading is steady until the whiskers make contact with the can's surface, where there is a dip in the readings (indicating contact). Then, as the whiskers are raised out of the water, the readings start to return back to the initial starting conditions, again likely because the temperature is adjusting to ambient temp.
However, this was only the first test we ran with a single object so we need to run more tests for a more representative picture and to make better sense of the data. The sealant we had ordered came in today so Hao and I applied it to the edges of the acrylic tank and then left it for 24 hrs to cure.
July 16:
I started working on the Flexiv robot arm and planning out a trajectory for the underwater testing we want to do in the tank. The trajectory essentially involves motion of the whiskers, attached to the robot arm, in a rectangular pattern. The whiskers would:
- Start at a home position above the tank and out of the water,
- then slowly lower into the water, move forward slowly as the whiskers brush against the object to be tested,
- then move up and out of the water,
- and finally move backward, reverting to the home position.
The Flexiv robot arm had some default code for moving itself in a linear motion. I spent some time understanding how exactly the code was performing this motion (the different reference frames, torque controls, and logic). I then tried to modify the code to follow the trajectory but ran into a few errors:
- adjusting the speed was probably the most important and challenging part. This was important because a) we want the whiskers to move in a slow, controlled manner to obtain desired contact and data, b) to protect the whiskers and the arm does not perform any erratic movements, colliding into a surface. To adjust the speed, I tried changing the frequency at which the program was run which did seem to work initially but it wasn't a great fix as the frequency applied to the entire code and I could not control individual sections. I then increased the number of points plotted in each of the arm's paths using the linspace function, thereby selectively changing the frequency of actions.
- the arm would move slowly in the defined path but after following its trajectory, it would jerk back to its home position which isn't safe for the whiskers or robot. To solve this, the home position was changed to match the trajectory end position.
July 15:
Today, I continued to scavenge for objects on the YCB Object dataset. This involved looking for representative objects that we can use for testing and fit easily in the tank we have. For more Ocean-like objects we want to test, I was looking for corals, shells, rocks, and others from free CAD model websites.
Here are the objects we have selected: 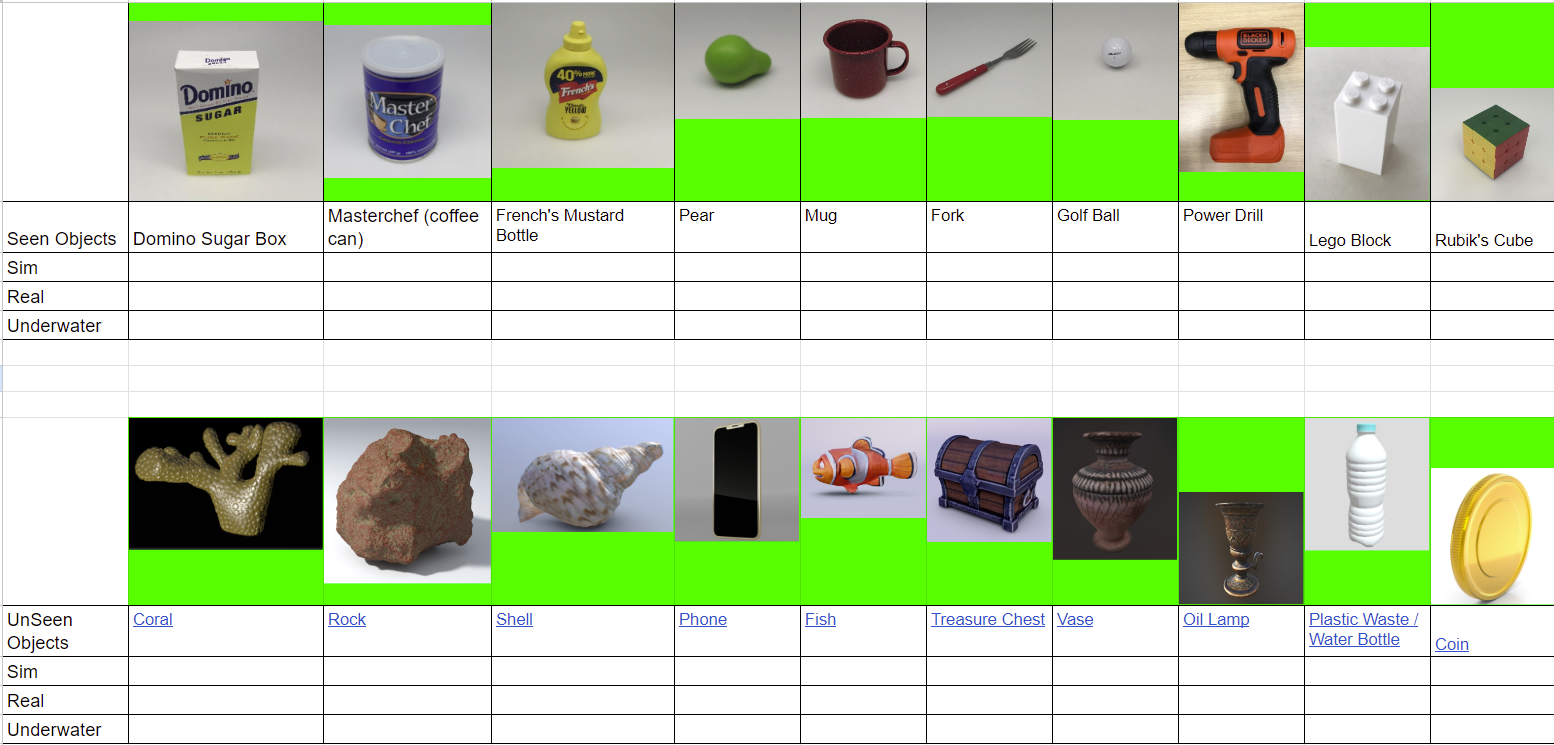
Week 3
July 12:
I started the day off looking into sealants to buy for the acrylic tank. Although the acrylic cement created a strong bond between the acrylic faces, it mostly just offers structural integrity and does not fix the small gaps between the faces to prevent leaks. Therefore, I was looking for silicone waterproof sealants to use for the tank. Afterwards, Hao shared a public dataset called YCB Objects from which we want to grab a few objects to do our underwater testing with. Using objects from the dataset means that we can get objects that are representative of other unseen objects, but also so that we have the existing CAD models we can run simulations on to compare simulations vs reality.
July 11:
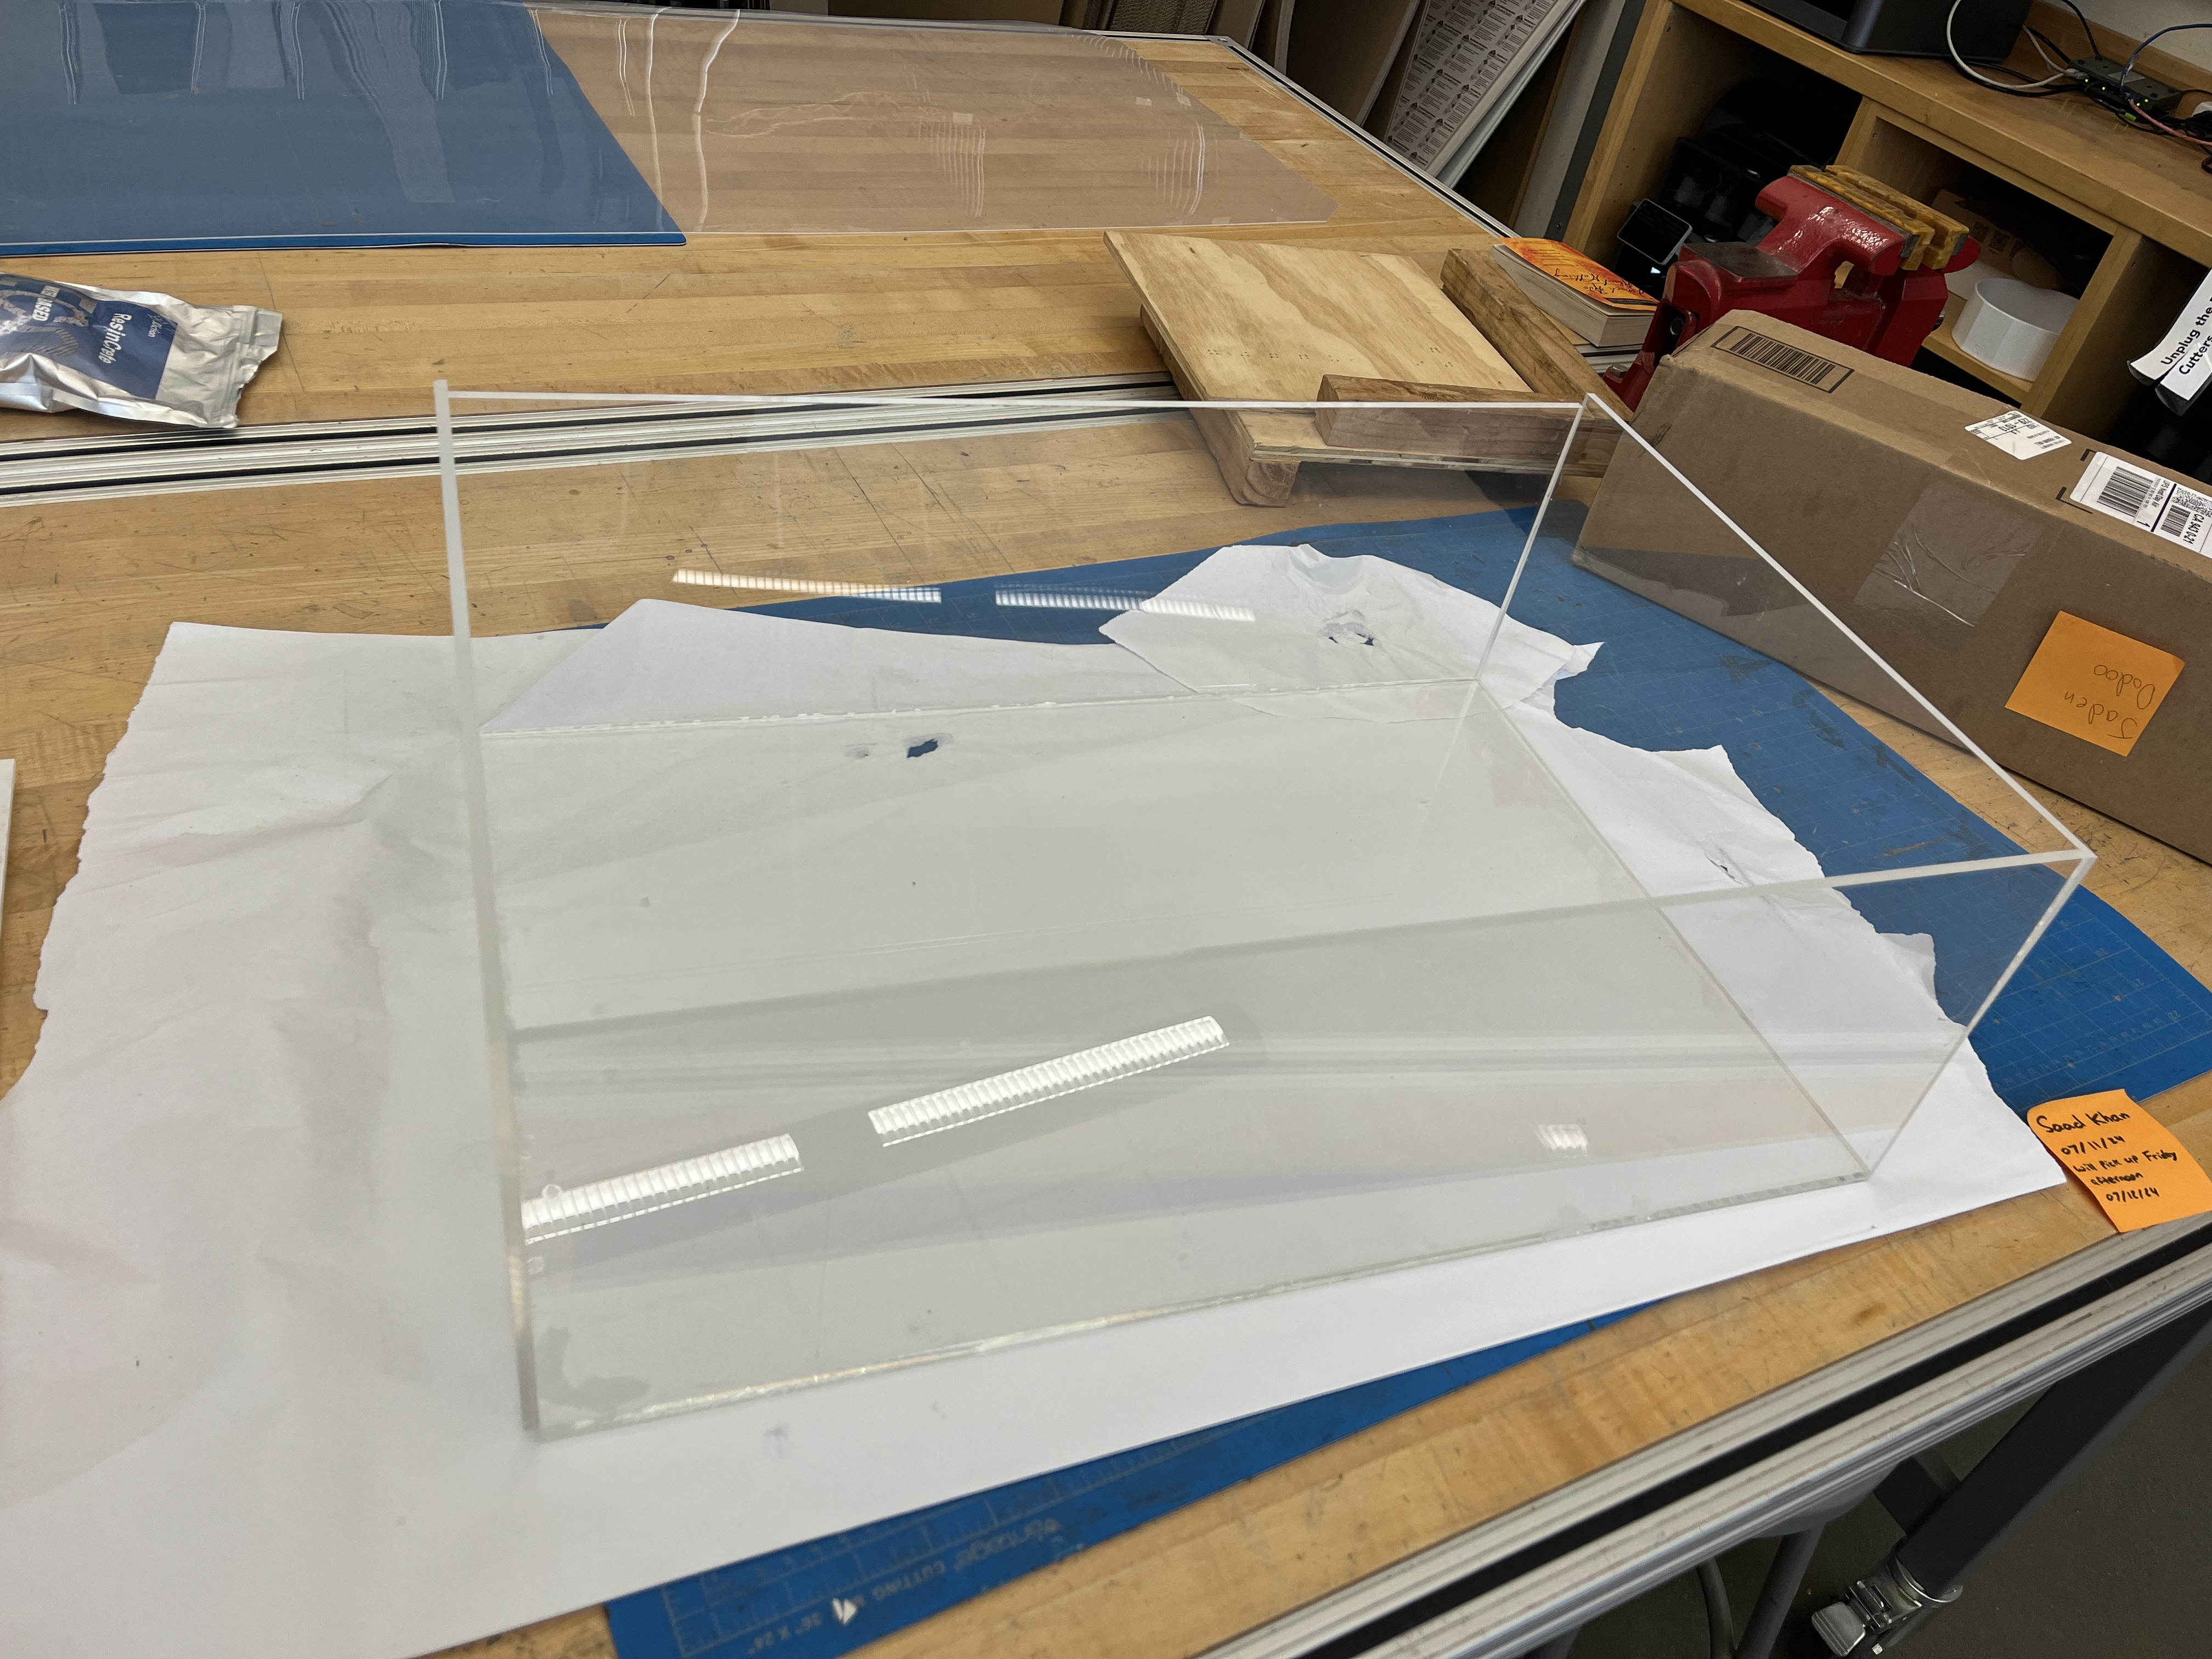
I learned how to do prints using carbon fiber, including loading/unloading the filament, drying it, and switching between AMS. I went to the PRL to build a see-through acrylic tank for underwater testing. I first cut down the acrylic pieces to size using a laser cutter. To assemble the cut pieces, I used acrylic cement which created a strong bond between them. Having assembled the tank, I left it to dry for 24 hours.
July 9-10:
I worked with Hao on trying to get the code running for the Flexiv robot arm. This was challenging as we ran into a problem in achieving linear motion (trajectory for underwater testing): the arm would tend to jerk upwards before performing its linear travel. This was corrected by changing speed values and the home position coordinates. Though this solved the problem, when we reverted the code to the previous version, the problem was gone??
July 8:
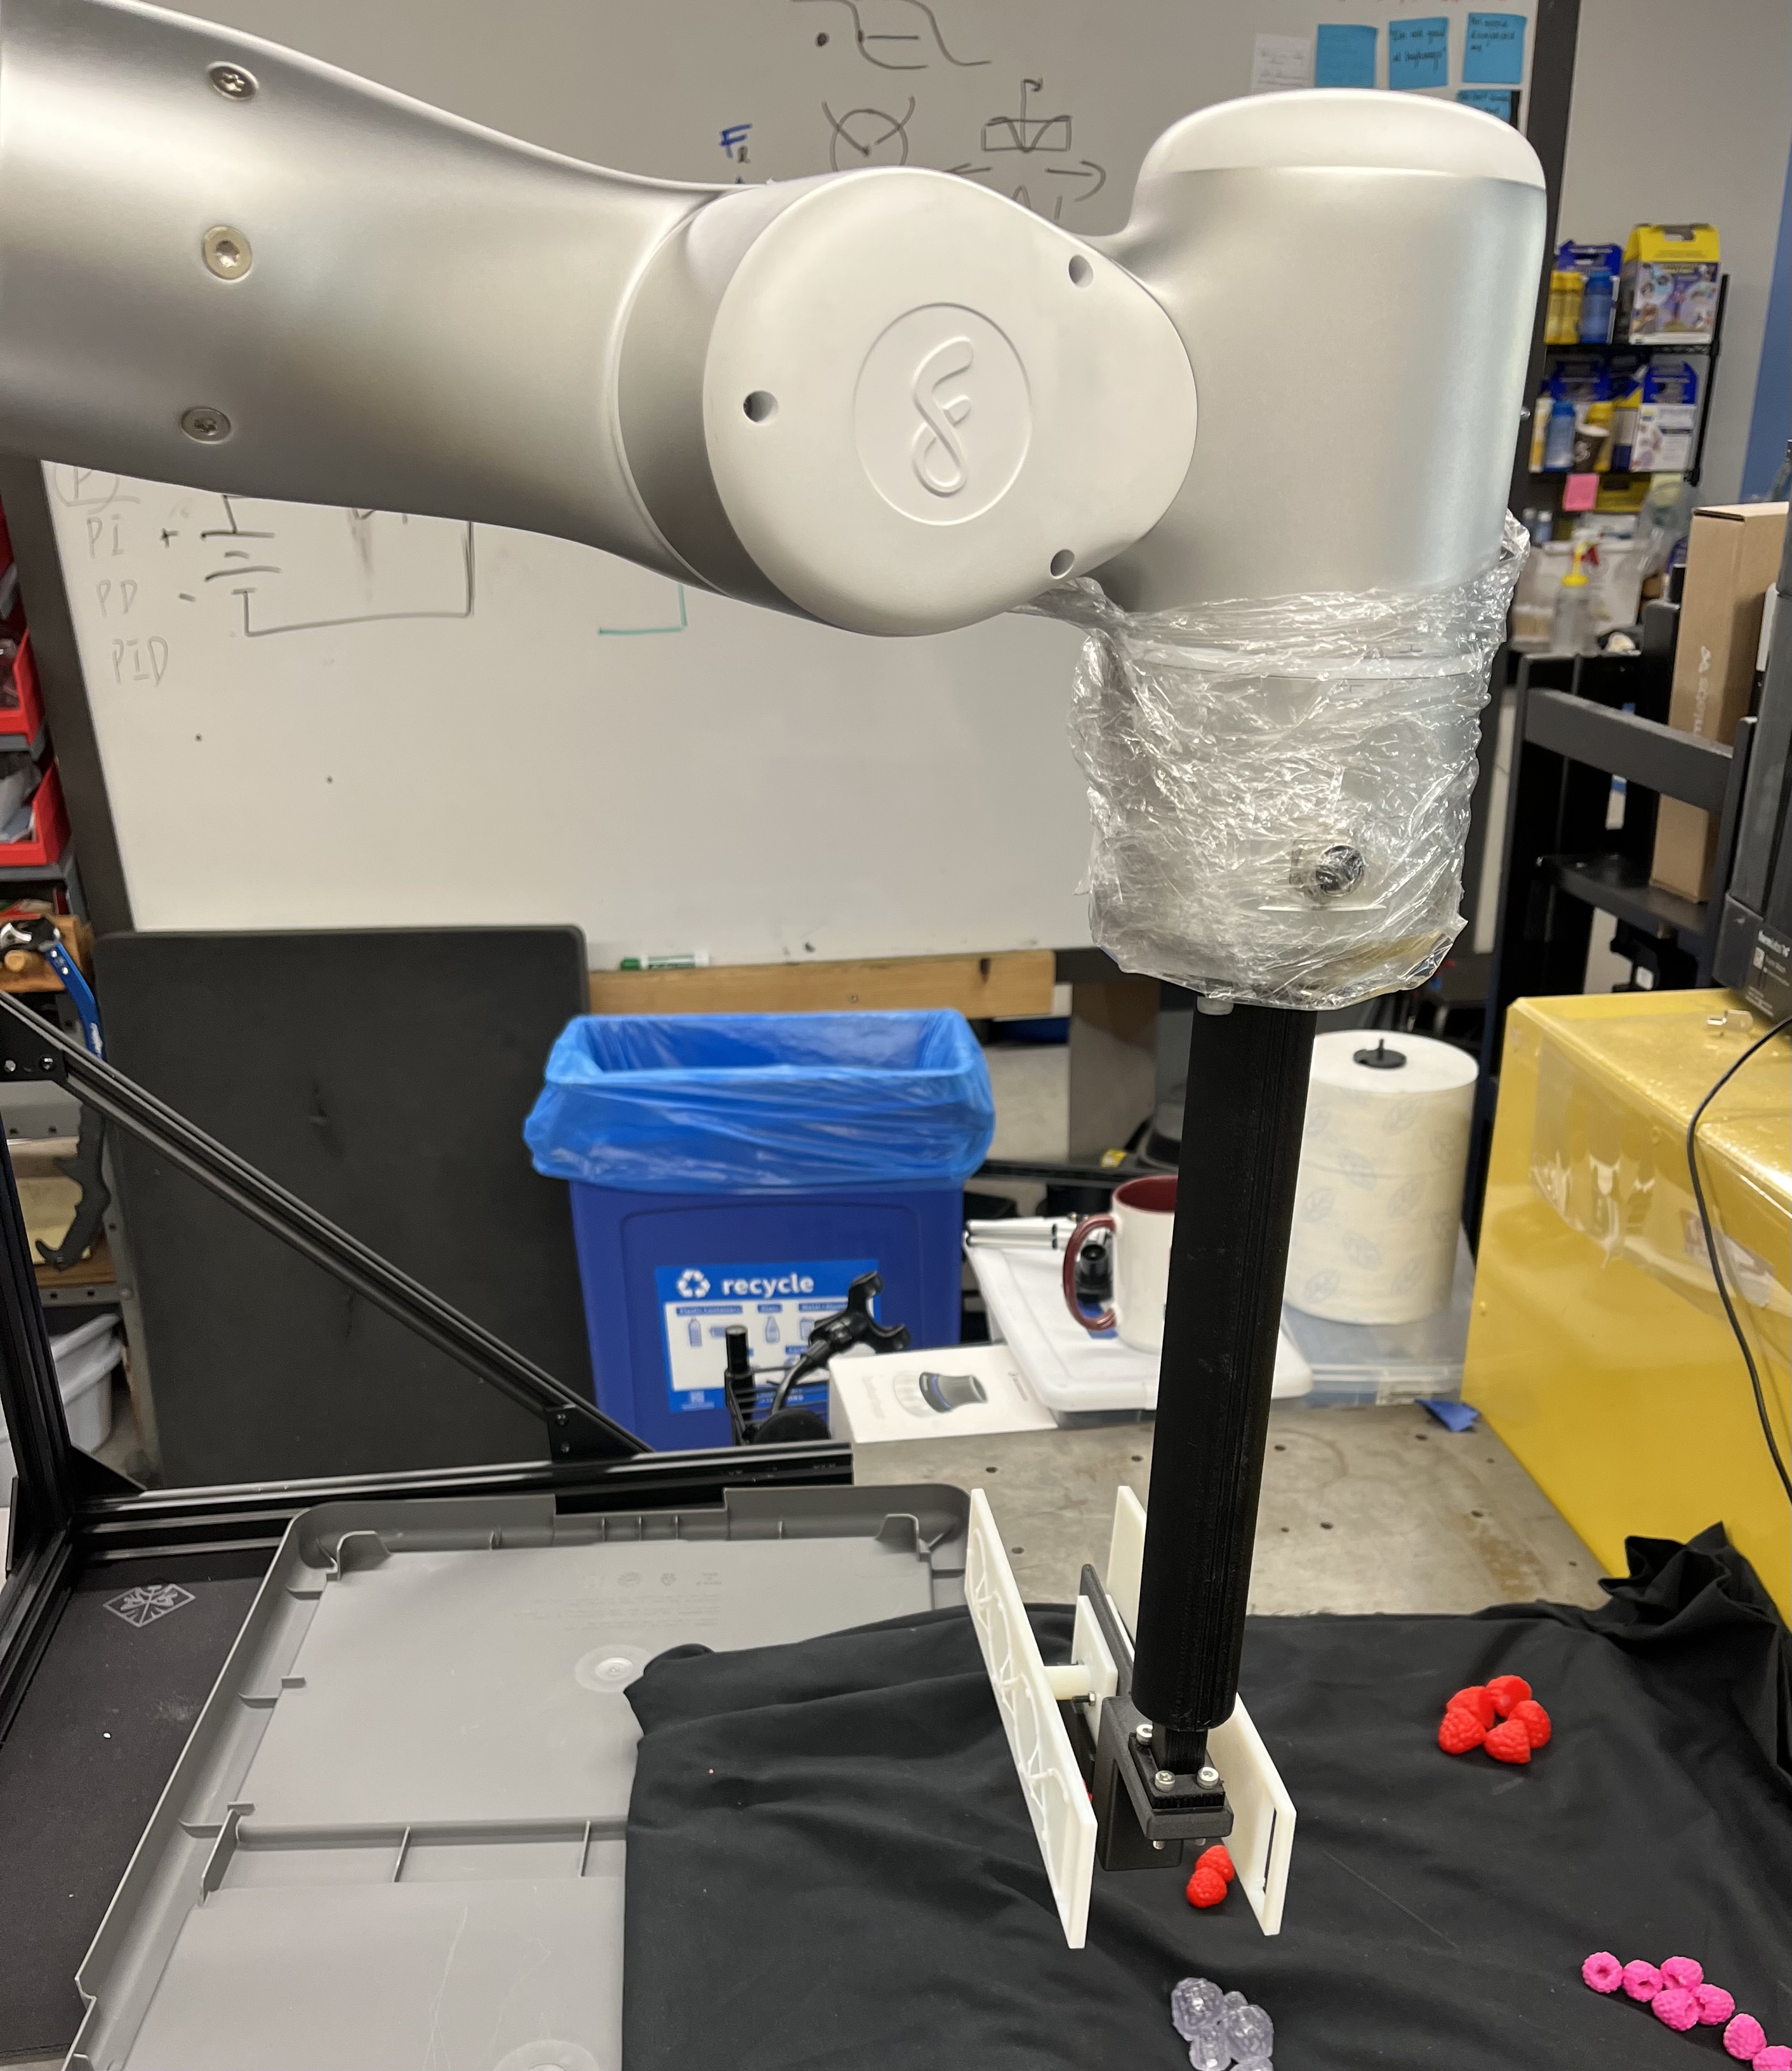
I started this week off fixing the attachment I designed onto the Flexiv robot arm. This turned out well and there were no problems in the attachment process. After doing so, however, it was apparent that the attachment, made of PLA, was shaking and wobbling. This is a problem as it could add noise to the data collected by the whisker when testing in water. Therefore, I switched to using carbon fiber which was stiffer and decreased the wobbling.
Week 2
July 3:
After printing my first design on the Bambu printer in the lab, I realized there were a few design considerations which I had not taken into account and needed to address:
- Make screw holes more accessible for ease of attaching/detaching
- Make it narrower to easily fit into plastic tank for water testing
- Lose excess material
- Add bottom support mount to hold array in a stable position
And so, here is the updated version.
July 2:
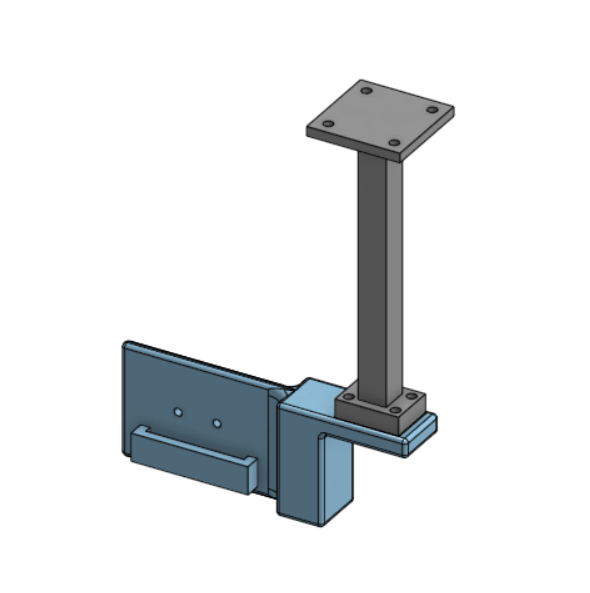
My first task was to design an attachment to connect the robot arm that will be used for testing to the sensor array which houses the whiskers (optical fibers and FBG sensors).
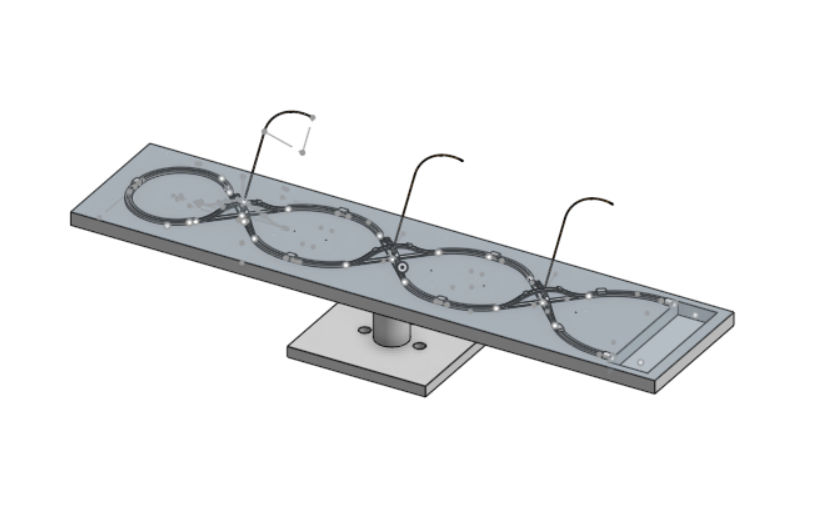
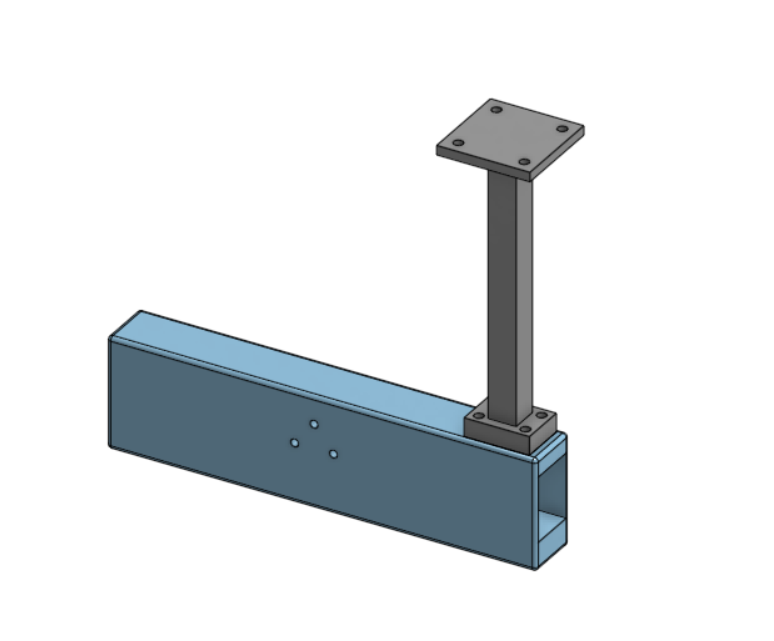
Here is the design I came up with where the sensor array (shown above) would attach to the sides via screw holes.
July 1:
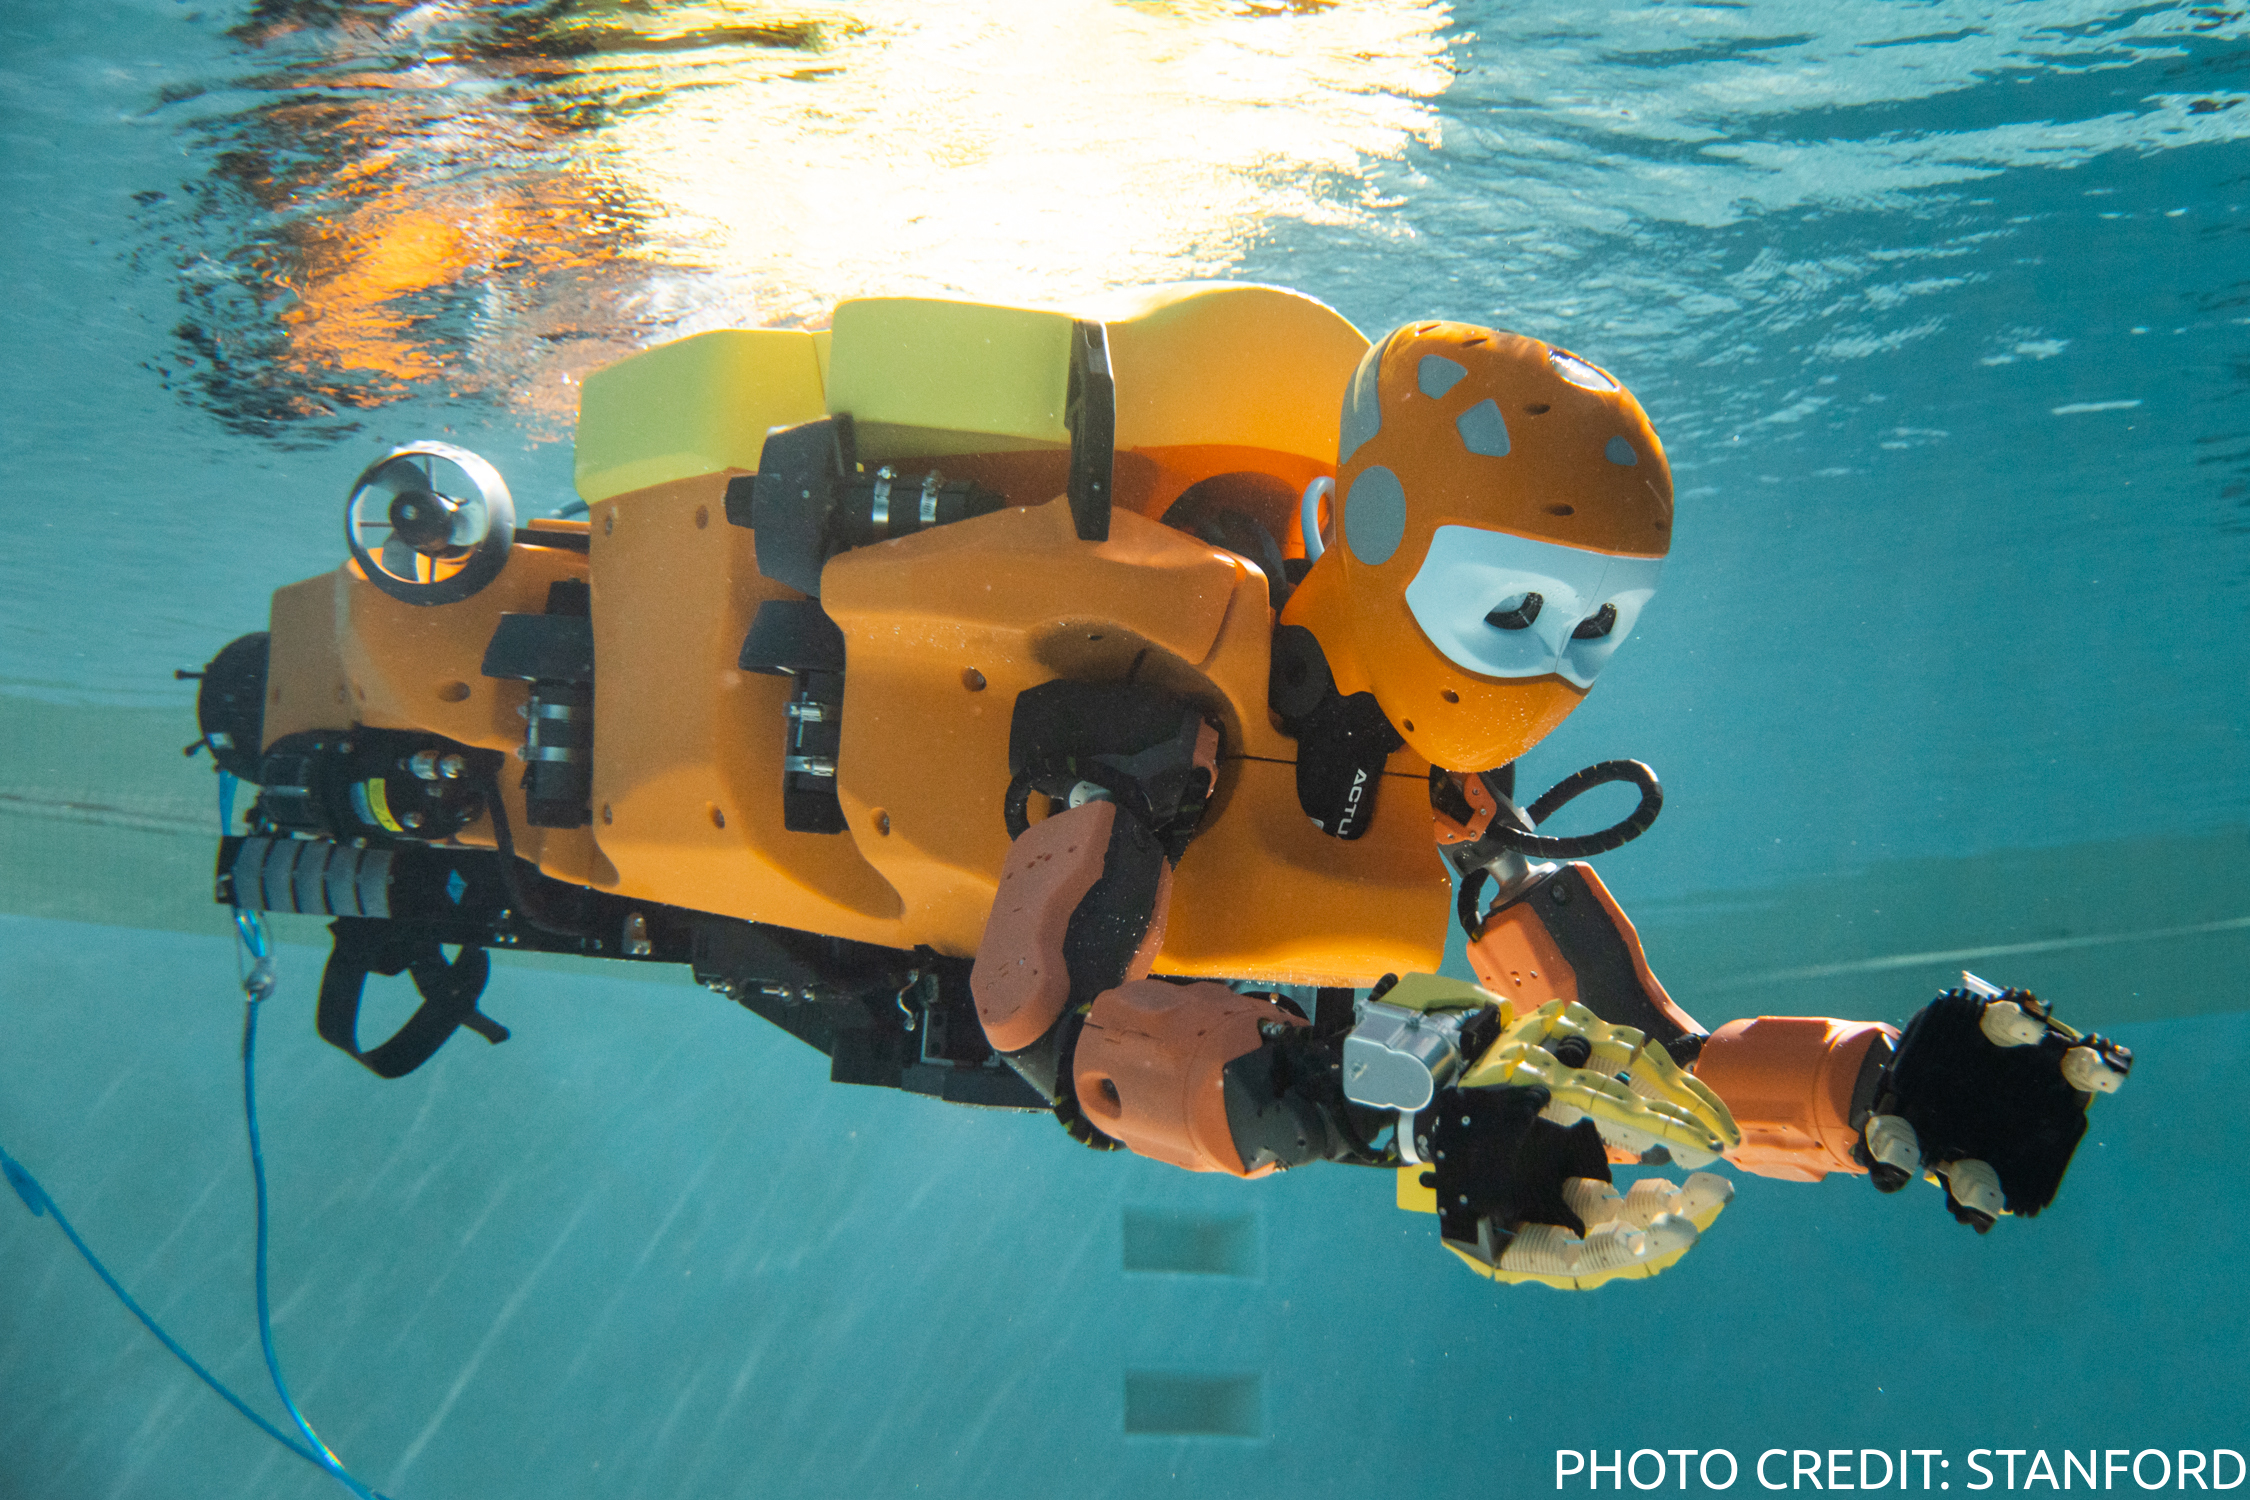
I talked with my PhD mentor, Hao Li, about the project I will be working on for the summer: whisker-inspired tactile sensing under deep water. The research involves developing highly flexible, curved, passive whiskers mounted along a robot arm to gather sensory data as they brush past objects during normal robot motion. The whiskers will be tested underwater and eventually mounted onto the OceanOneK robot. Over the next couple of weeks, I will be working on developing the apparatus for testing and reading fiber optic sensors in water.
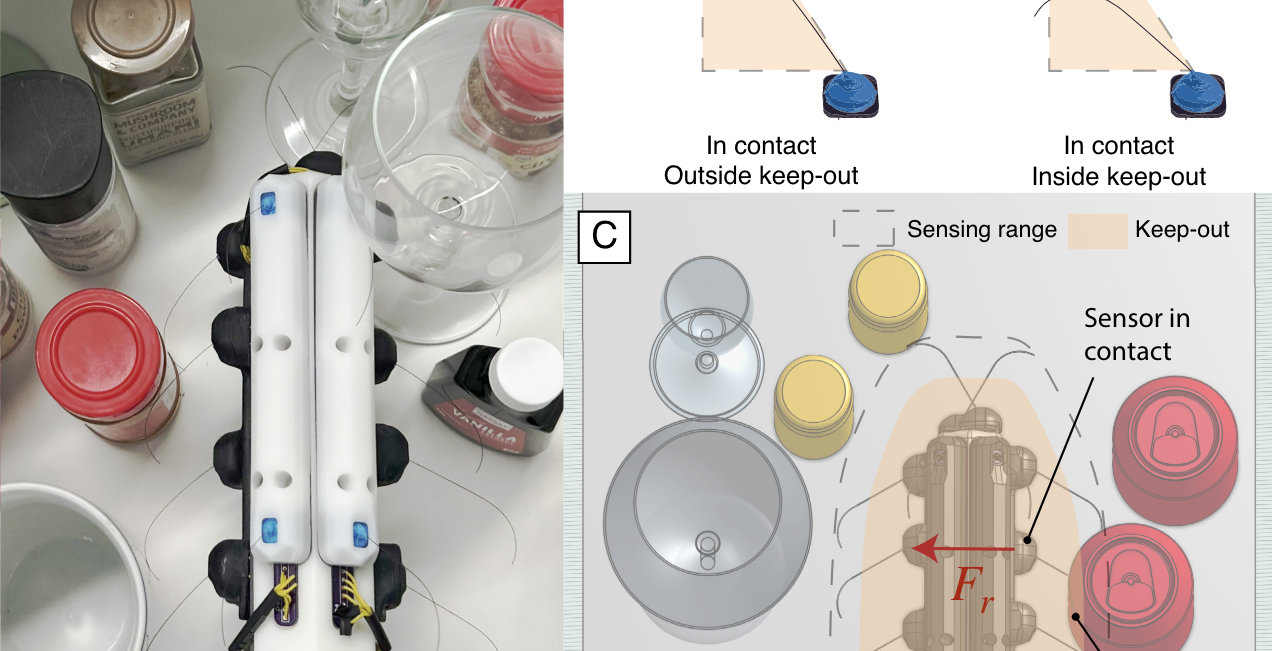
- Lin, Michael A., et al. "Navigation and 3D Surface Reconstruction from Passive Whisker Sensing." arXiv preprint arXiv:2406.06038 (2024).
Week 1
June 27:
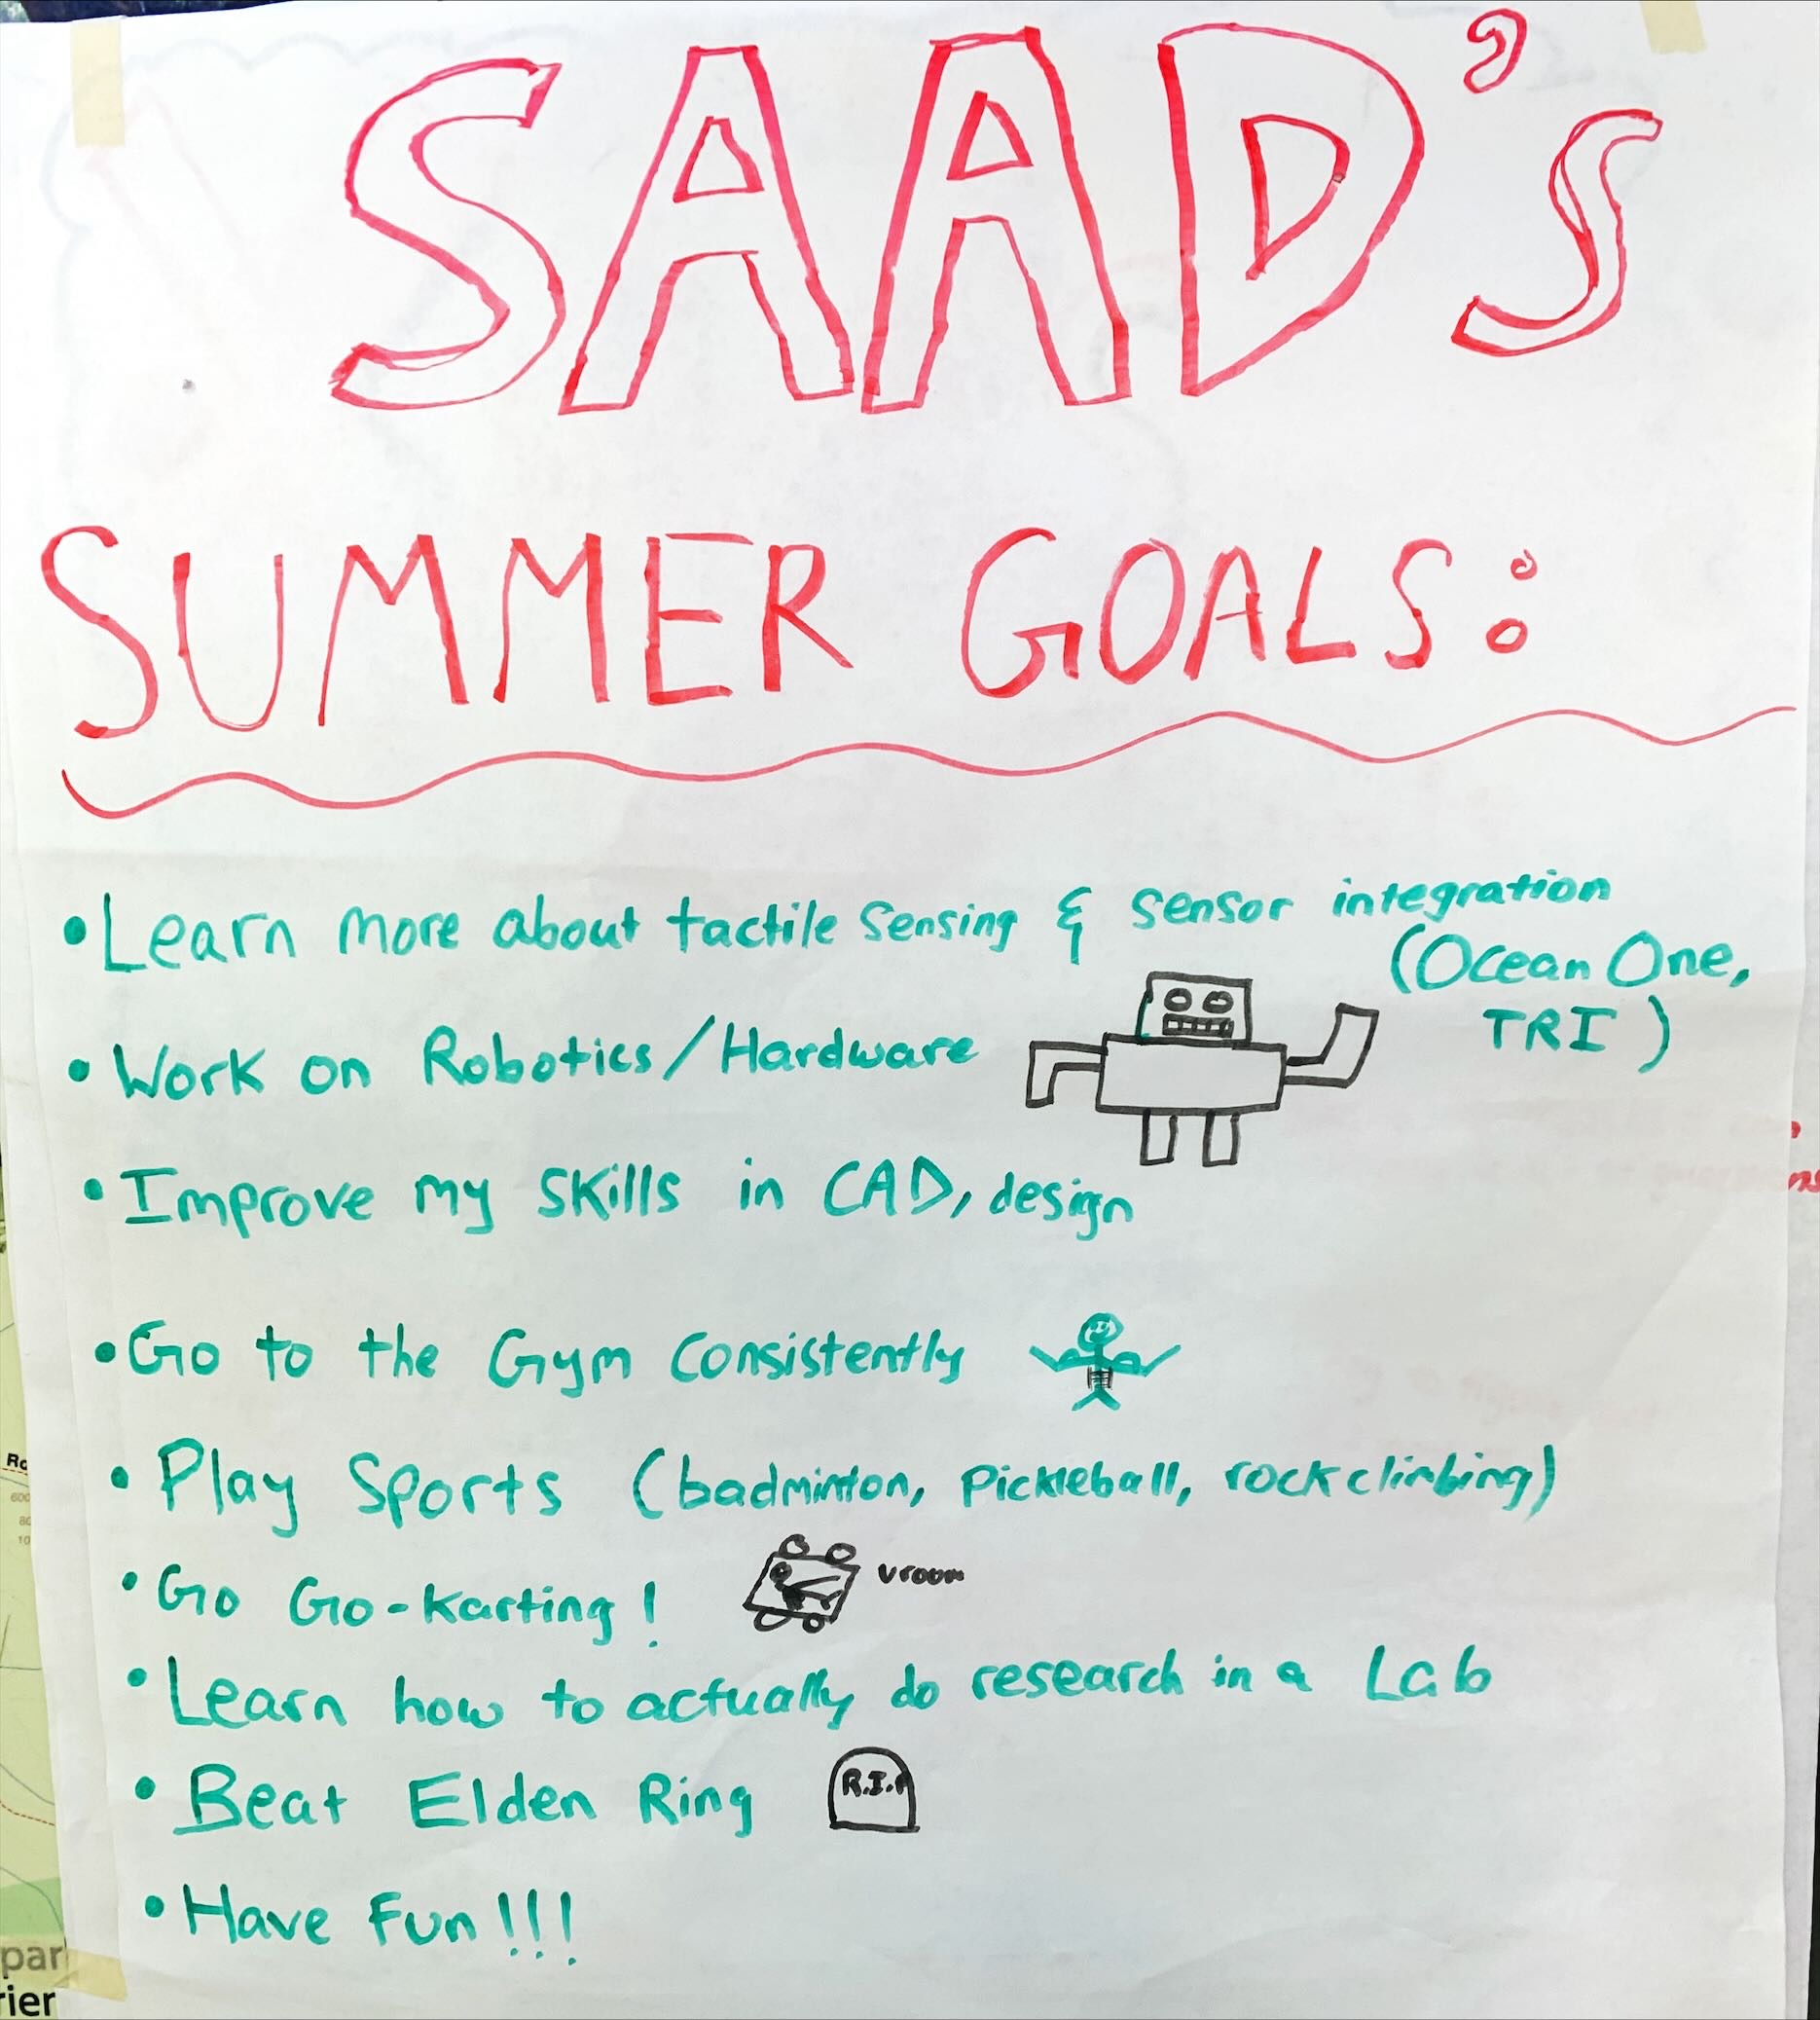
Today we had a Summer Retreat!!! Went hiking at Butano State Park, where I got to know my fellow lab members more. After a picnic, we all shared our summer goals. Here are mine! Afterwards, we went to Bean Hollow State Beach!
June 26:
I learned about the various applications of gecko-inspired adhesives including grasping onto objects in space. More specifically, I learned about the mechanism through which the adhesive functions via free-body diagrams. This involved the microwedges on the adhesive and how they activate when they slide against a flat surface, offering great resistance in shear, with the goal of trying to maximize the normal force before the adhesives fail. EmJ shared a paper which provides good background knowledge about the adhesives and their mechanism:
- Hawkes, Elliot W., Hao Jiang, and Mark R. Cutkosky. "Three-dimensional dynamic surface grasping with dry adhesion." The International Journal of Robotics Research 35.8 (2016): 943-958.
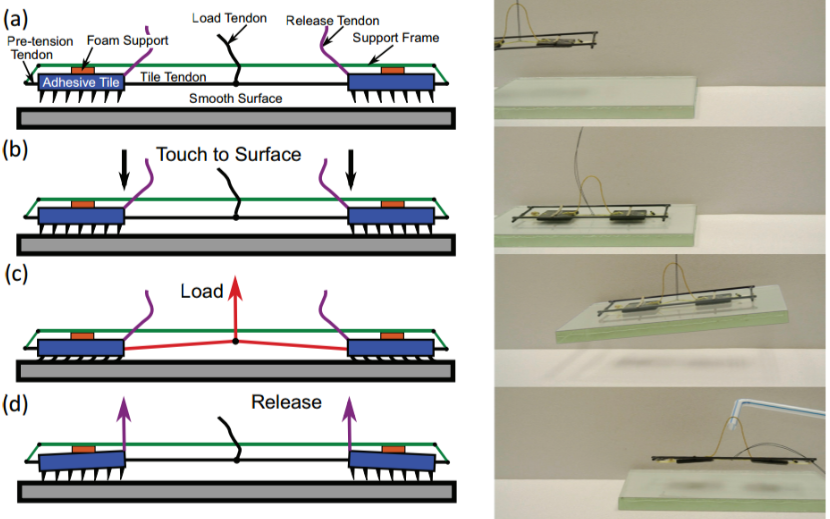
Afterwards, I spent some time doing the following:
- Went through tutorial for OnShape
- Started playing around with the software, making a few basic designs with Xitlali and Abby.
- Prototyping 2-tile designs for the adhesives
- While messing around with designs on OnShape, I was not aware of the importance of the line-of-action running from the string (tendon) attached to the tile running through to the center of the adhesive and the challenges of maintaining this line-of-action.
June 25:
Lab cleanup: organized lab hardware, materials, electronics
Intro to Gecko dry adhesives
June 24:
Starting off the Summer, we had an orientation, where we got safety training and an overview of ongoing work in the lab. I also created my own profile, here on the BDML website.
Afterwards, we had a SURI lunch and scavenger hunt around campus, which was a nice bonding event with other students doing exciting research in different labs.
Tadbot experiment intro tour: I got to see poison frogs at the Biology lab! I learned about the goal of creating realistic simulations of tadpoles in order to fool the parents into feeding the Tadbot to study frog behavior.

