Grace's Summer Blog
Week 7 (Aug 5 - Aug 9)
Poster:
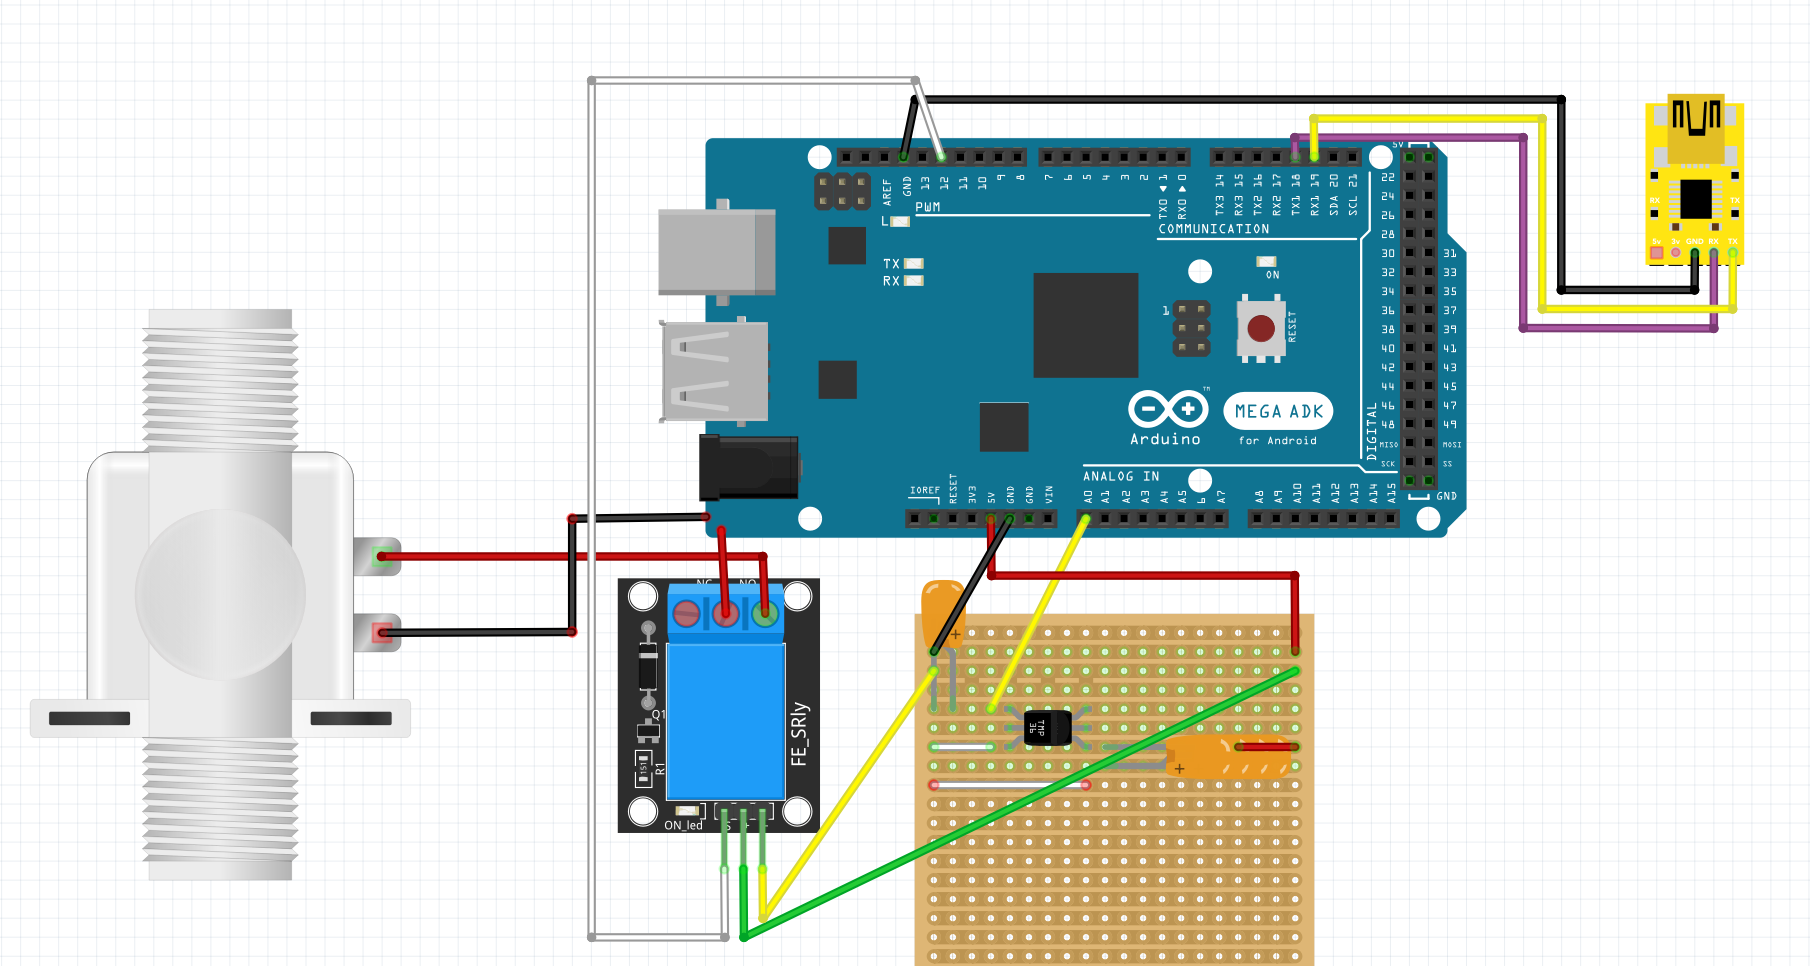

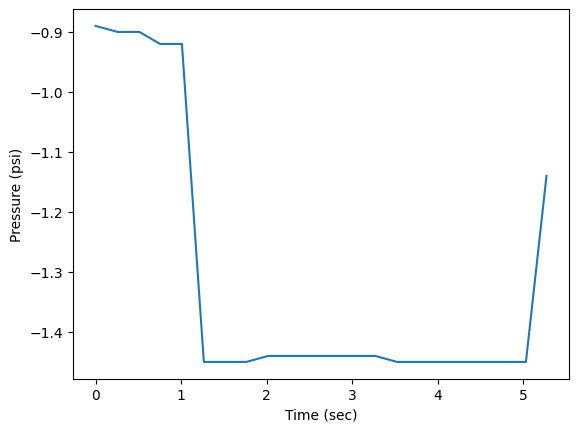
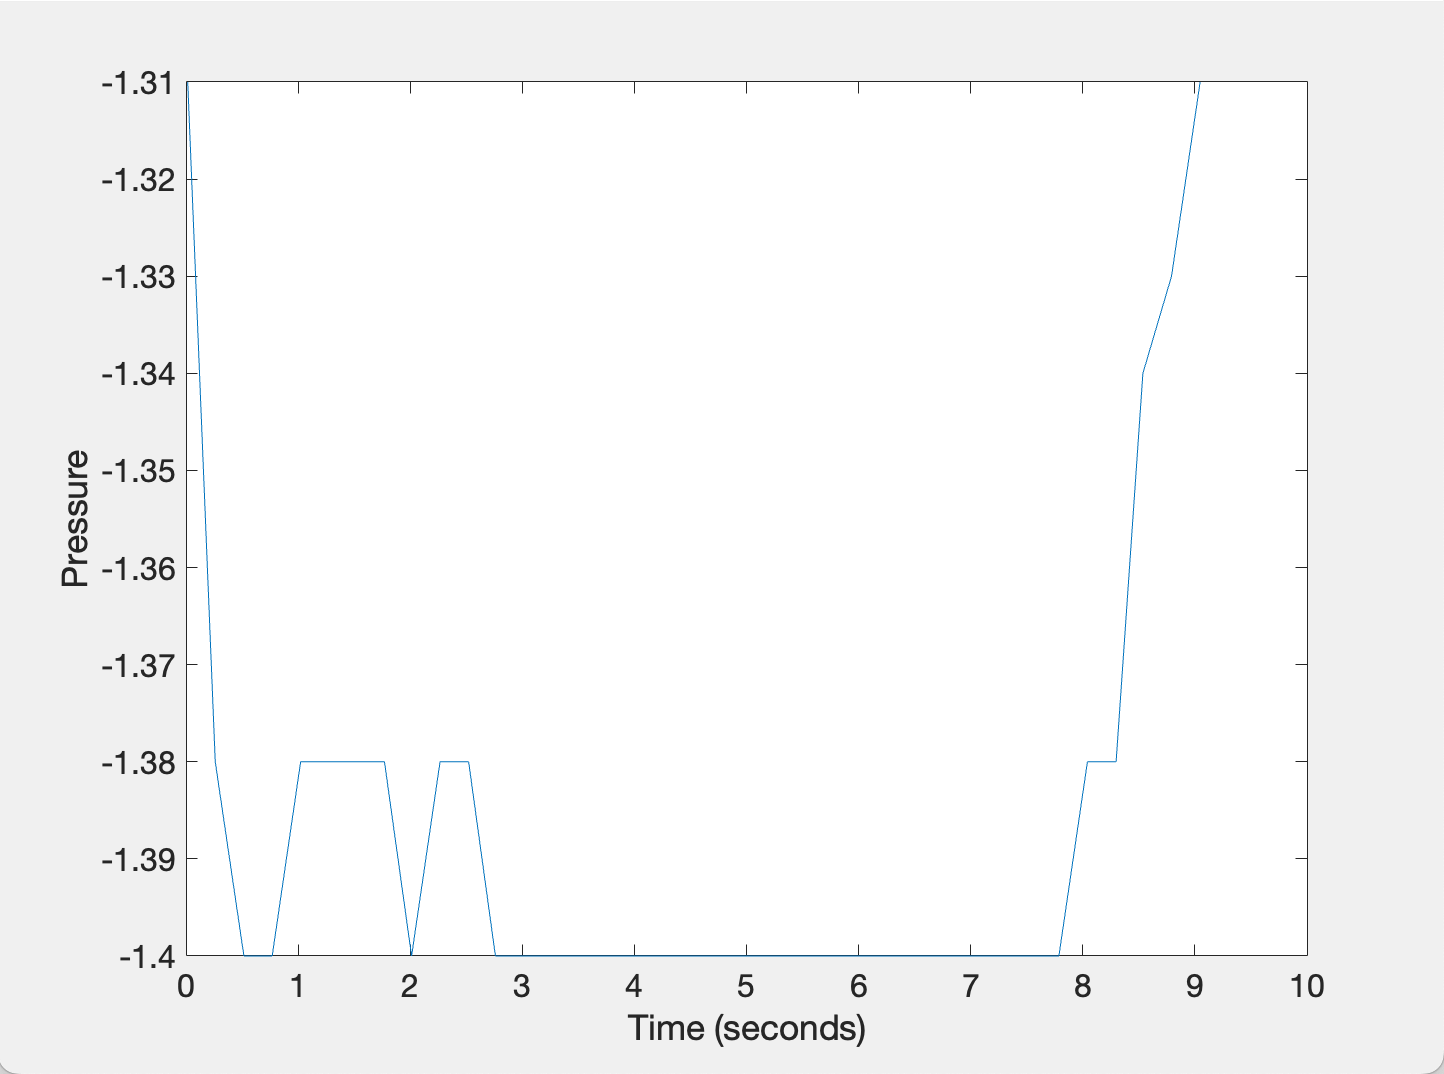
Monday: Today I worked on the code for most of the day, trying to change the logic to get the valve controlled by the code. I have gotten this control aspect to work now, but the plots and data collection are still not working correctly. I also made the circuit using fritzing today for documentation. I have plots of a good seal and bad seal, just not from the most recent code. Those plots are shown above.
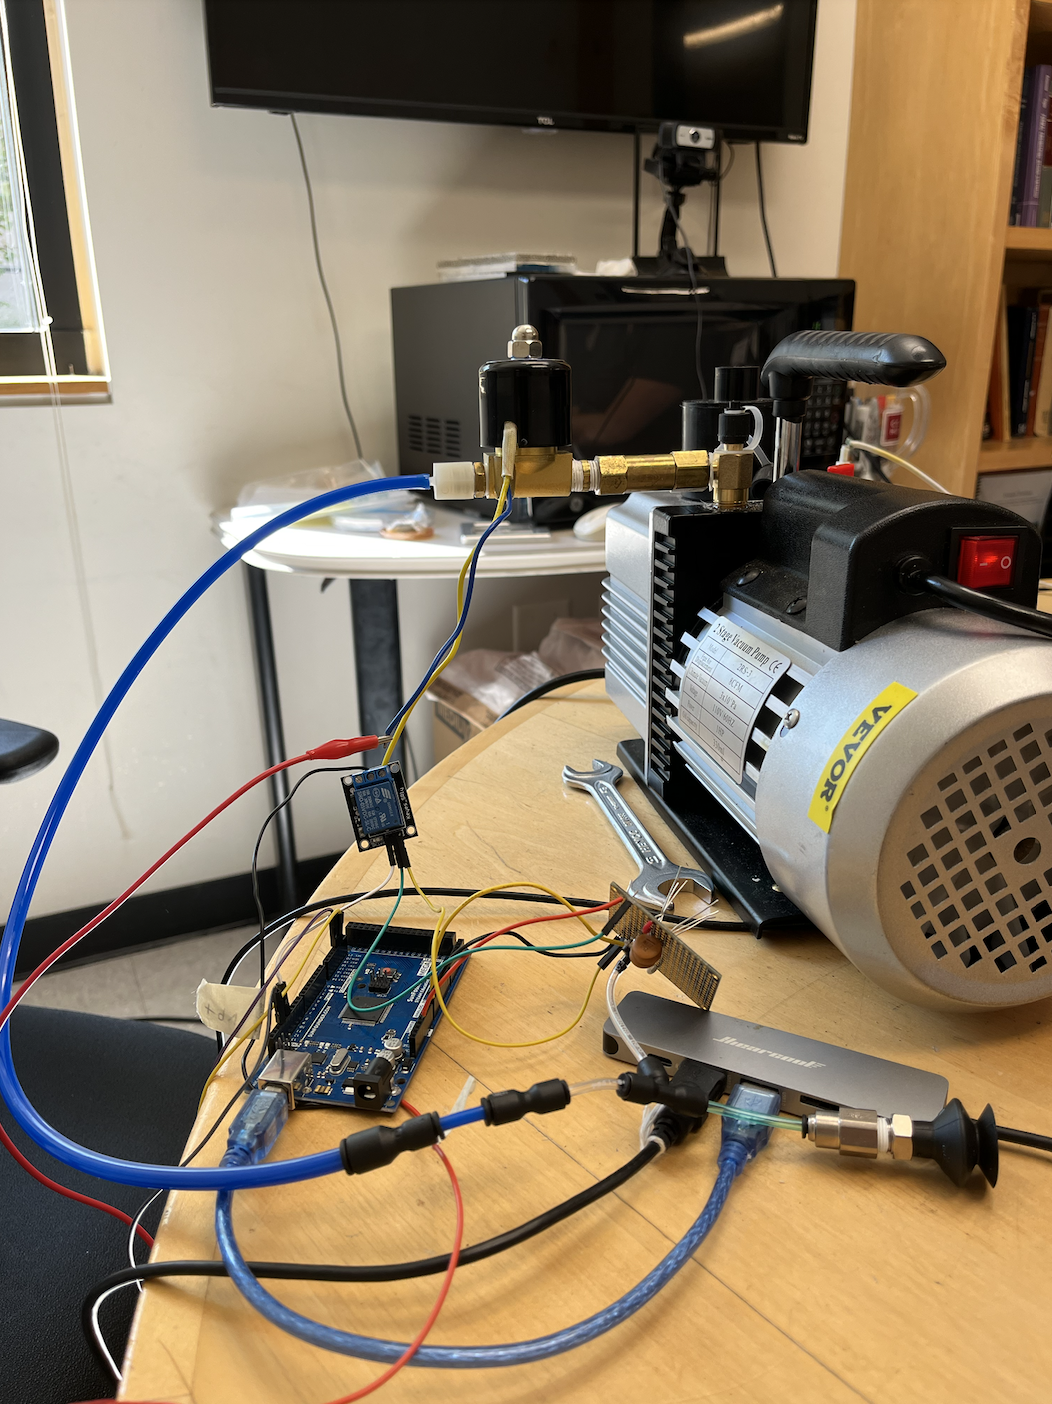
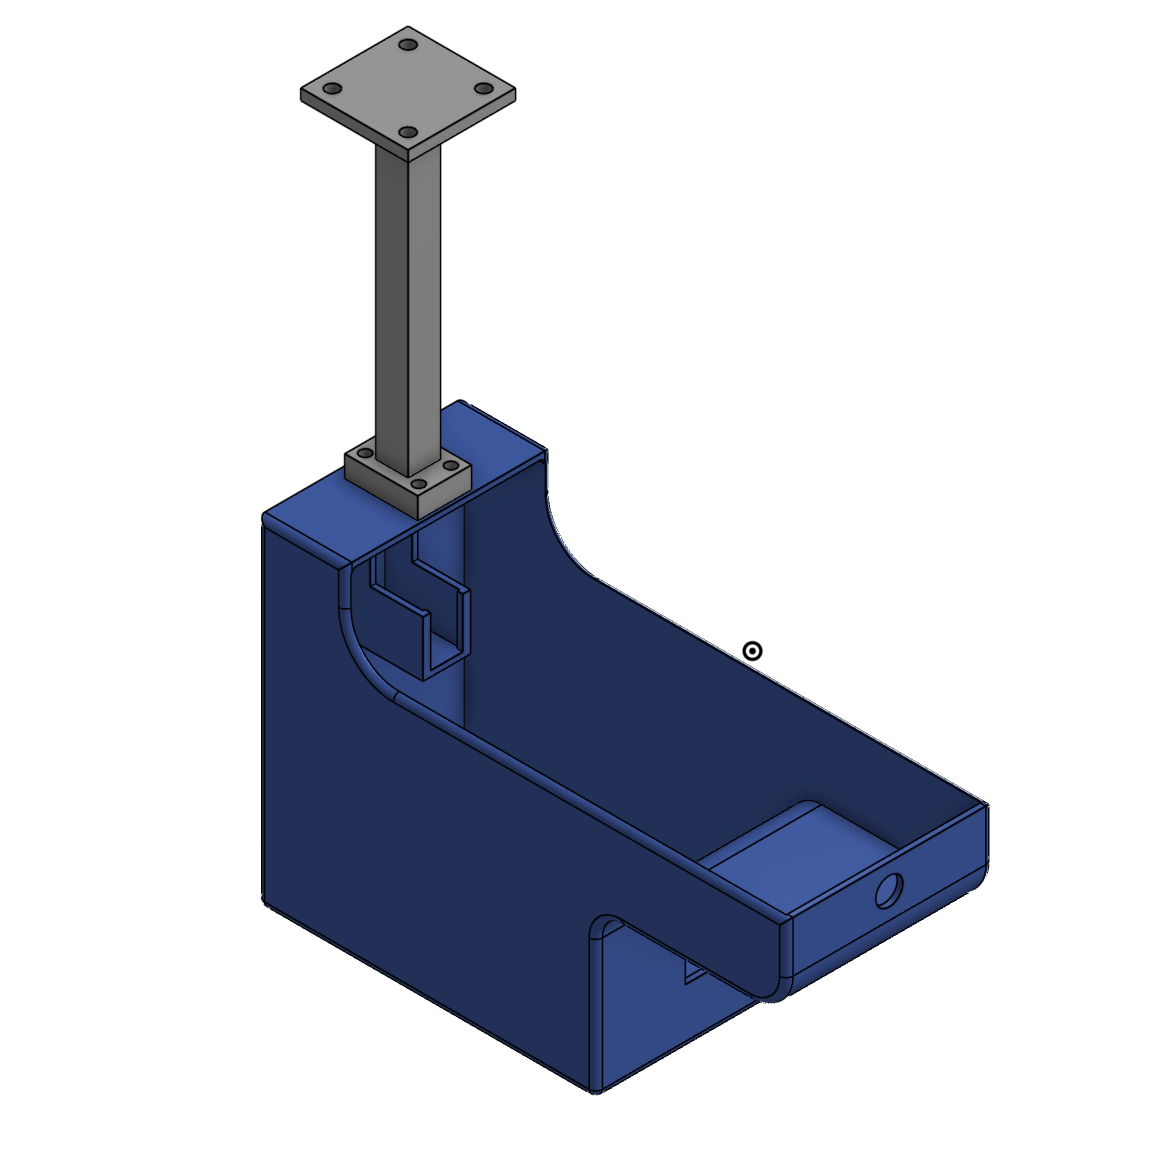
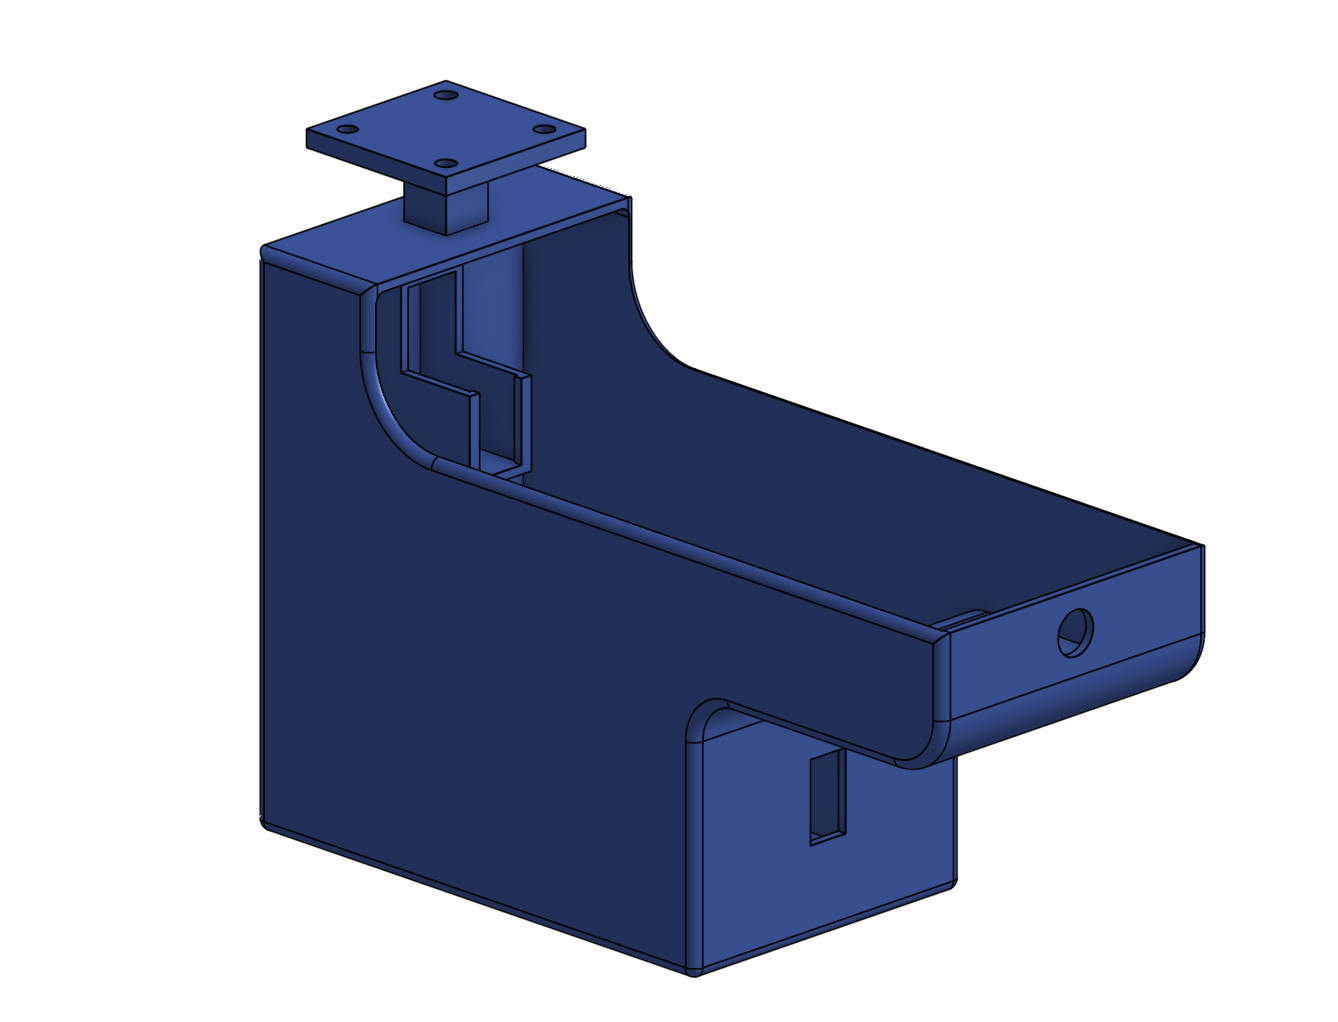
Tuesday: Today I worked on the code again for most of the day. Unfortunately I can't seem to make much progress. Although it seems like a simple change, for some reason adding a second prompt to send to the arduino and turning the valve off seems to mess up the serial communication/data processing. Aside from working on the code, I started 3D printing the attachment and I received some advice on my poster design from EmJ.

Wednesday: Today I got my attachment out of the 3D printer and put everything together to take photos of the setup for my poster. After this I continued to work on the code, and have gotten it to work as intended, just with a slight issue with the time data that I hope to fix tomorrow. I also spent some time working on improving my poster.
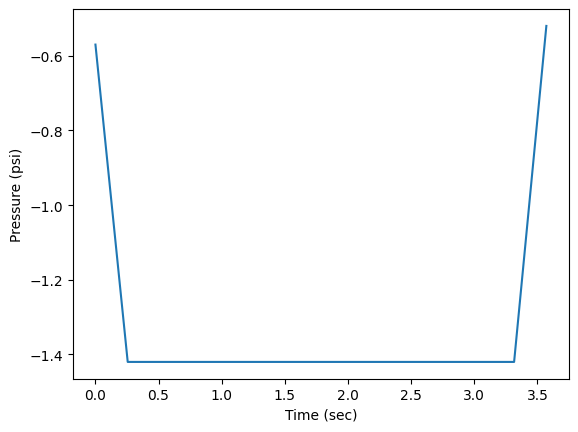
Thursday: Today I worked more on the code and it is now working properly. After changing it to stopping everything once "soff" is entered and the valve is turned off, the process became much simpler. I also fixed the timing issue today, and now the plot of pressure vs. time is accurate and makes sense. Today I also submitted my poster and worked on the slides and script for my presentation that I have to give next week.
Friday: Today I went to Hojung's defense presentation and celebration with the rest of the lab. It was a great presentation and I enjoyed hearing about all of the impressive work and research he has completed over the past several years.
Week 6 (July 29- Aug 1)
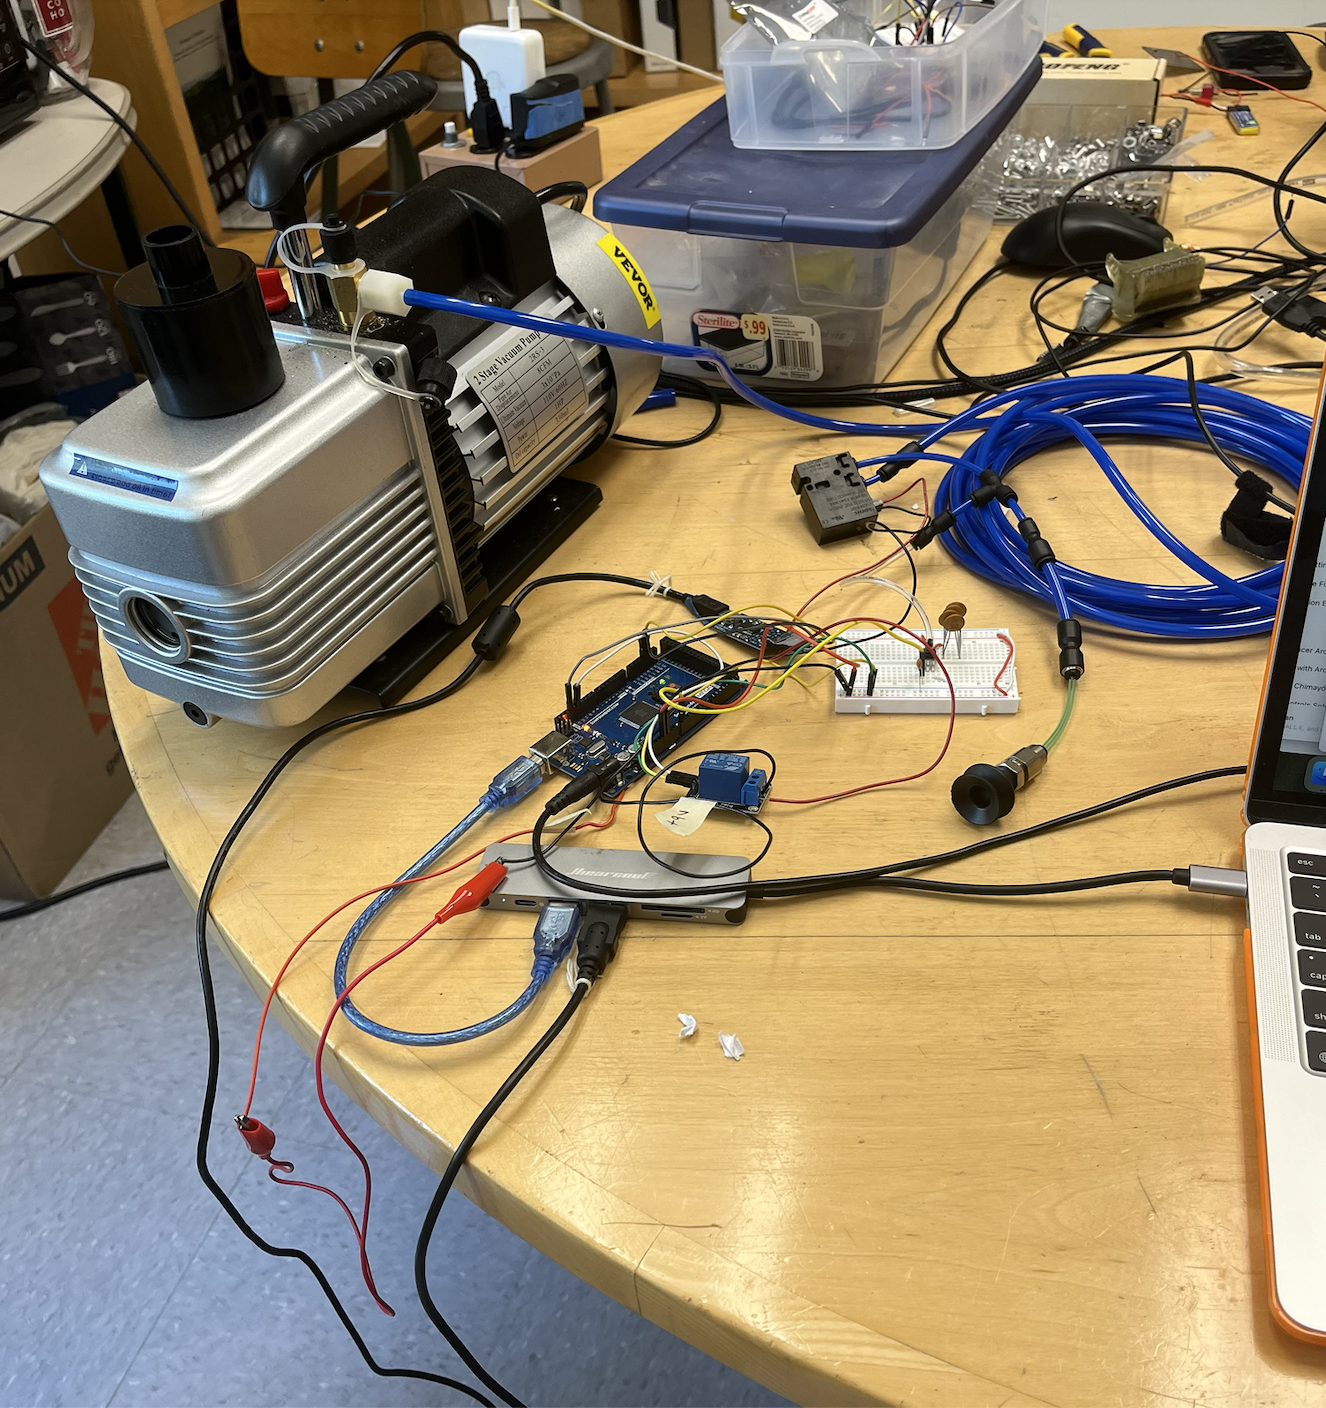
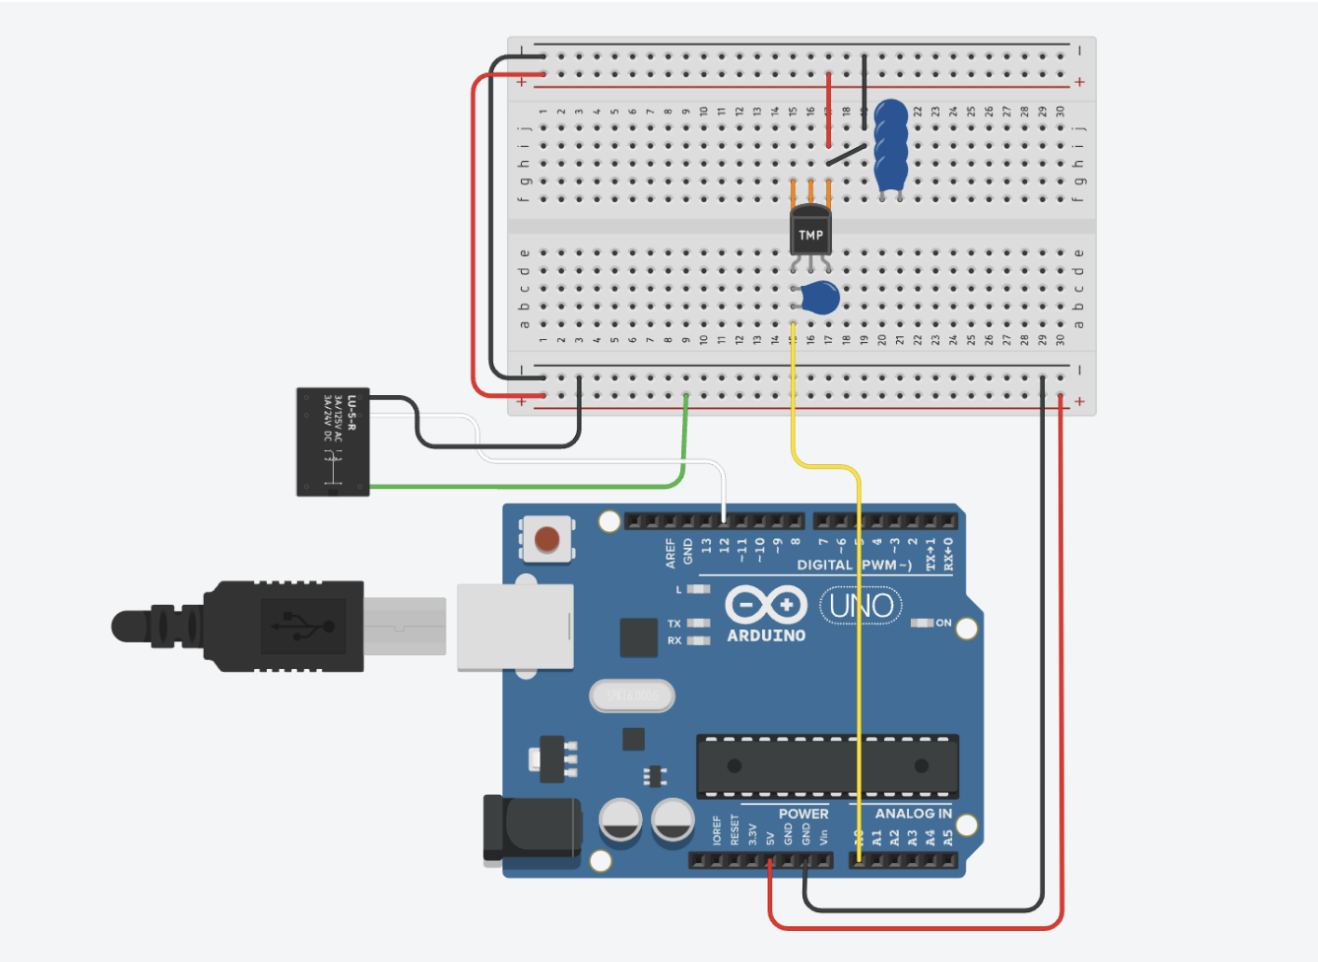
Monday: Today I mapped out the wiring from the breadboard onto the snap board and then soldered it on. Once I finished this, I hooked up the circuit and connected the Arduino to run the code and verify it worked. However, when I did this the Arduino would not connect and got very hot. This made me realize I put the pressure transducer in the wrong orientation, with the wrong pins connected to ground and voltage supply. I then removed the pressure transducer from the board and tried to remove the capacitors to re-do the layout. The capacitors have been very difficult to remove and I cannot find any around the lab so I may need to order more.
Tuesday: Today I re-soldered the circuit onto a snap board. Then I connected the circuit to the Arduino and pump to make sure that it was working. When I did this, the process worked as usual but when the solenoid valve turned on, no air flowed out to create a suction. Because of this, I started searching online for a solenoid valve replacement.
Wednesday: Today I replaced the previous solenoid valve with a more heavy duty one that I can use as a temporary place holder until the valve from amazon arrives. Once I hooked this all up, the solenoid valve was working with the code. However, the pressure values printing in the serial monitor were not changing which indicated an issue with the circuit. I spent some time debugging the circuit and caught many small errors in the soldering. After correcting these and comparing the circuit with the breadboard one using the voltmeter, I finally got the circuit printing correct pressure values.
Thursday: Today I spent some time fixing some of the soldering connections that had come lose in the circuit and were messing up the functionality of it. Then I spent some time editing the tubing diagram and circuit diagrams in my documentation of the project to make sure everything was up to date. I also spent some time editing the CAD designs for the compartment attachment to better fit the new solenoid valve that has been ordered on amazon.
Friday: Today I redid the logic of the code in the Arduino and Python scripts to have the suction be controlled by the valve rather than the vacuum pump. I have it almost working other than a few issues with the plotting which I hope to fix on Monday.
Week 5 (July 22-26)
Monday: Today I converted my Matlab code to a Python script in Spyder to work compatibly with the Arduino script. I also worked on editing the suction cup attachment design to fit the Arduino and other attachments and wiring. Currently, the goal is to test the suction cup on the Flexiv Robot by the end of the week. To do so, I need to make a working prototype of the suction cup attachment, switch from Matlab to Python, and experiment with sampling rates and filtering.
Tuesday: Today I finished the suction cup attachment design on the Flexiv Robot using Onshape. I learned how to use Bambu Studio after downloading it onto my computer and uploaded the part. I plan on printing the part tomorrow morning.
Wednesday:
I was not in the lab today due to a meeting and a SURF Industry visit. However, during the free time that I had, I modified the CAD Design to get rid of the unneeded long extension arm and replaced it with a shorter extension that attaches directly to the robot arm.
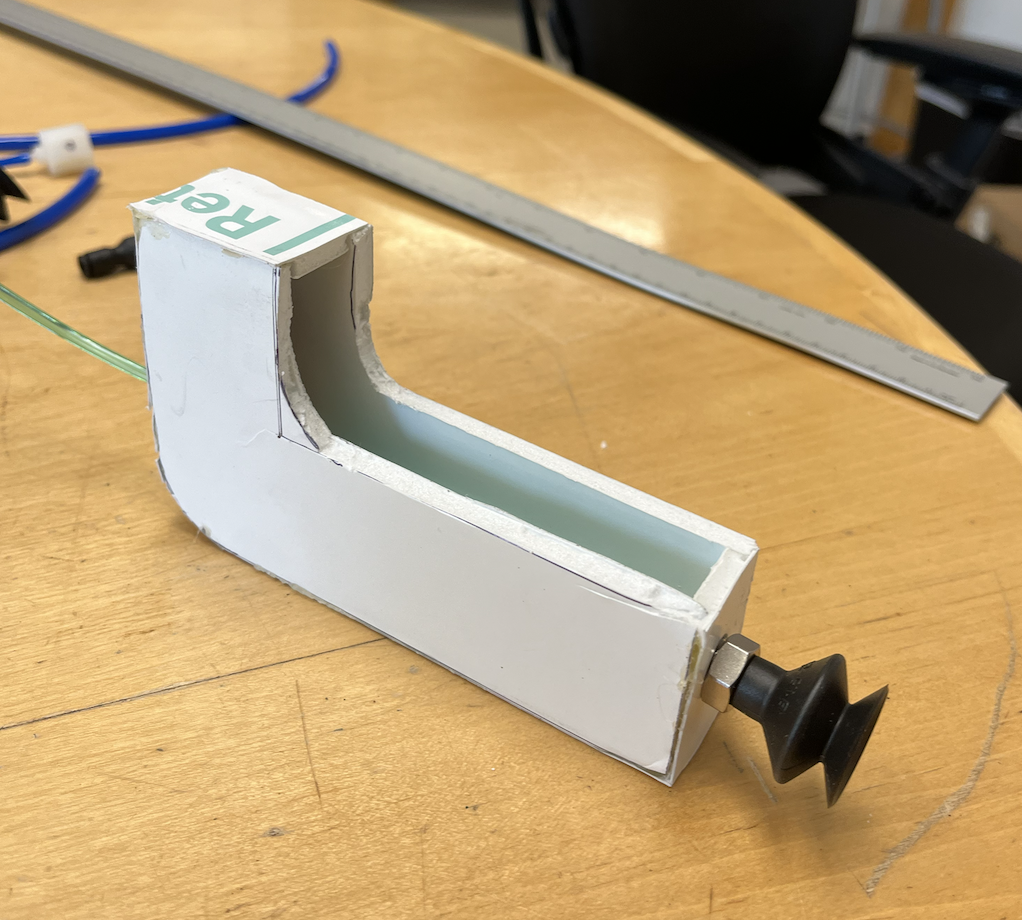
Thursday: Today I restarted the design for the suction cup attachment. I made a prototype with foam core to make sure everything fit inside. Then I started the CAD design for it.
Friday: 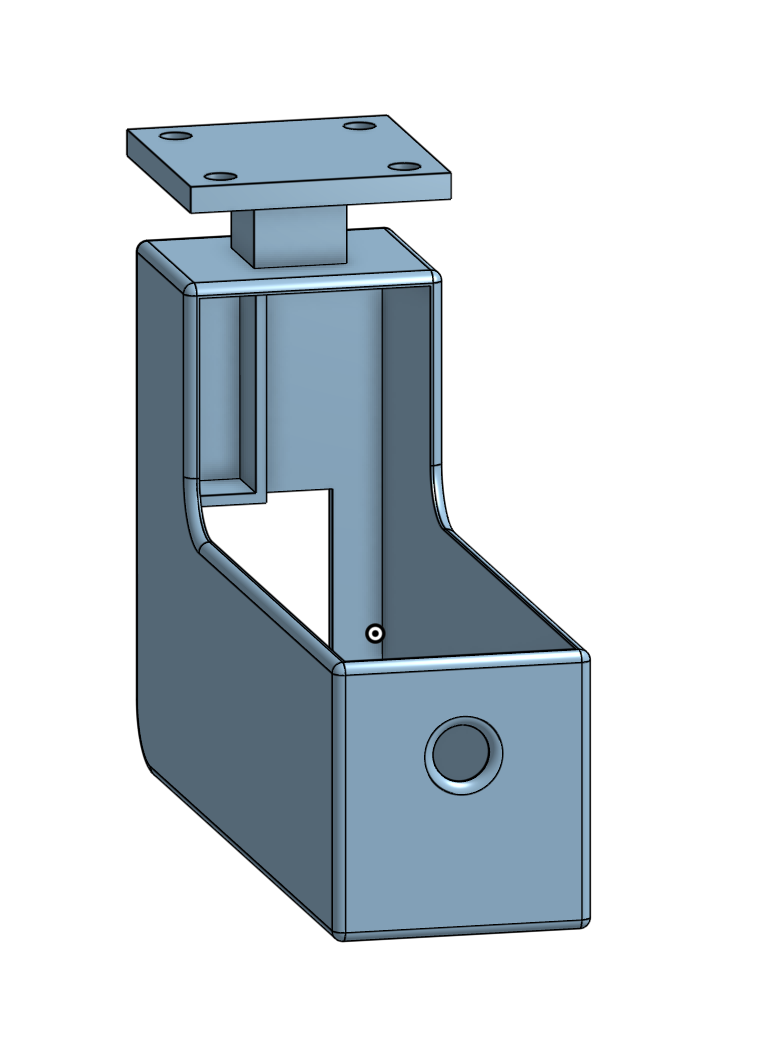
 Today I made two different CAD Designs on Onshape for the suction attachment design. One has a cap that directly screws into the Flexiv robot arm first and is then screwed into the main suction attachment. The other has an extended attachment to directly screw it into the Flexiv Robot arm. I am having trouble adding threads to the holes for the first design because even with the downloaded solid works of the countersink screw from Mastercarr, after watching tutorials it seems the only way to make a threaded hole is to sketch a helix and sweep through that with the exact dimensions you want. I am leaning more towards the second design currently just because it requires less screws and is more likely to fit and not have issues with threaded holes.
Week 4 (July 15-19)
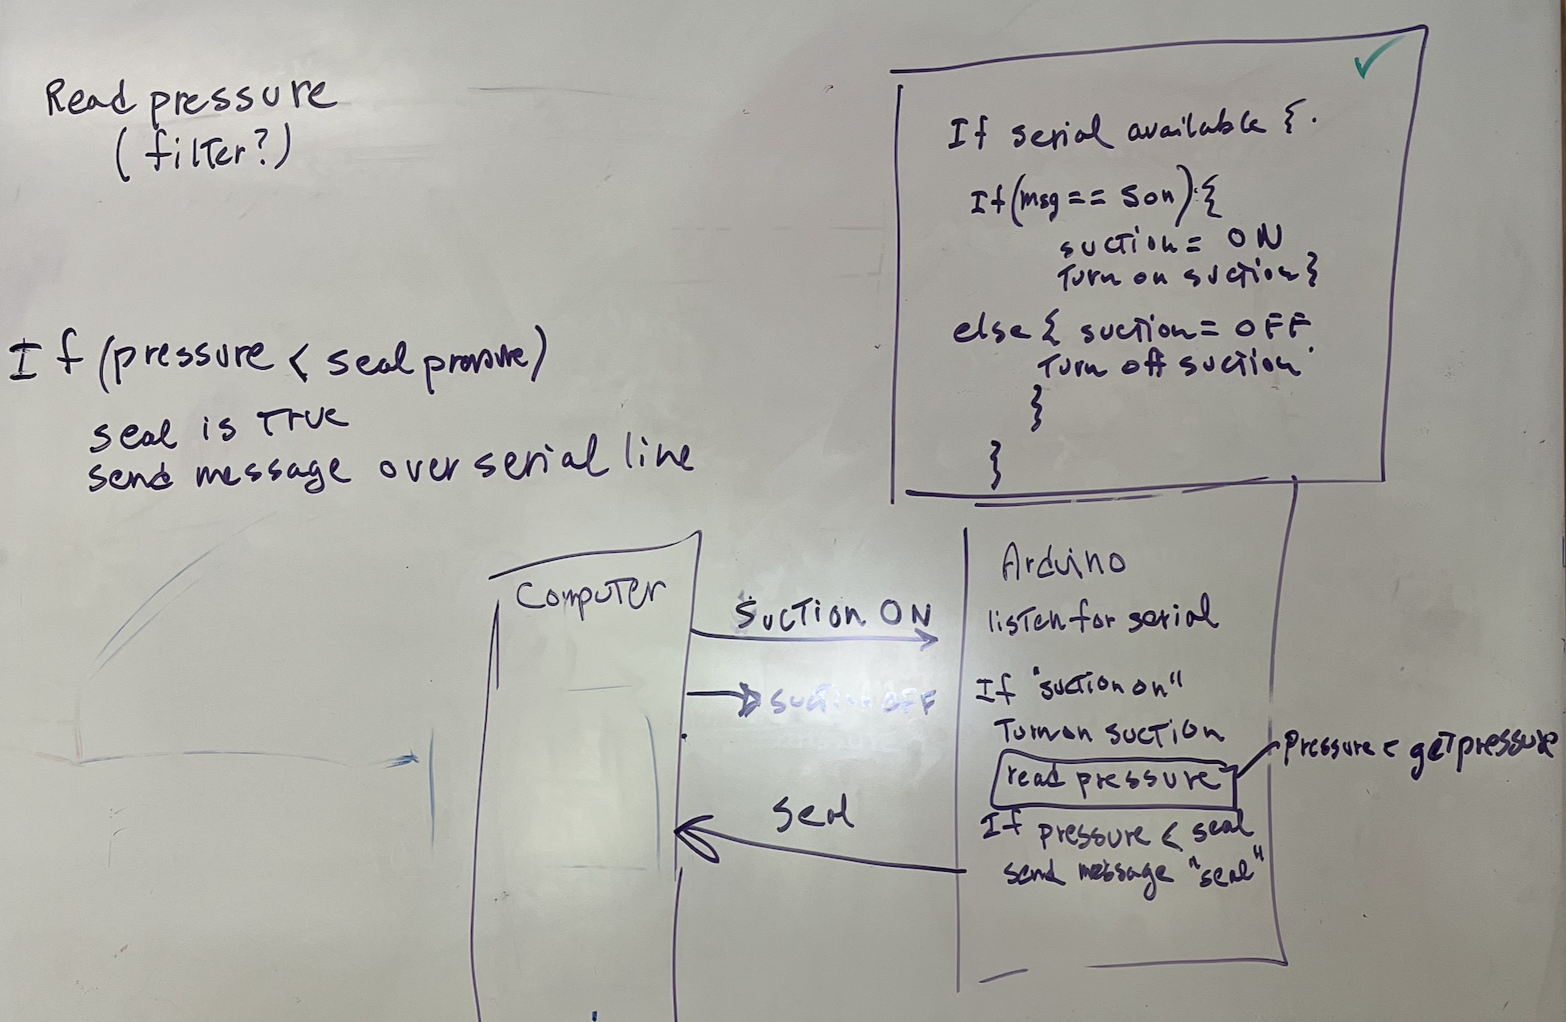
Monday: Today I worked on writing Arduino code to read the pressure sensor. By looking at the documentation of the pressure sensor, I was able to correctly align it in the circuit have read pressure values be printed in the Serial Monitor. I also set up serial communication between the Arduino MEGA and my computer to use later on for turning on and off the suction. I also gained a better understanding of how the final Arduino Script should be organized.
Tuesday:
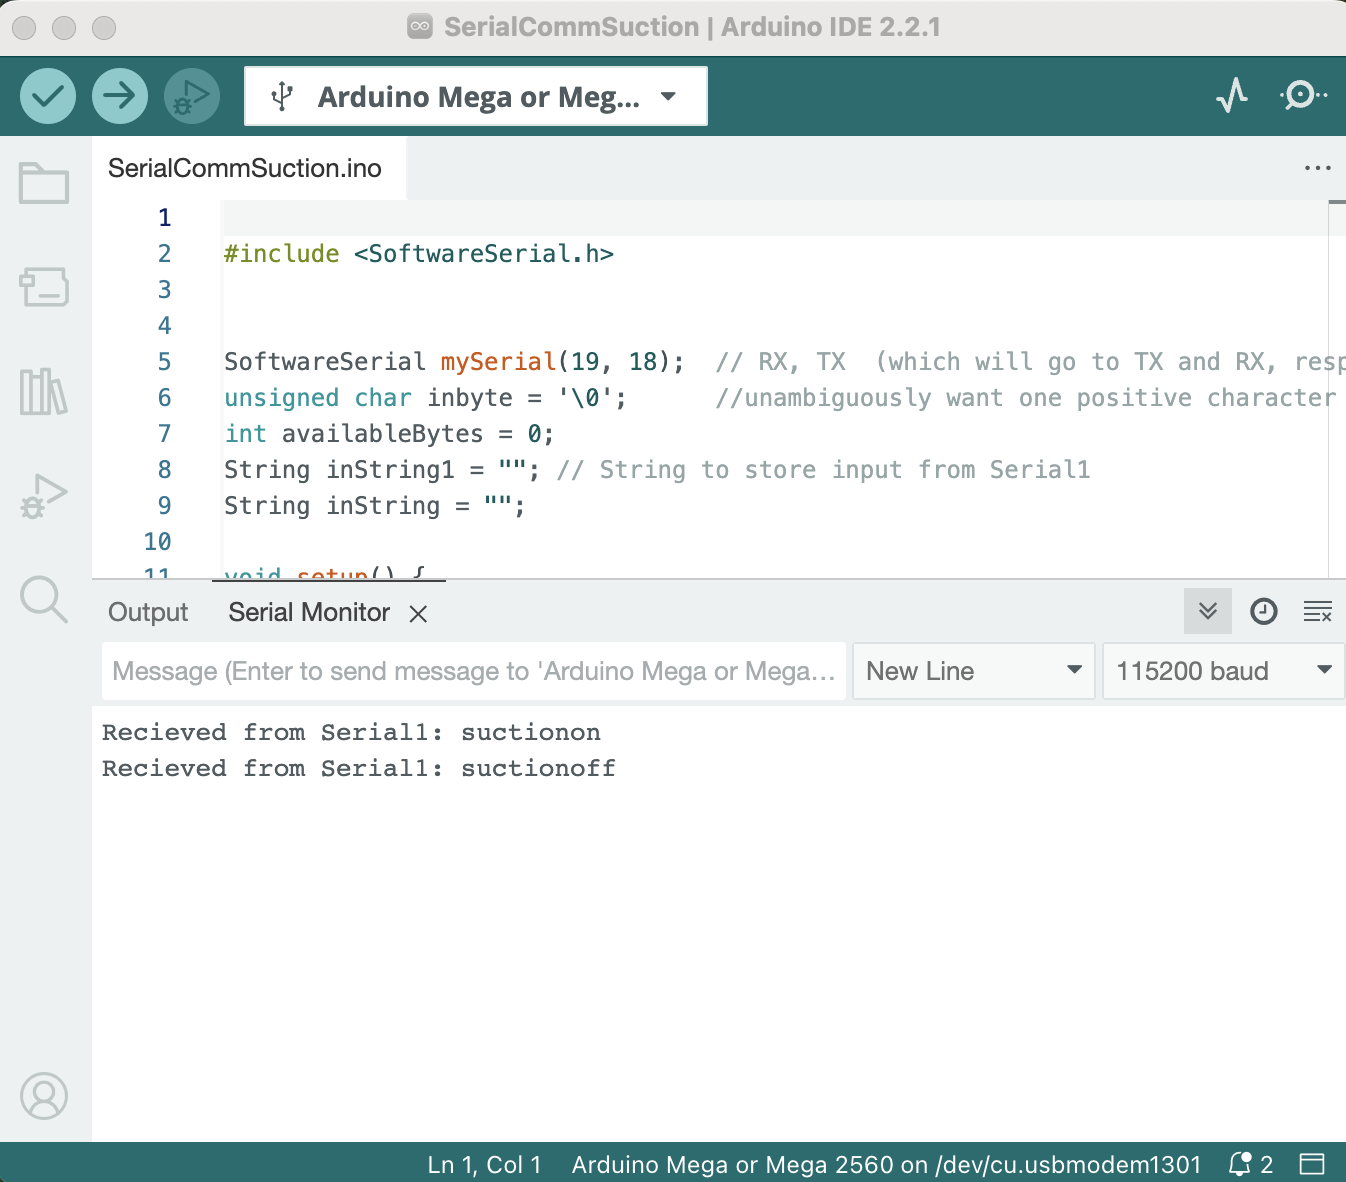
Today I wrote an Arduino Script that puts together everything shown in the photo of the whiteboard. Starting with the valve off, it turns on the valve and reads the pressure sensor when "son" is sent from my computer to the Arduino. When anything else is sent to the Arduino, the pressure readings stop and the valve closes. After I got this code working, I began looking at how to send data from the Arduino to Matlab to ultimately plot the pressure sensor results.
Wednesday: Today I worked on connecting Matlab to serial communication with the Arduino. The goal was to replace the use screen in Terminal with using Matlab. Once I got communication between them, I started working more on writing a Matlab script that will work with how we want the overall system to function.
Thursday:
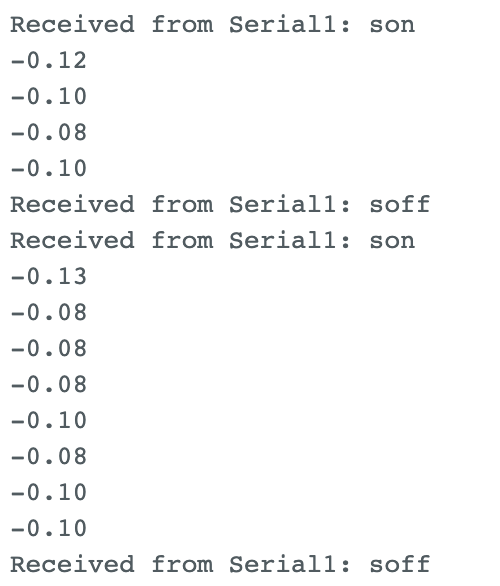
Today I got the Matlab code running effectively with the Arduino Code. From the Matlab command window, the user can send "son" to turn on the solenoid valve and the arduino starts measuring the pressure. If the pressure reaches below a certain pressure value that I defined as "seal", Matlab starts collecting the pressure data until that seal is broken. I connected the circuit to a vacuum pump to collect data. It then plots pressure versus time with the data Matlab collected.
Friday: Today I spent some time with the rest of the lab to continue cleaning up the lab. I also connected a pressure gage to the vacuum pump to compare the pressure read on the gage to the pressure shown from my code. At atmospheric pressure, the output voltage is 0.5 V and at the vacuum pressure (-90kPa), the output voltage was read as 0.371 V. Plotting these two points showed a plausible linear between pressure and voltage. I learned that the suction pressure -1.4psi shown in the code was not relative to atmospheric pressure but +1.4psi relative to the vacuum. I also spent some time reading related papers:
- A Multi-Chamber Smart Suction Cup for Adaptive Gripping and Haptic Exploration
- Haptic Search With the Smart Suction Cup on Adversarial Objects
Week 3 (July 8-12)
Monday: Today I stepped through a Serial Communications tutorial and created serial communication between the Arduino and my laptop's Terminal. Then I created a serial communication between Python and Arduino following a tutorial. I downloaded Miniconda onto my laptop and used Spyder to run a simple Python script that got the Python to send data over the serial port.
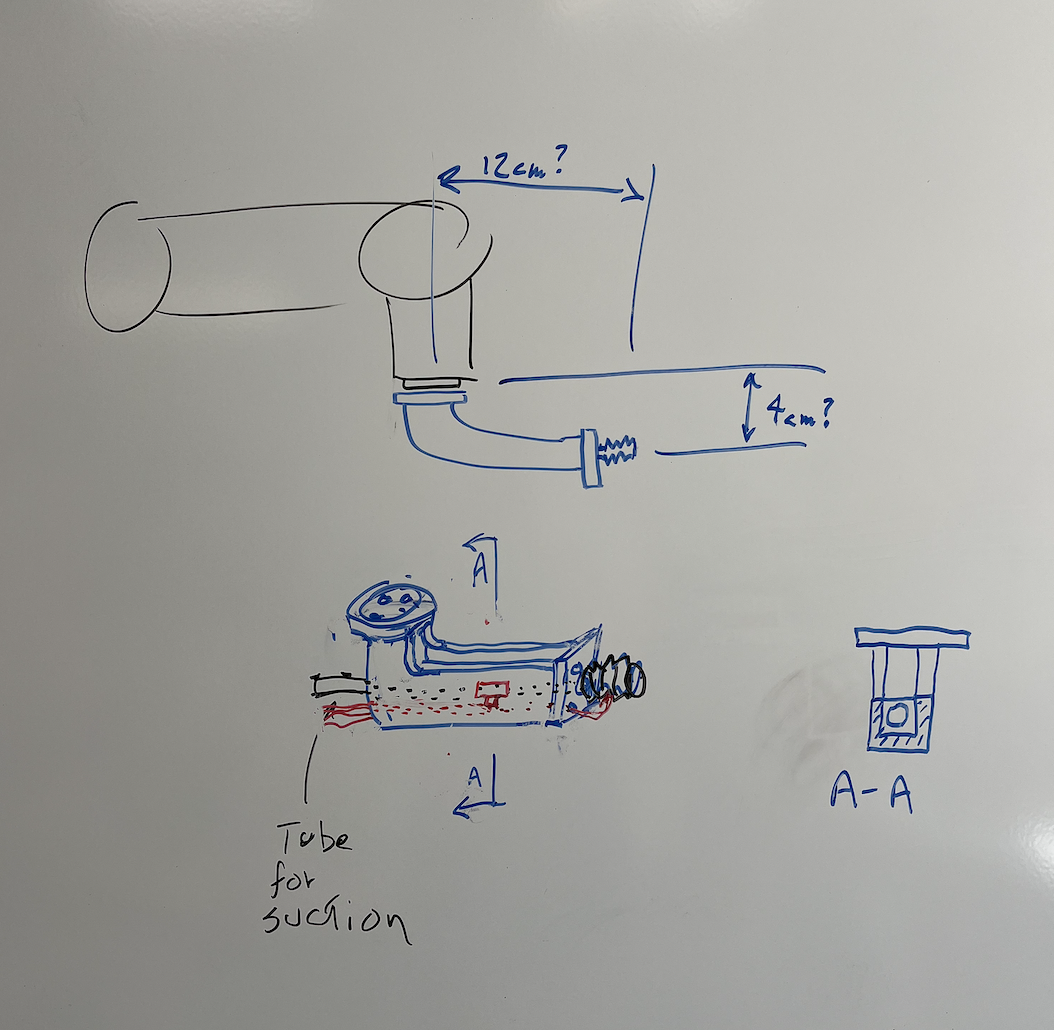
I was also assigned the project of designing a suction cup attachment to a robotic arm that will allow contact and pressure sensing of vacuum sealing. Dr. Cutkosky sketched out what this design should roughly look like:
I began by finding the SolidWorks file of the suction cup we had in the lab and importing it onto OnShape.
Tuesday: Today I made a prototype of the suction cup arm attachment. After sketching out the dimensions, I made the prototype out of foam core and hot glue.
Then I began looking through the available tubing to figure out how the vacuum seal would be constructed. I also had a zoom meeting with Dane and found the Arduino files and set up that were being used for this project.
Wednesday: I emailed myself the Suction Cup Arduino code that was found on the BDML computer and commented on each line of the code indicating what that line of code was doing. I also began making a diagram of the tubing layout for the suction cup. The rest of the day I was gone for a SURF Industry Visit.
Thursday: I finished the tubing layout diagram for the suction cup connections. I also created a circuit diagram on TinkerCad that shows the wiring layout for the suction sensing connections. Additionally, I found documentation of the pressure transducer used in this circuit as well as other components such as the relay and the suction cup.
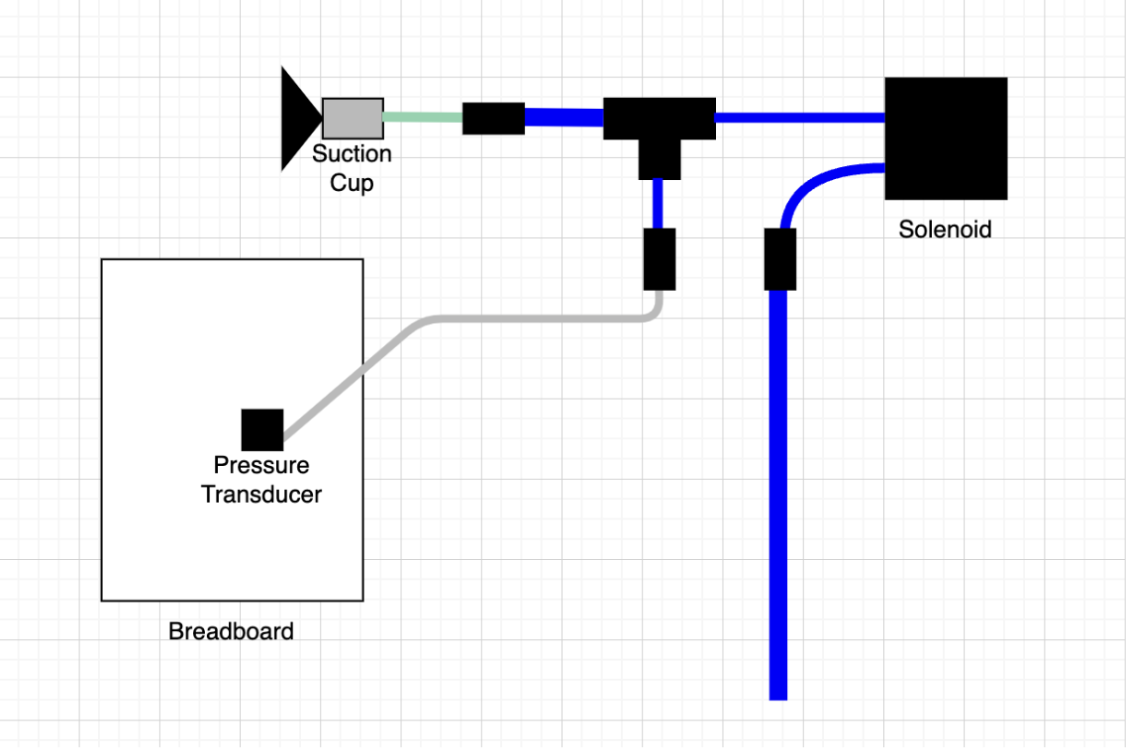
I have been documenting all of this related work in a Suction Sensing Google Doc. Dr. Cutkosky also spent some time explaining the circuit to me and helped with connected a 9V supply to the Arduino MEGA. I then soldered two wires onto the back of the Arduino MEGA for connecting the Solenoid valve to the power supply.
Week 2 (July 1-5)
Monday: This week I was out of town for my sister’s wedding. During the free moments that I had at home, I spent some time creating an OnShape account and watching OnShape tutorials to familiarize myself with the platform.
Tuesday: I made an account on Tinkercad and stepped through some of the Arduino tutorials. After some tutorials on how to use Tinkercad, I simulated a two-pronged Force Sensor connected to an Arduino to mimic the Pressure Sensors that are used in the Suction Cup Adaptive Gripping project. In creating this simulation on Tinkercad, I wrote an Arduino sketch that read and printed in the Serial monitor the reading on the force sensor. If the force was above a certain value, the red LED that was connected to the Arduino was turned on and if not, the LED was left off.
Wednesday: Given my interest in working on the Gecko Adhesion project, I reached out to EmJ for some papers to read about this project and I read and took notes on each of the articles. From the Gravity-assisted flat surface gripper for drone perching article, I learned that some of the key characteristics for the gripper are:
- It should require very little normal force to engage with the surface.
- It should use the adhesive efficiently to maximize load capability, loading the entire adhesive area evenly and avoiding stress concentrations.
- It should support loads in any direction in the half-space above the surface.
- It should release with very little normal force.
From the Astrobee Gripper article, I learned that free-flying robots can help astronauts by reducing the time needed for simple tasks. The gripper of these robots consists of two main subsystems: the lower assembly and the upper assembly. From the Zero-gravity gripper article, I learned that removing orbital debris to prevent collisions with satellites is a challenge that future work aims to address by developing advanced grippers on robotic arms.
Week 1 (June 24-28)
This first week has been a great introduction to the BDML lab. At the beginning of the week I helped clean out the lab which helped me learn more about where things are located in the lab. Later in the week I learned about the TadBot project during a visit to the Biology lab where the frogs are kept. While there, I learned that both frog parents care for the tadpoles and that one of the goals of TadBot is to create realistic tadpole simulators that trick the parents into feeding them by moving at a specific frequency.
This week I also reviewed Python tutorials and learned the basics of reading and writing text files. I learned that MuJoCo is a platform for simulating and testing robotic systems and worked on downloading it onto one of the laptops in the lab. During this process, I learned about Linux virtual environments, which allow different versions of the same tool, and created one on the laptop to use MuJoCo with.