On this page... (hide)
- 1. June 22
- 2. June 23
- 3. June 24
- 4. June 27
- 5. June 28
- 6. June 30
- 7. July 1
- 8. July 5
- 9. July 6
- 10. July 7
- 11. July 8
- 12. July 11
- 13. July 12
- 14. July 13
- 15. July 15
- 16. July 18
- 17. July 19
- 18. July 20
- 19. July 22
- 20. July 25
- 21. July 26
- 22. July 28
- 23. July 29
- 24. August 2
- 25. August 3
- 26. August 8
- 27. August 9
- 28. August 10
- 29. August 11
- 30. August 15
- 31. August 16
- 32. August 17
1. June 22
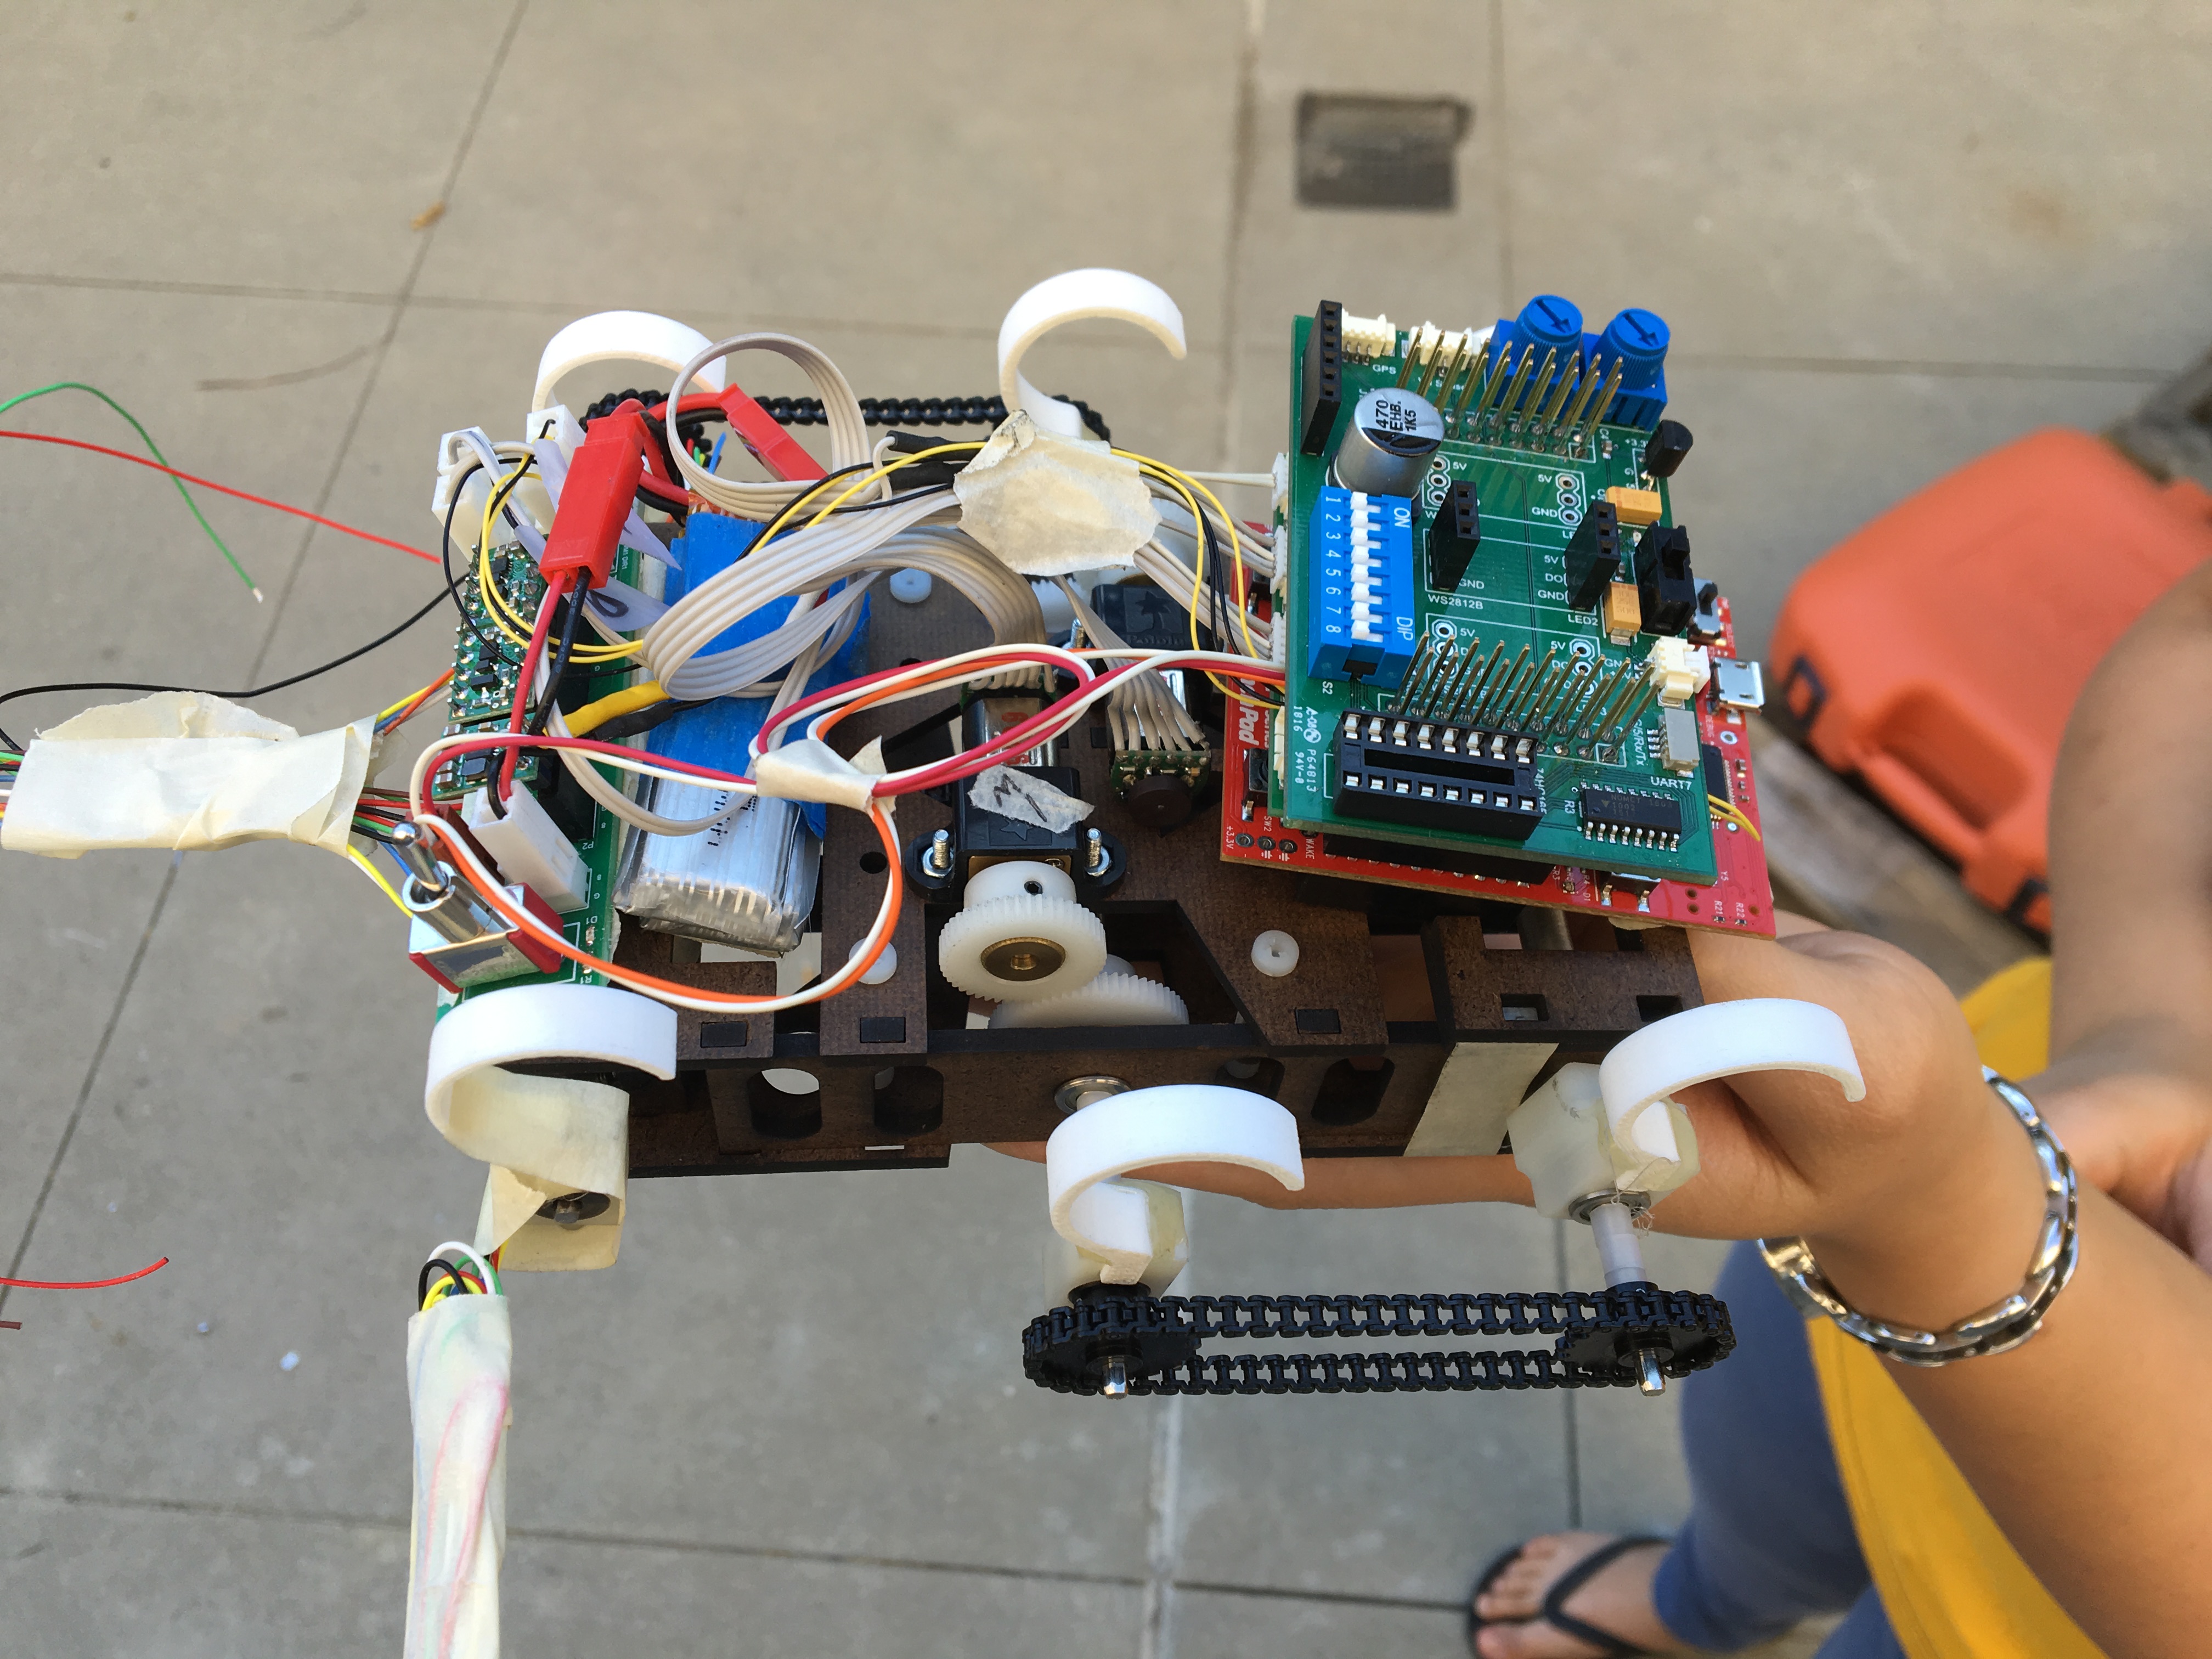
Today was my third day of work, and the first day I knew we were supposed to keep a blog. It seems like a great idea, actually.
After hitting 100 balls at the driving range this morning, I rolled into work at 9:00 am.
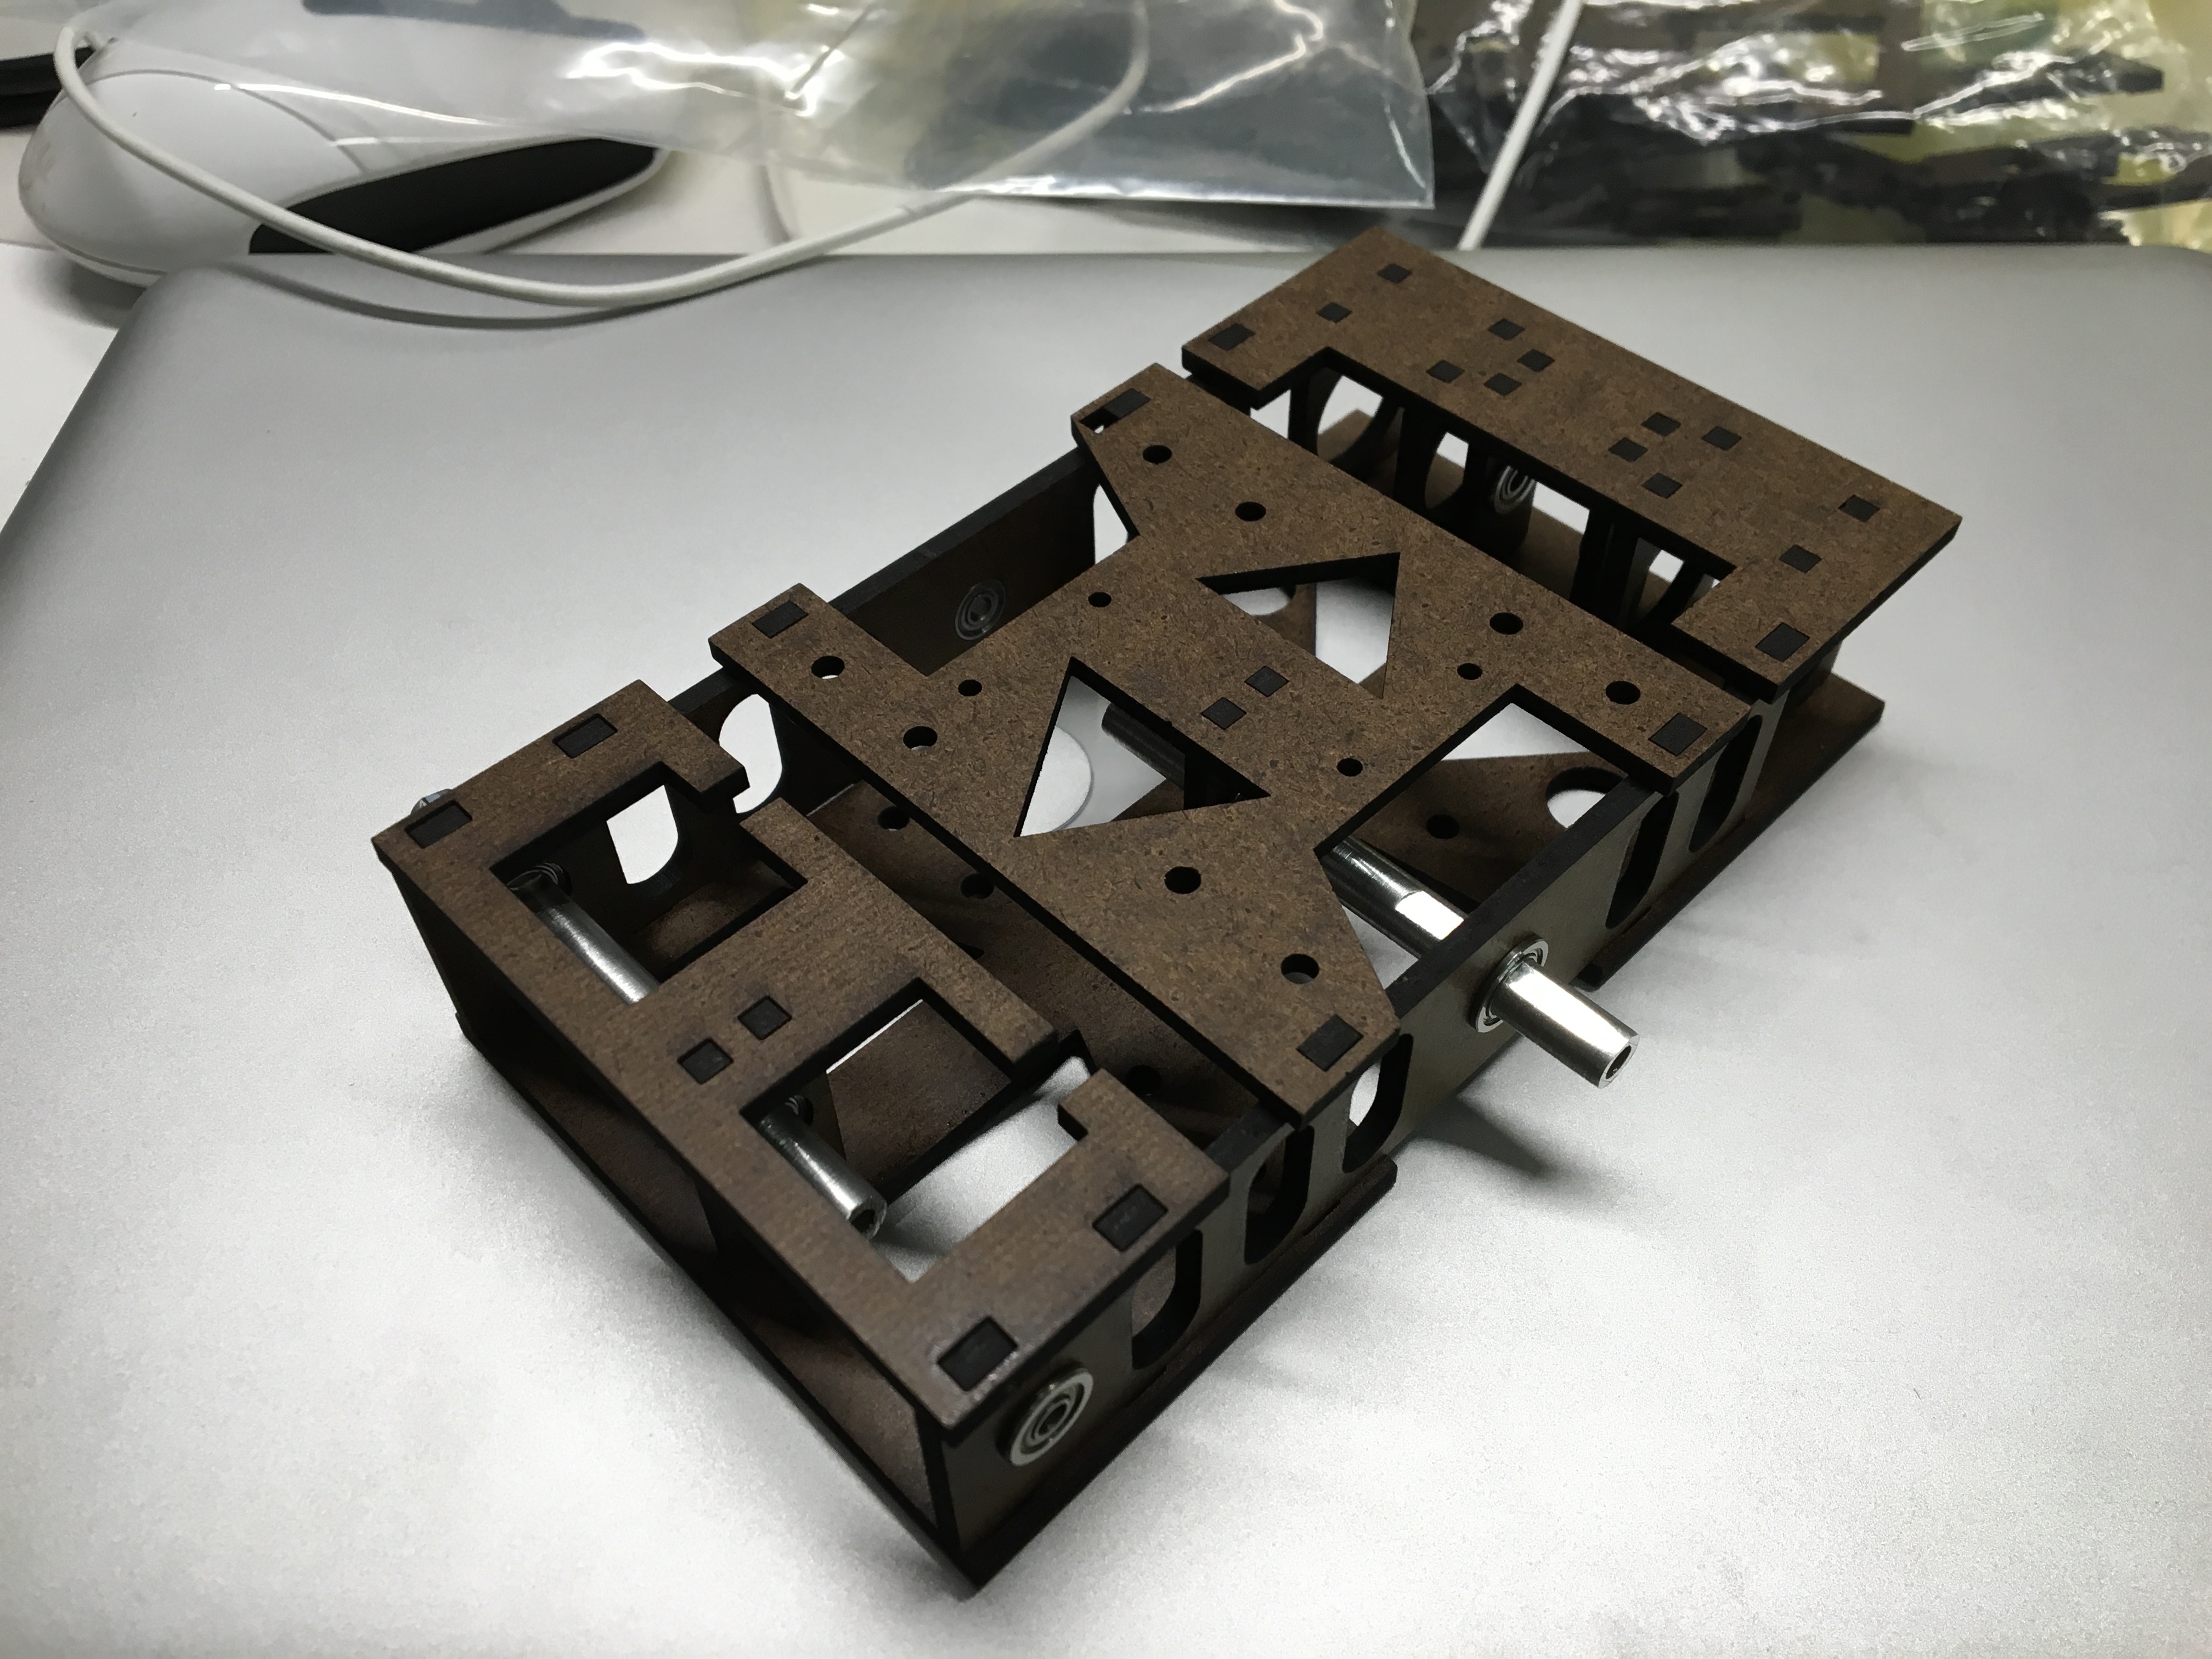
I'm helping Alice manufacture and assemble a second iteration of her tactile sensing robot. So, I went over to laser cut the skeleton of the robot once again. I've had to make a few changes to the offsets of the lines for the laser to follow to adjust for the curf of the laser. The pieces should fit together tightly, so I'm working with micron differences in the offsets. The version I laser cut this morning was a bit tighter than what I did yesterday, but it's still too loose. I'm thinking about using wood glue instead of trying to find an exact fit.
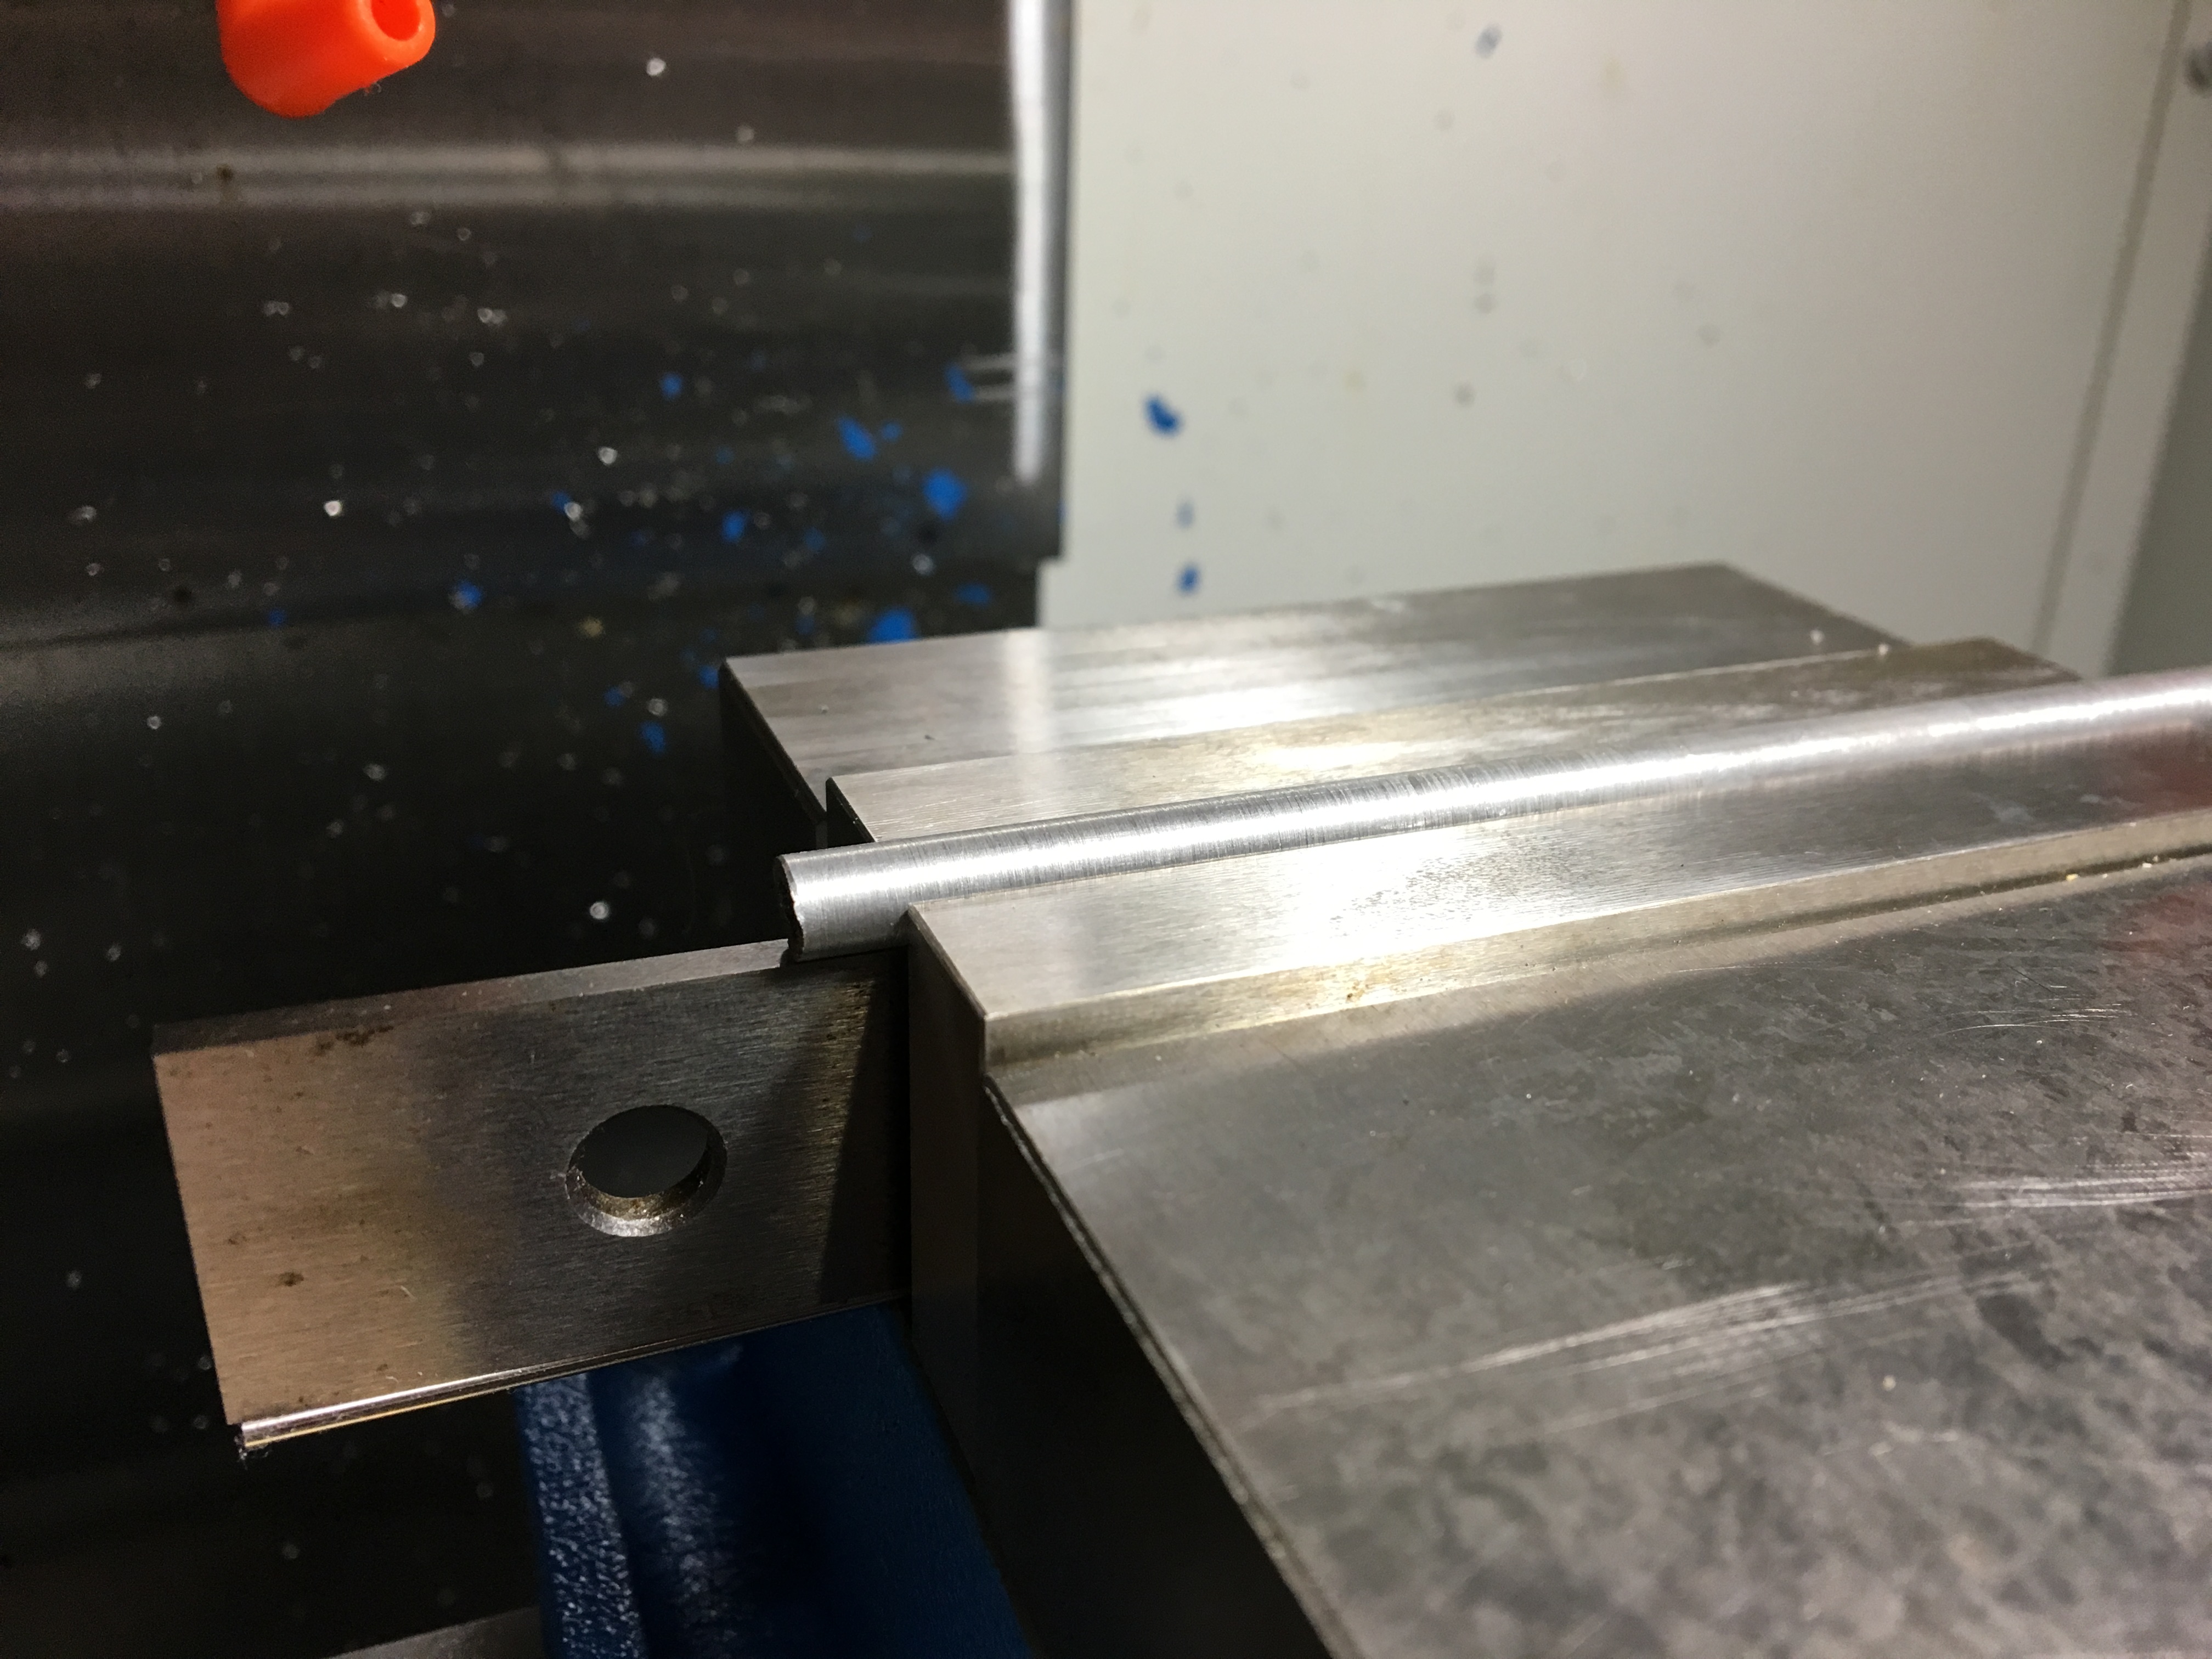
After that, I made another 1/4" shaft for the robot. The shafts are tubes with 1/16" wall thickness, and Alice needs me to turn them into D-shafts on the end so they can be secured to the legs. I also need to make them fit snugly into the bearings. To do this, I put the shaft into the power drill and drilled a hole in a wooden block as a jig to stabilize the shaft. I then turned down the shaft using 80 grit sand paper and smoothed it out with 500 grit, until it fit nicely into the bearing.
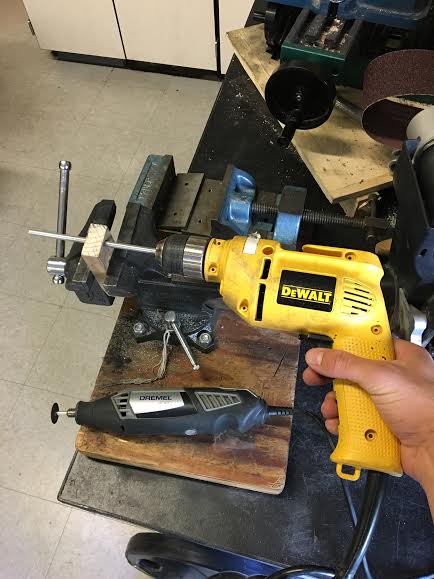
To add a flat to the shaft, I fixtured the shaft into the vice of the Office Mill, and took 25 thou off the top with a 1/4" end mill. The fixturing and the final product (after cutting to size):

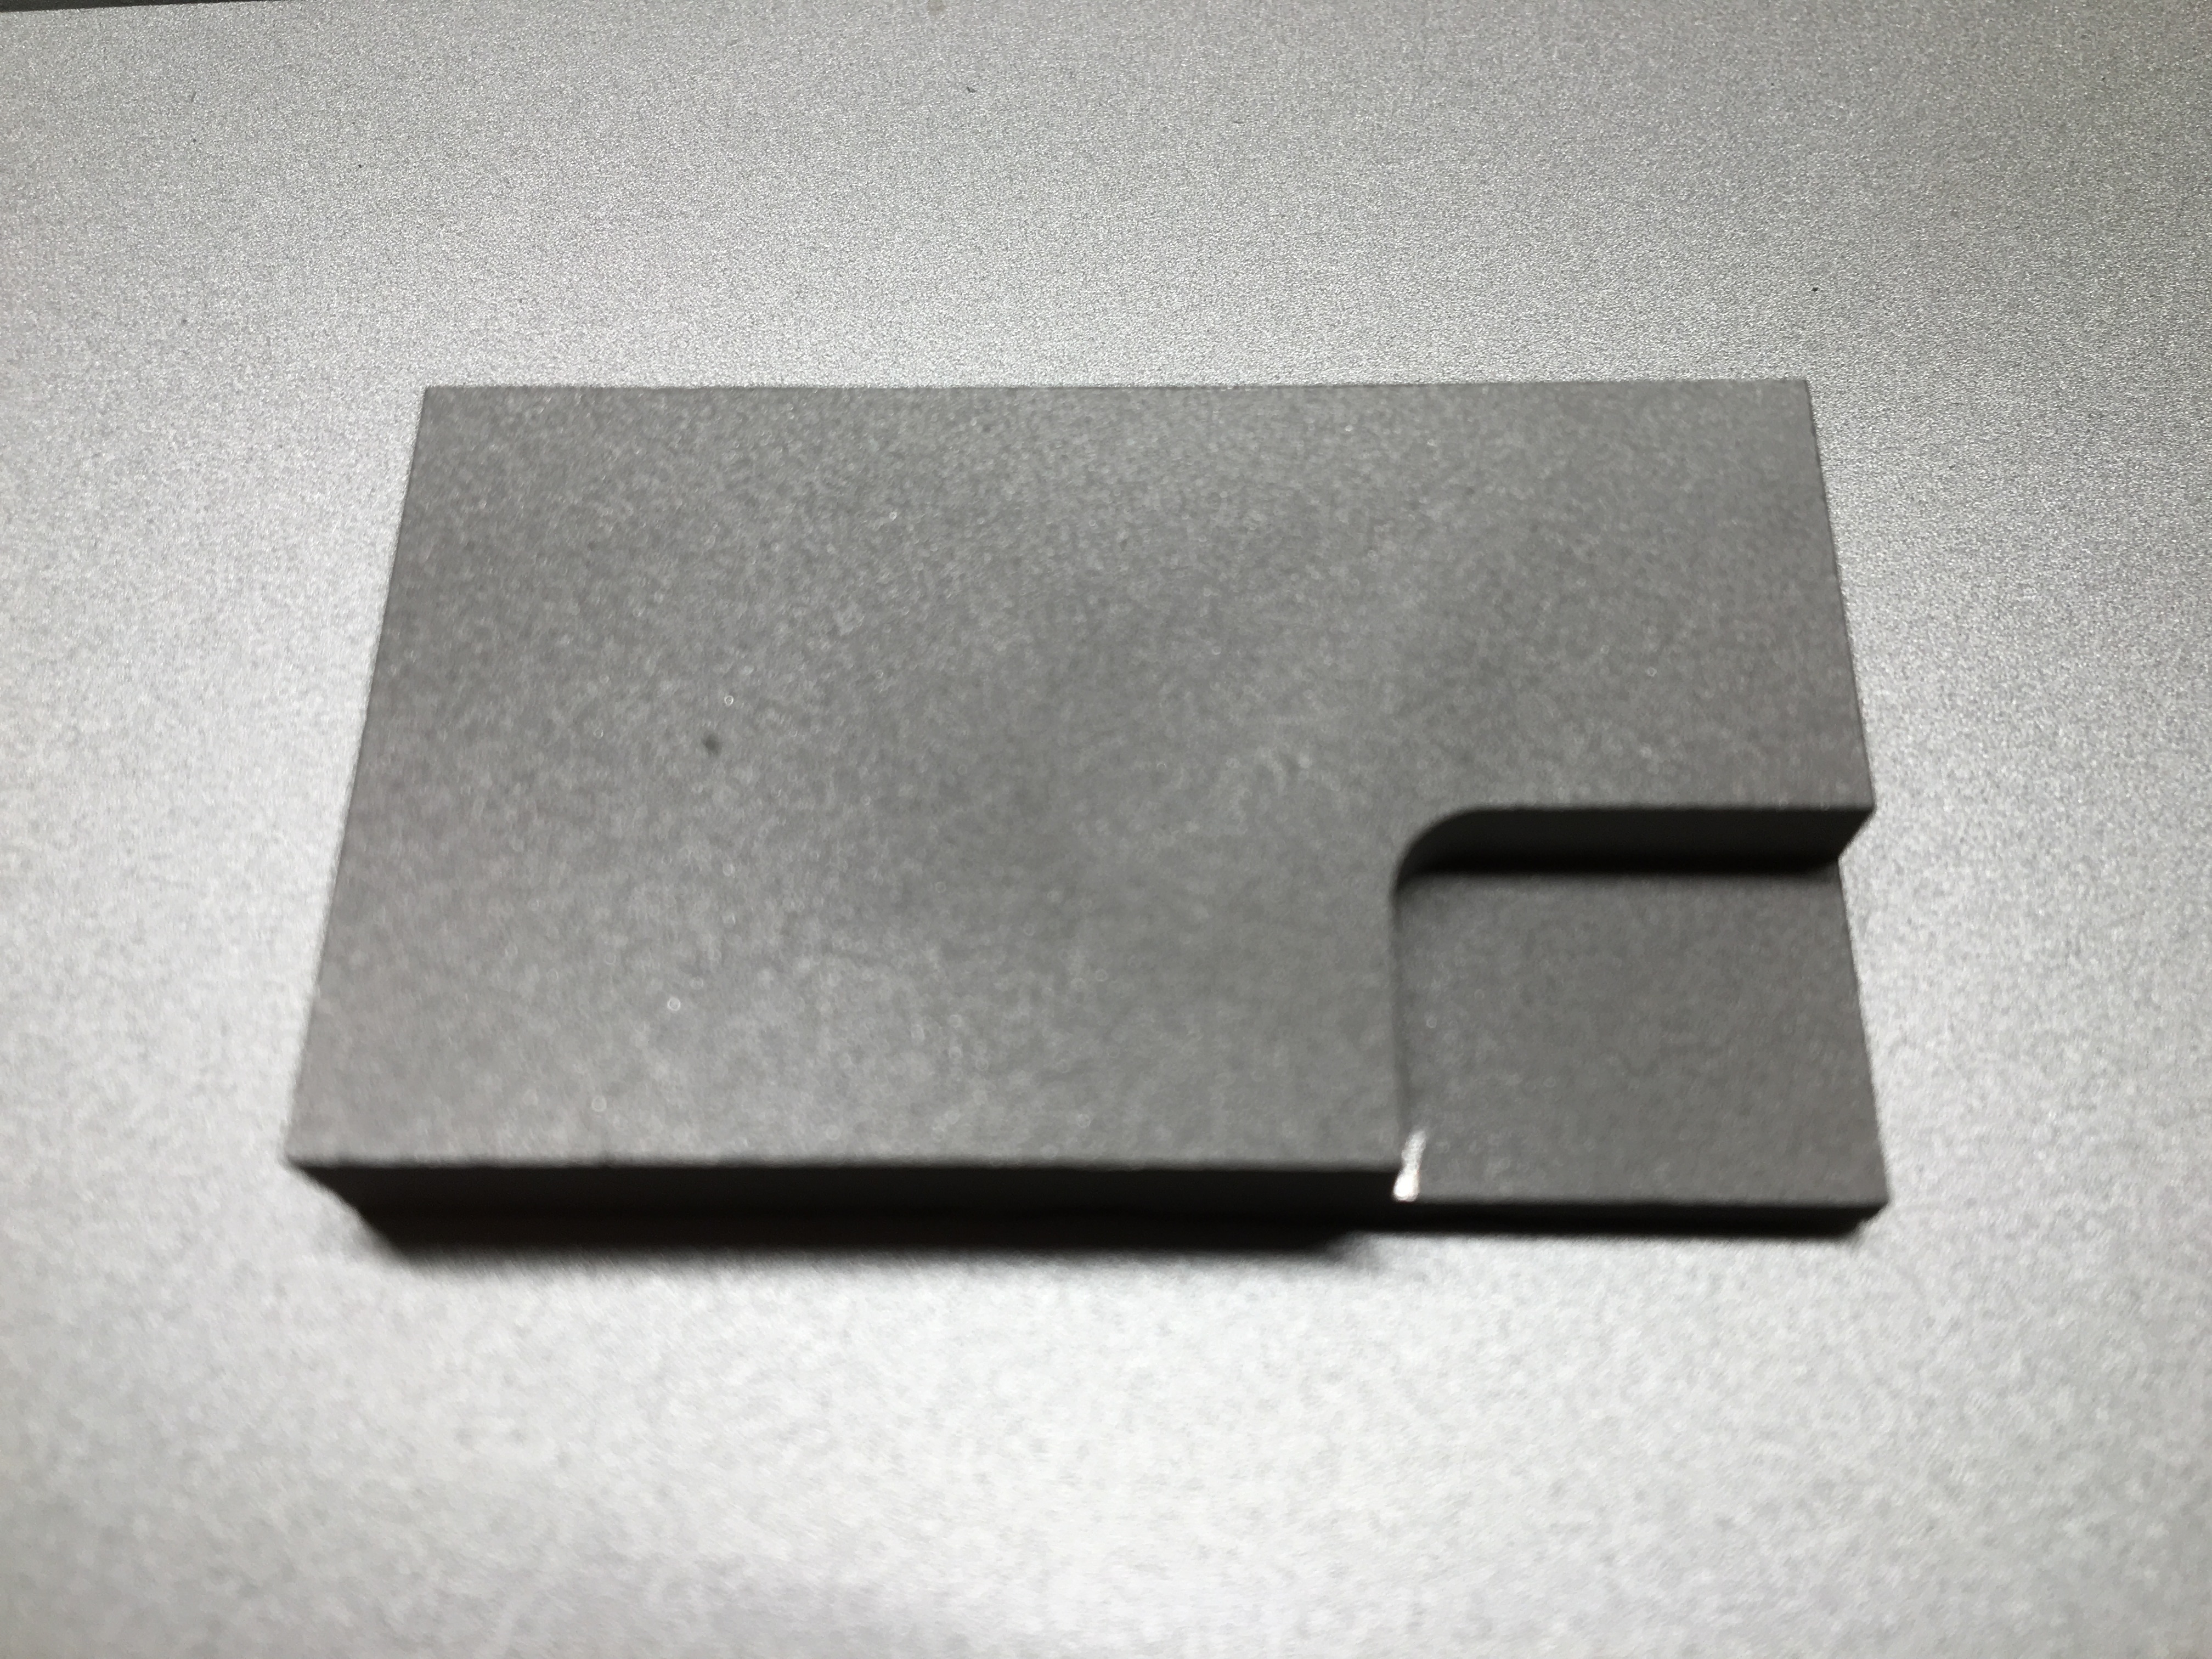
After all that, I worked on improving the ME 112 force plate. Mark wanted the sensor mechanism to be more rigid, easier to take apart, and flush with the rest of the plate. So, I CADed a base for the sensor to sit on, with a pocket in it to clear some electrical components.
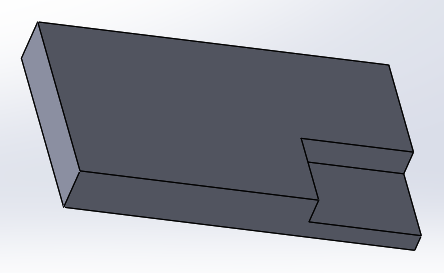
After machining the part, I realized that I had put the pocket for the electicals on the wrong side of the part, and so I came back at night to machine it again. Here's the final product:
2. June 23
I started the day out by cutting out the top plate for the force plate sensor (the part that the object being measured actually makes contact with). Mark told me he wanted it to be stiff, so I made it out of carbon fiber. He also told me that there needed to be about one millimeter of slop in between the edges of the plate and the board it fit into, so I sanded it down with a Dremel until it fit the dimensions perfectly.
At lunch, I had a good time trying to spit out new and creative ideas to Arul about ways to make a repeatable mold for the adhesive skin. Most of the ones I came up with had already been tried or reasoned out, but it seems like there were a couple worth trying. Being able to make a mold that lasted a long time, rather than two or three pours, would be incredibly valuable it seems.
For most of the rest of the day, I worked on laser cutting the frame of Alice's robot. All my previous iterations of cuts had fit together too loosely, which was frustrating and bad for the robustness of the robot. I finally figured out the reason for the pieces being too loose, no matter how much I changed the parameters. There had been extra lines on the file that were too small to see, which were being cut out outside of the square holes. I had to get rid of these lines, and once I did, everything fit together quite nicely.
Lastly, I went outside with Alice to take video of the robot running on different surfaces. One of the middle legs broke while videoing, and I spoke with Alice and Arul about the possibility of machining a leg or a mold for one, but we decided against it.
3. June 24
Today was a bit of a down day. I came in and didn't really have any task to work on, so I played around in SOLIDWORKS trying to figure out if it would be possible to machine the legs of the robot out of aluminum, for added stability. It turns out it would be quite difficult given the size of some slots that have to be cut.
Alice didn't get to the lab until around 11 because of some unlucky transportation failures, so that waiting period was elongated.
At 11:30, we had lab meeting, where there were two very cool presentations, both of which were of specific interest to me. First, Michael presented on some surgical forceps with tactile sensors on them. The shape of the forceps tips is quite odd, and Michael doesn't have any experience with CNC machining, so he asked if I would perhaps be able to help manufacture his design. It seems like an exciting challenge. The next presentation was by one of Mark's advisees, Joo Yeun. She discussed a sensor that can track both normal forces and shear stresses. The sensor plates are manufactured in a very clever and unique way, and Mark thinks that the surfaces she's making could be useful in creating an electrostatic grippers. Mark told me that he would like to work on that with me in the future, which I'm quite excited about.
After lunch, I spent the rest of my time in the lab testing out the 3mm hex shafts that Alice got for her robot. I have to drill tiny holes exactly normal to one of their flats, which is a challenge. I practiced on a couple, and when I got the technique down, we realized that we don't have the right size drill bit, so I'll have to wait on that.
At four, I went to the TLT to get a tutorial from Claire on how to use the vacuum former. I need to make a shell for the robot, and that will be the first thing I pick up on Monday!
4. June 27
I started off the day today by heading over to the TLT lab to vacuum form the robot's protective shell. I laser cut a duron box with the proper dimensions as a proxy for the robot itself. Here's what it looks like:
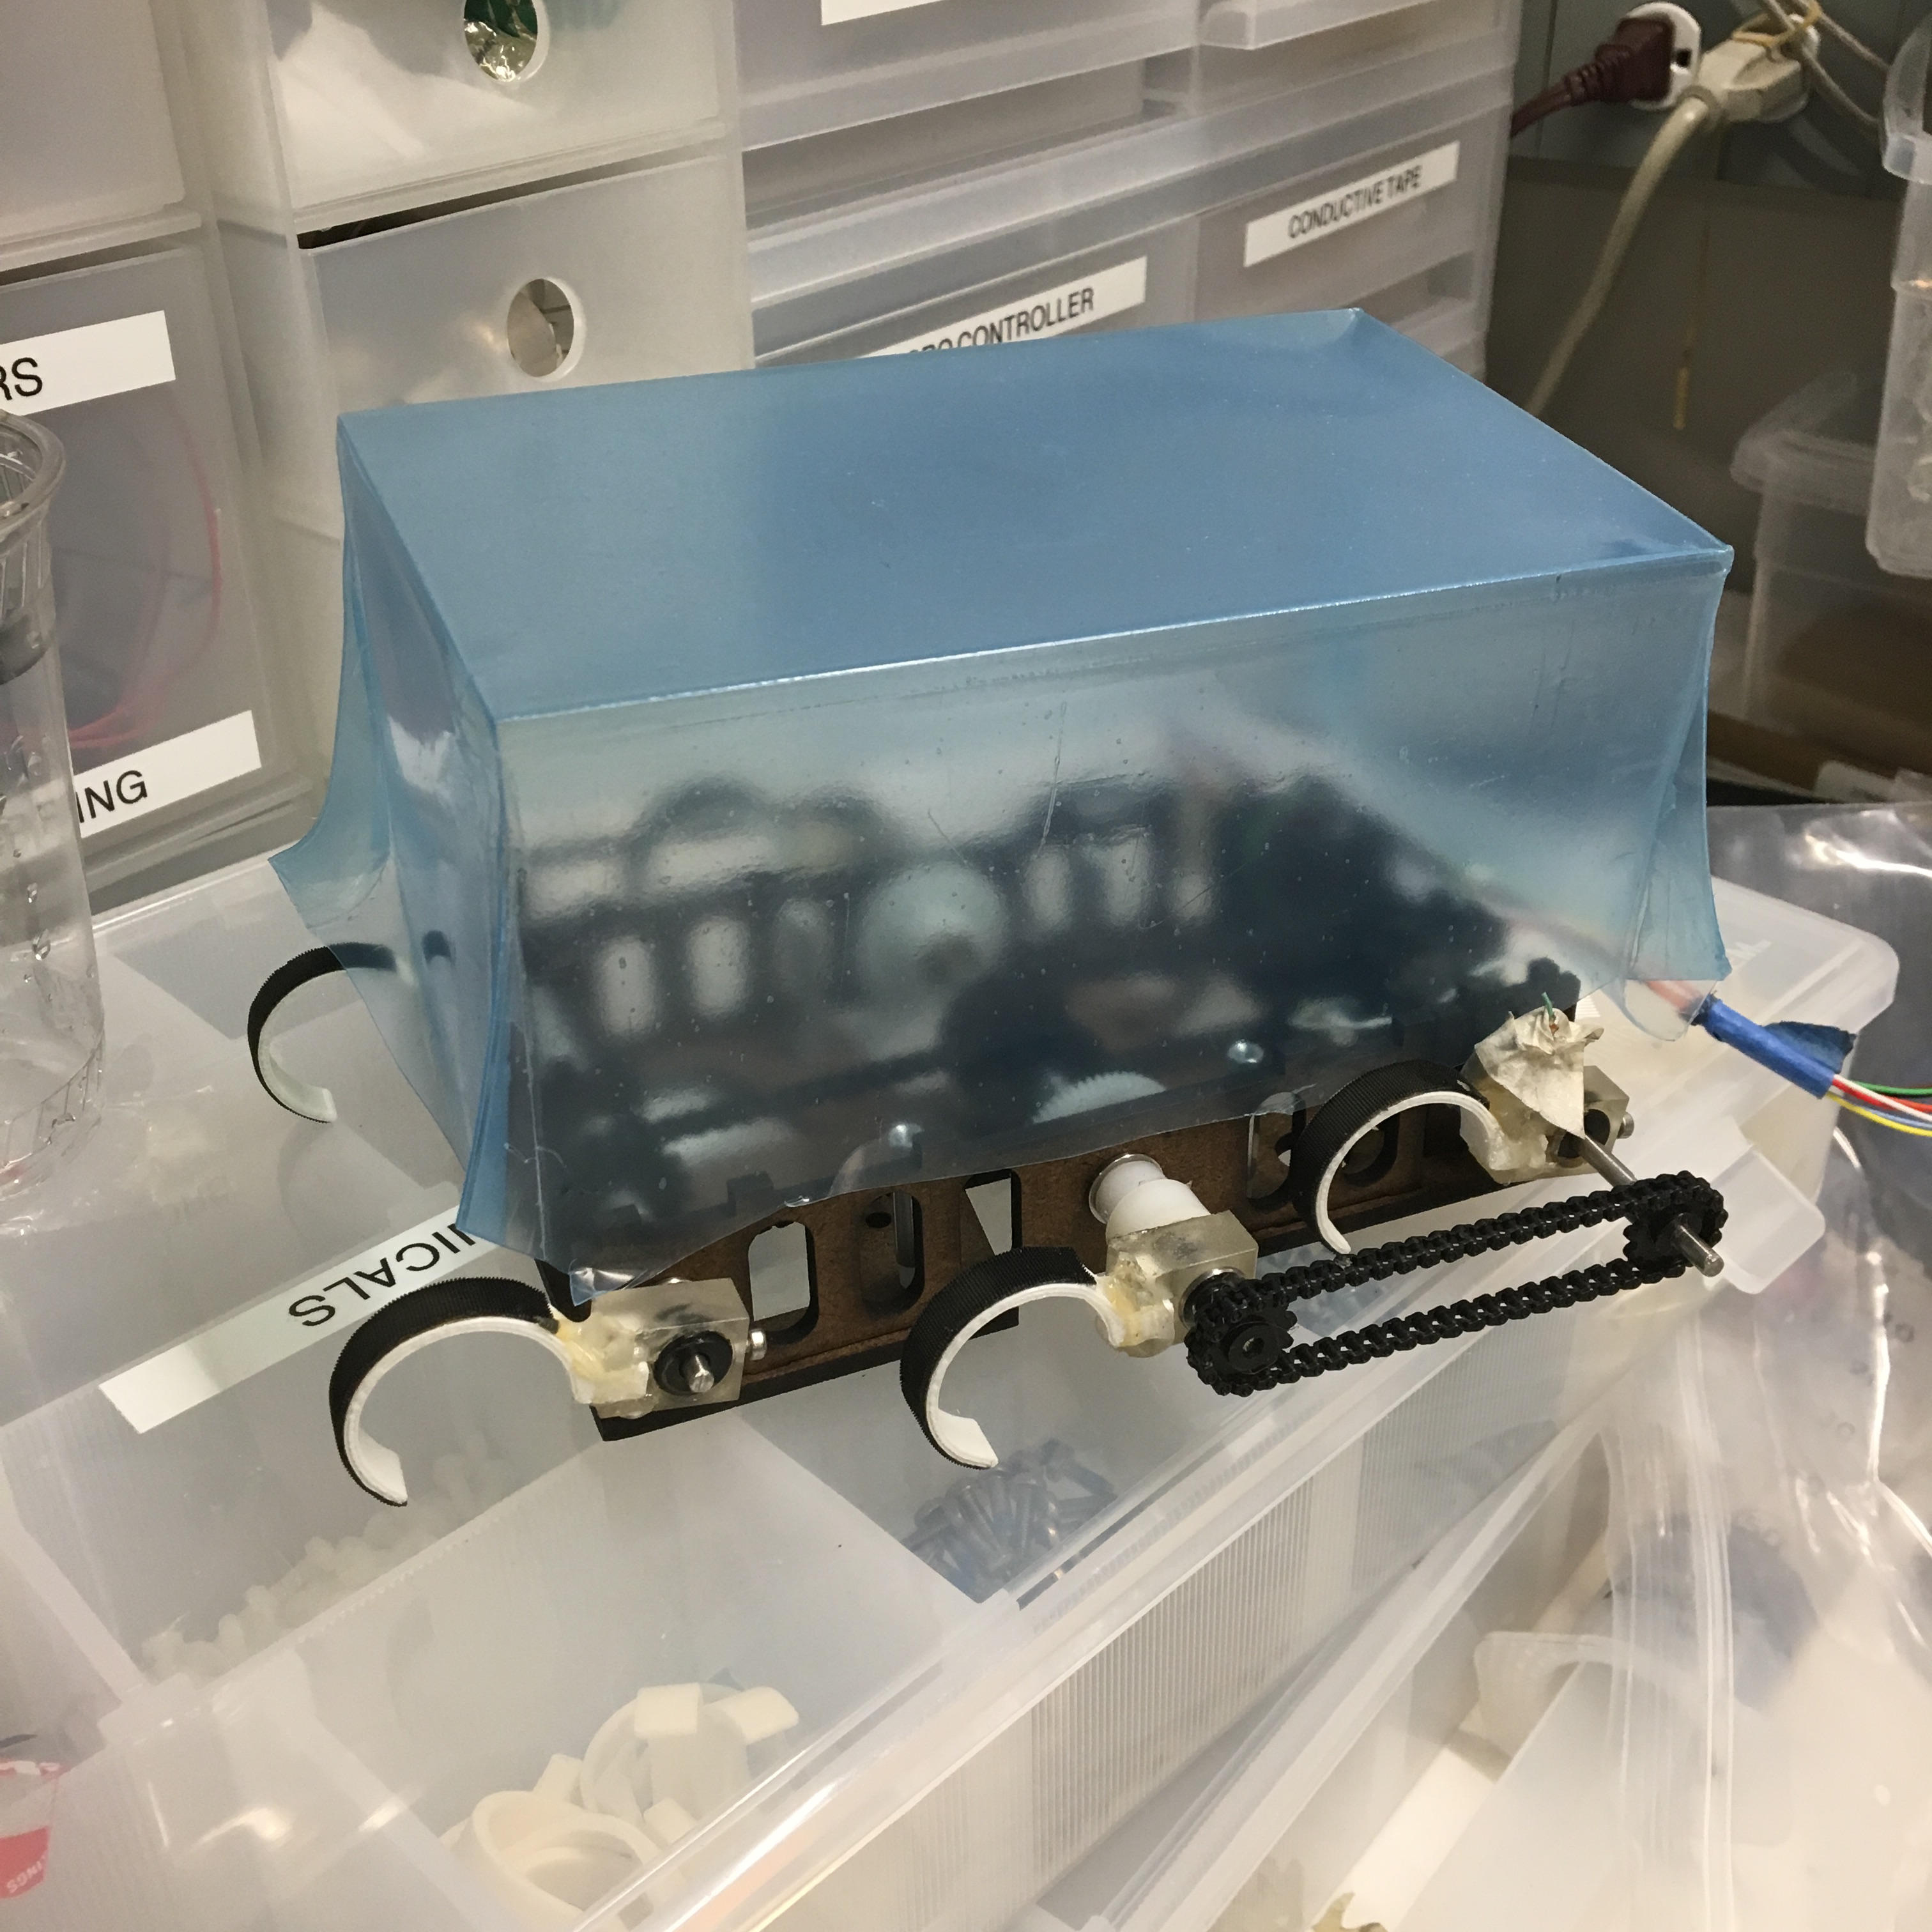
Once I cut slots for the legs, it should wrap around the whole body perfectly.
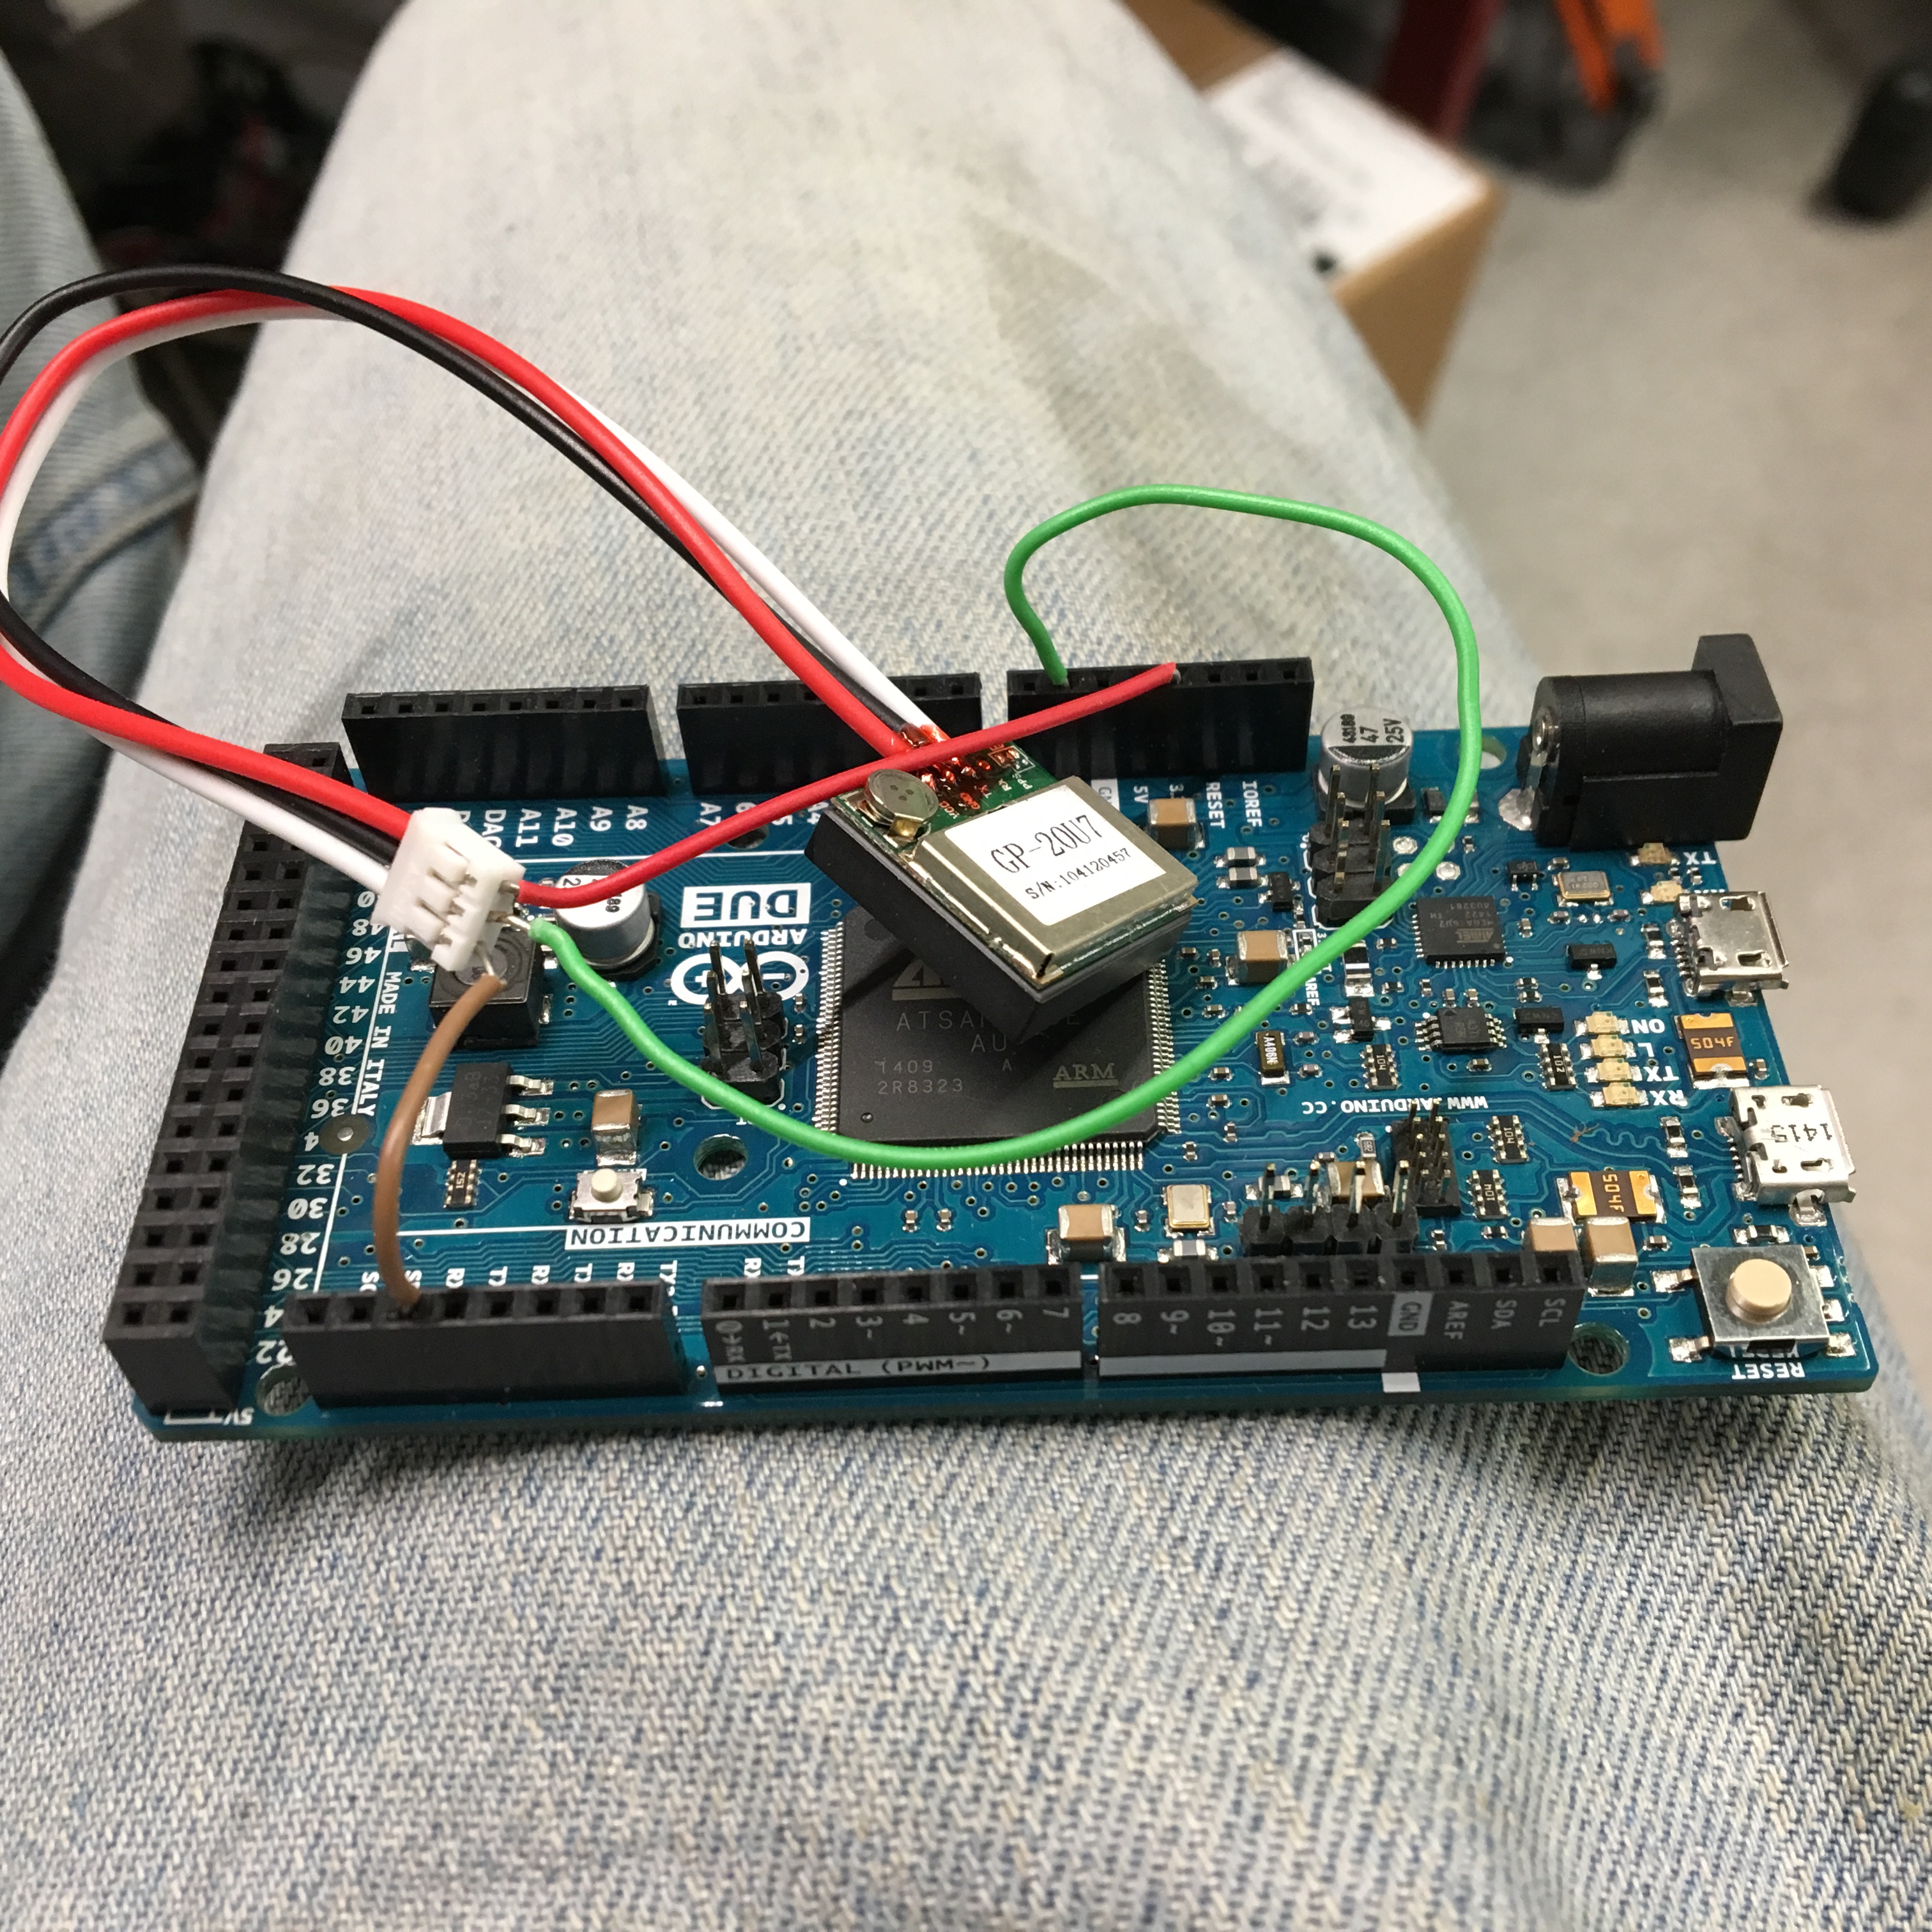
For the rest of the day, I worked on communicating with a GPS module via an Arduino Due. I had never used an Arduino before, let alone to communicate with an external device. After looking up some tutorials and looking at some sample code, I adjusted an existing code to match up with the module. The biggest challenge was to access the data the GPS was feeding the Arduino and decode it. By the end of the day, I was able to manipulate the time reading the module was giving me, and I'm in the middle of getting the latitude and longitude to be doubles, because they're fed to the Arduino as strings. There seem to be some accuracy issues with the GPS, so we'll see how to fix those up.
5. June 28
When I got to the lab this morning I whipped out the Arduino and GPS once again to fix up the latitude and longitude readings. Right as I got those squared away, Alice told me that the GPS has a margin of error of 2.5 meters, and that it would therefore be useless. There goes a day of work down the drain! Oh well, I learned something.
Mark informed me and Tyler once again that he would like us to calibrate the force plate. We took apart the old one and I laser cut the boards for the new one. He taught me how to calculate the coefficients of the force plate sensors using a bit of linear algebra once we have all our data. I haven't taken linear algebra, and I've only done a bit of it in my dynamics class, but I'm not too worried because it's just math and, plus, I have MATLAB on my side.
The rest of the parts for making the updated version of the robot got here, including the drill bits for drilling the proper sized holes in the shafts. I drilled most of the holes I'll need to put things together, and I installed the slip rings in the back. Lastly, I tapped a few holes in the quarter inch hollow shafts for sprockets to be fastened down to. I should be able to finish putting the robot together in the next few days, unless I commit more of my time to various other projects. I'm very excited to be done with the small, menial tasks that this robot requires. I'm eager to have a more serious, continuous project that is more suited to my skill set.
6. June 30
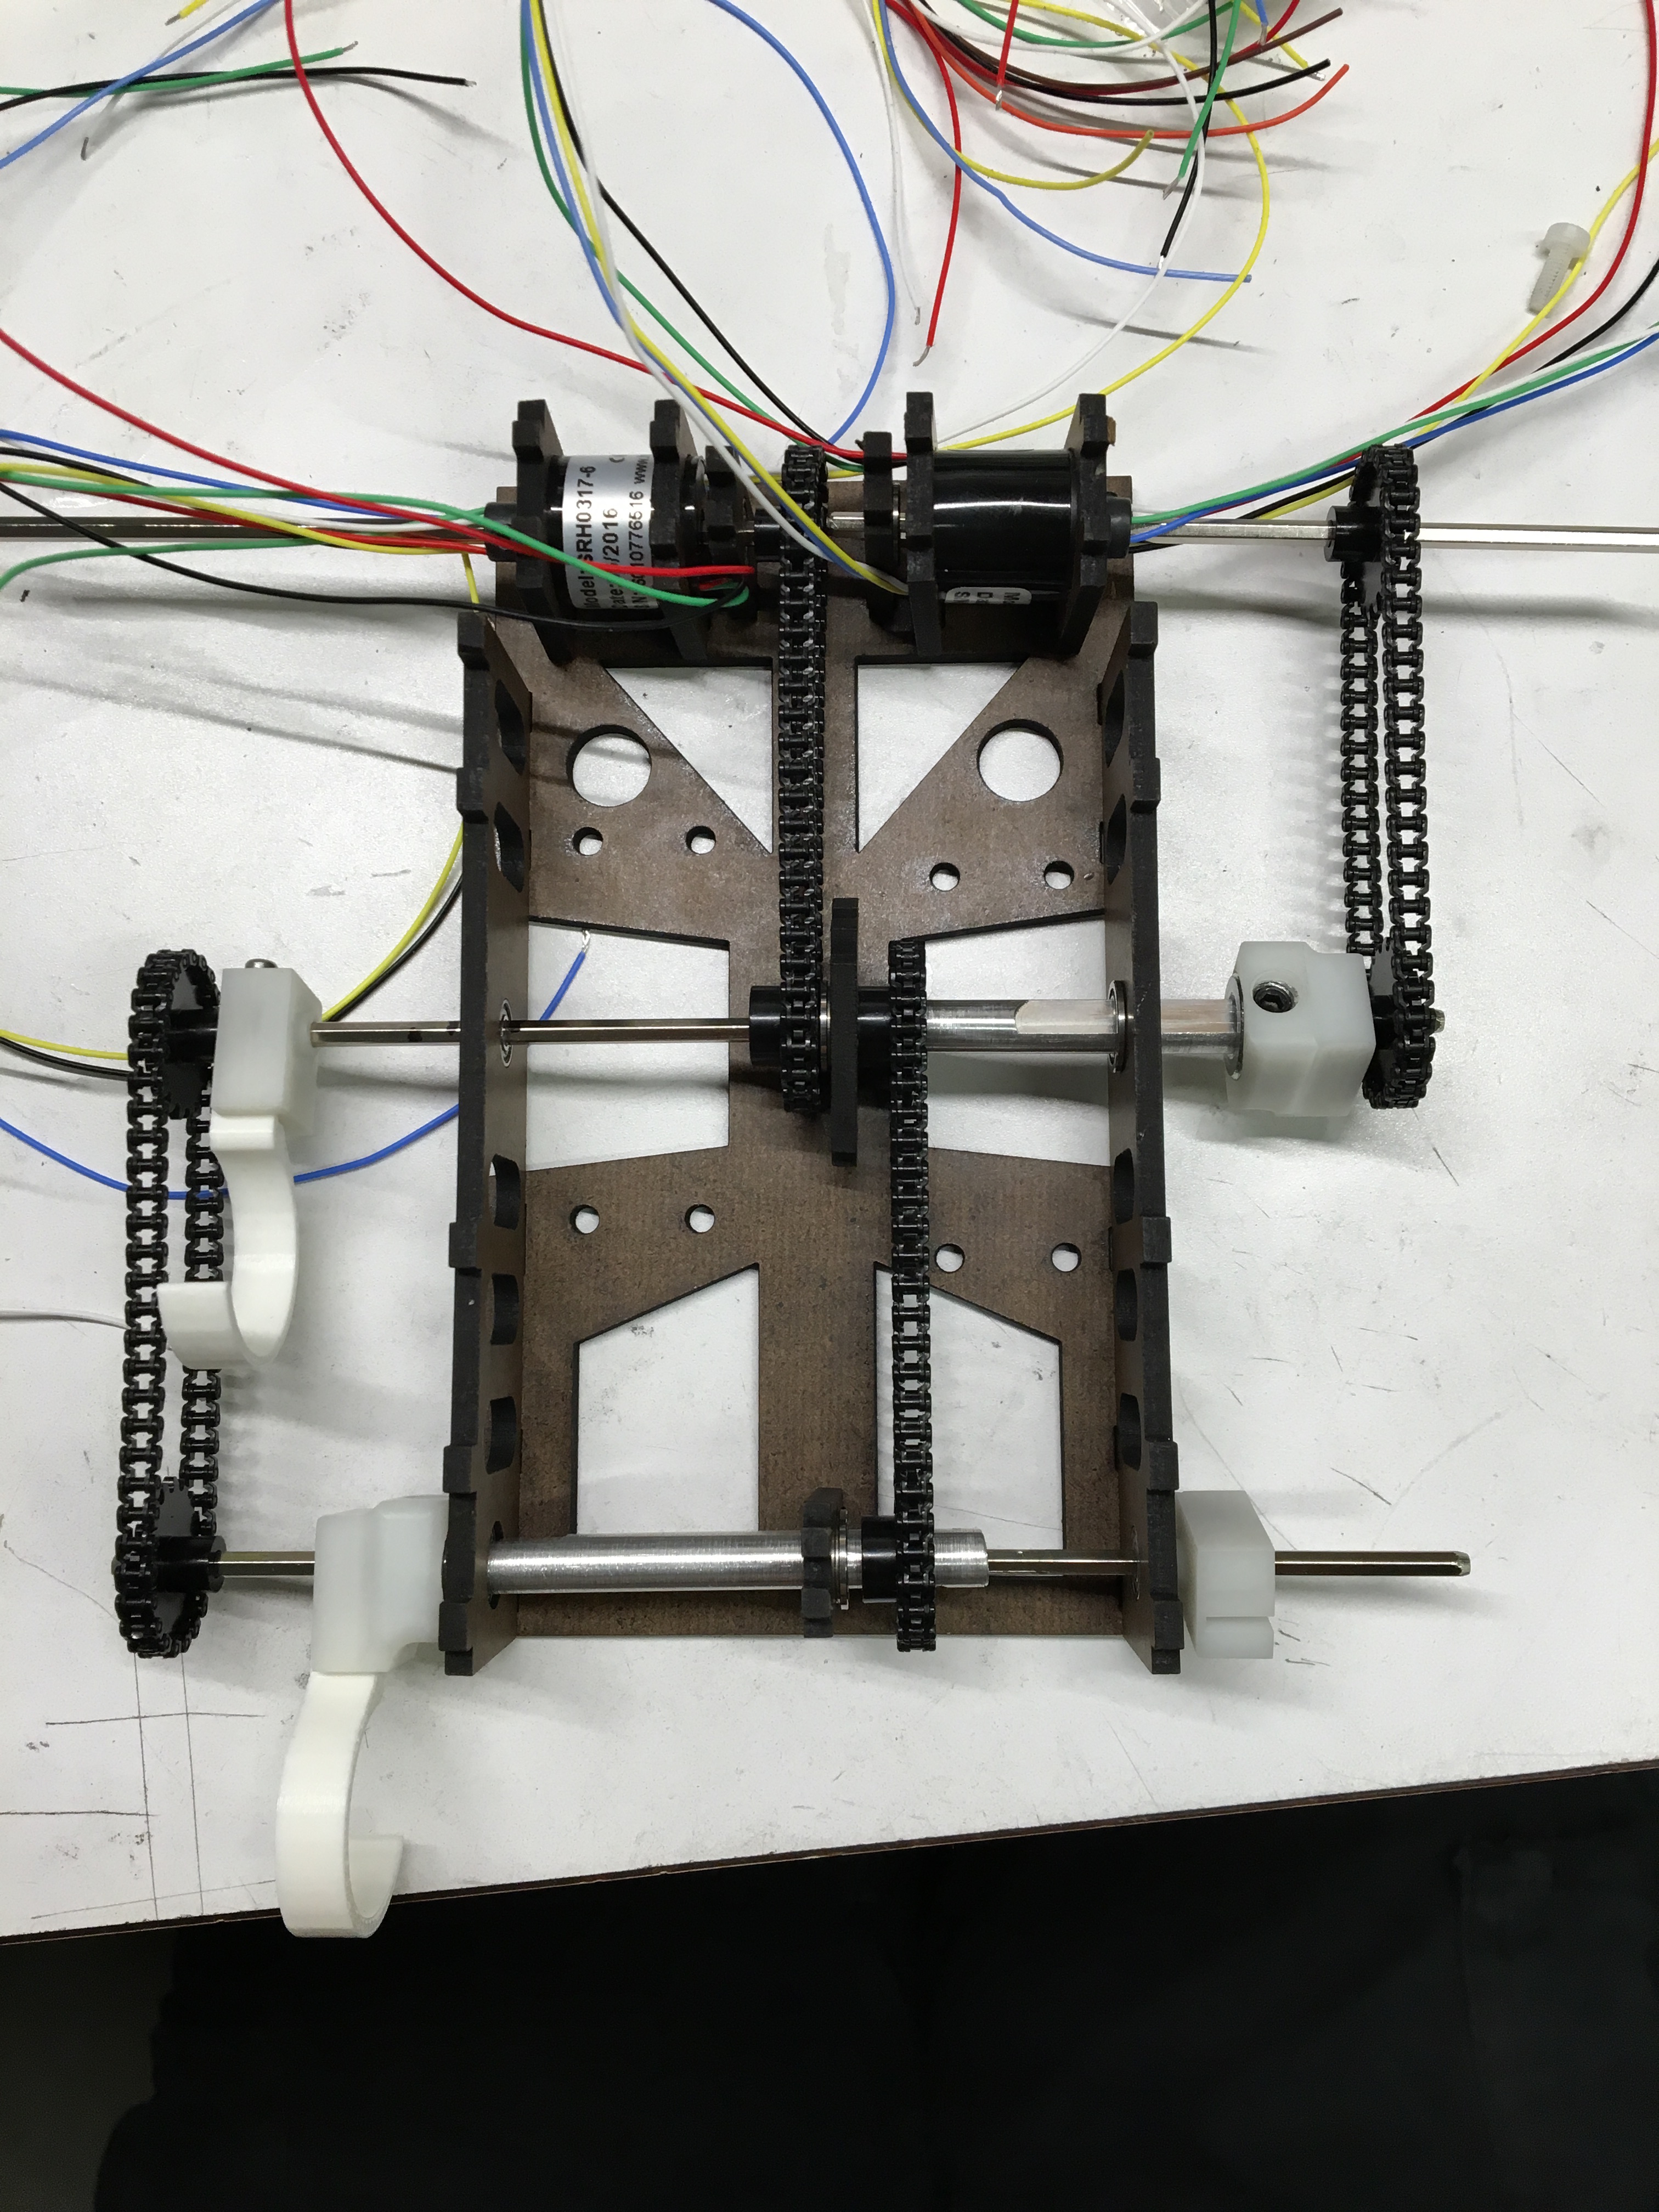
Today was a day of assembly. I started the day with almost all the holes in the shafts drilled, and with all parts ready to go. First, I installed all the shaft collars into the plastic pieces that hold the legs. I had to install them such that the set screw of the collar pointed exactly downward, so that when the piece is fastened onto the shaft, the leg will be perpendicular to the body. The biggest challenge of the day though was to align the sprockets on the shafts such that all the connected shafts had parallel flats. I had to drill holes in the exact right place on the sprockets and install the link chain between them while the shafts were at just the right angle. I spent my whole day working on this, and got good work done. Hopefully I'll be able to finish it up tomorrow.
7. July 1
Today was basically a continuation of yesterday. I continued my work of aligning all the shafts as well as I could. I drilled all the final holes, and got every single part ready for assembly. I worked at this for a few hours, before Alice told me that she and Tae were coming in tomorrow and could do the final assembly then. Because of all the handling I've done of the duron frame, the joints have become looser and looser, and it's a bit wobbly now. Alice said Tae would laser cut a couple fresh frames tomorrow.
At lab meeting today, Will made a fascinating presentation about his current project. He's working on a drone that can perch on wild animals like giraffes and stick a GPS device on them, so they can be tracked. He's gaining biological inspiration from an existing bird that lands on animals and picks ticks and fleas off of them. The whole lab had fun spitting out various different ideas for how to get the job done. Will also talked about more broad ideas of biomimetics, and it was fun to listen to and think about.
After lunch, I talked with Michael about machining his forceps part. The part requires a part flip, and Arul suggested machining soft jaws for fixturing the piece after the flip. I personally think that using wax for fixturing would be easier and work just as well if not better.
After that discussion, I began to go through all of the cutting tools in the lab to update our inventory. That is an ongoing project, seeing as we have many many tools.
8. July 5
Today was super productive. I came to the lab and realized that there was a sprocket hole I had still yet to drill, so I got on that right away. Additionally, over the weekend, Alice realized that the middle D-shaft was a bit wonky and causing friction, so I machined a new one, and tapped and drilled the holes once more. At that point, all the individual pieces were done, and it was time for a complete assembly.
I spent the whole day after that working on the assembly. At every step, I would test for friction along the shafts. I did the assembly several times, each time focusing on a different component to make sure it would work smoothly. Finally, I put everything together, aligned all the legs, and closed it off. It was beautiful.
Alice and I tested it, and it ran, but it was turning right consistently. Alice and I went back to work on the robot to make sure all of the legs were as aligned as we could possibly get them. We tested it again, and it ran perfectly straight, which was extremely exciting and the entire point of this rebuild, but one of the chains snapped in the process. We had to go back, dissect it, replace that chain, and realign the legs. We tested it again, this time outside, and it again ran straight, but the chain snapped again. We realized that one of the electrical boards was probably interfering with the chain and causing it to snap, so we are going to move the board slightly. We finished on a high note though - SAILR run straight for the first time.
9. July 6
Today was a great success. I came in in the morning thinking we had almost everything figured out for the robot to run straight, but it turns out I was wrong. Alice identified a few issues that were consistently causing chain breakage. Mainly, the two center shafts (quarter inch and 3 mm) were slightly warped, and the angle of the sprockets on them caused the chain to snap every time. So, I had to re-machine each of those shafts, but this time I did it in a way where I was sure to cause the least amount of flexing in the shafts as possible during the machining operations. I went slowly, carefully and methodically in drilling the holes and machining the flats, and it worked out well! The shaft was smooth and flat. Additionally, we replaced a bearing that we suspected of being a bit wonky.
The rest of the day was spent installing and carefully calibrating. It turns out that the alignment of sprockets that are connected by a chain is absolutely paramount. If they are not exactly collinear, the slight angle that the chain will run on will cause the plastic links to snap out of place. So, we spent quite a while making sure everything was in line. We made adjustments to the number of links in each chain to ensure equal friction on each motor, and replaced the chains with fresh ones.
We ran it a bunch of times, and each time it failed we identified the source of the error and debugged it. Finally, on the fourth or fifth try, we got it to run, and it ran quite well and quite straight. We decided that we will have a person steer it with a controller, but for an open circuit run, this was pretty impressive.
In addition to the deep satisfaction I felt as I watched the robot finally perform the task we set out for a couple weeks ago, I realized how intimately I understood the mechanicals of the robot, and how well acquainted I've become with the general necessities of creating a well-tuned robot. I made the majority of this robot's components by hand, and I had to do it in such a way that all the pieces would cooperate. And I did it! I feel good!
10. July 7
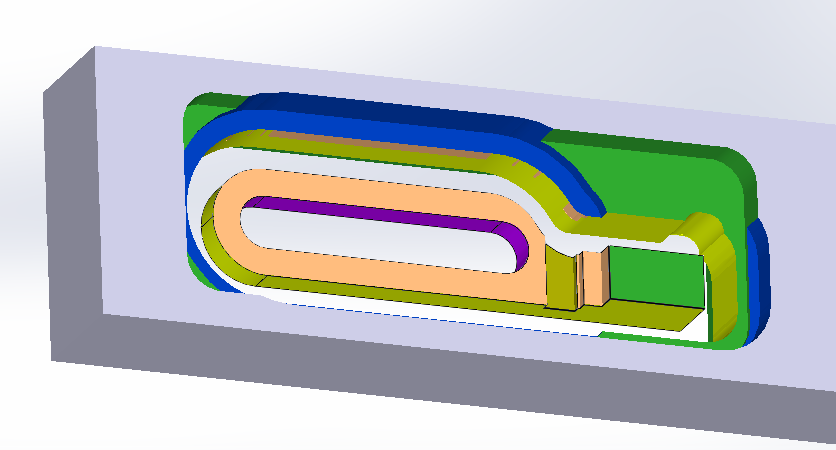
Today was a nice change of pace. Since the mechanical aspects of SAILR are pretty much complete, I worked on Michael's forceps. I spent the day making the CAM for his design. There was a feature of his design that was nearly impossible to machine, so I talked with him about it and he told me it was unnecessary and how to change it. I'm all done with the CAM, and hopefully should be machining tomorrow! Here's a picture of the part after the stock simulation:
11. July 8
Today was loads of fun. In the morning, I continued to update the tool database, which just consists of me going through all of our cutting tools (endmills, reamers, etc.) and marking them off on our excel spreadsheet of the tools we think we have. So far, I've found several tools that were unaccounted for, which is great, because it's always better to have more tools. I did this until lab meeting at 10:30.
At lab meeting, Arul blew everyone's mind by explaining how much better Onshape seems to be than SOLIDWORKS. He also made this incredible script which allows you to automatically make laser cutter joints.
Lunch was the barbecue, which was a blast. There were great people to talk to and conversations to be had. The biggest takeaway from the barbecue was that the BDML SURIs have to destroy the barbecue competition, and the way we're going to do that is by making a cattle-brand style stamp to brand the burger patties/buns. I'm going to machine our logo into a piece of steel and attach a rod to it so we can imprint our greatness.
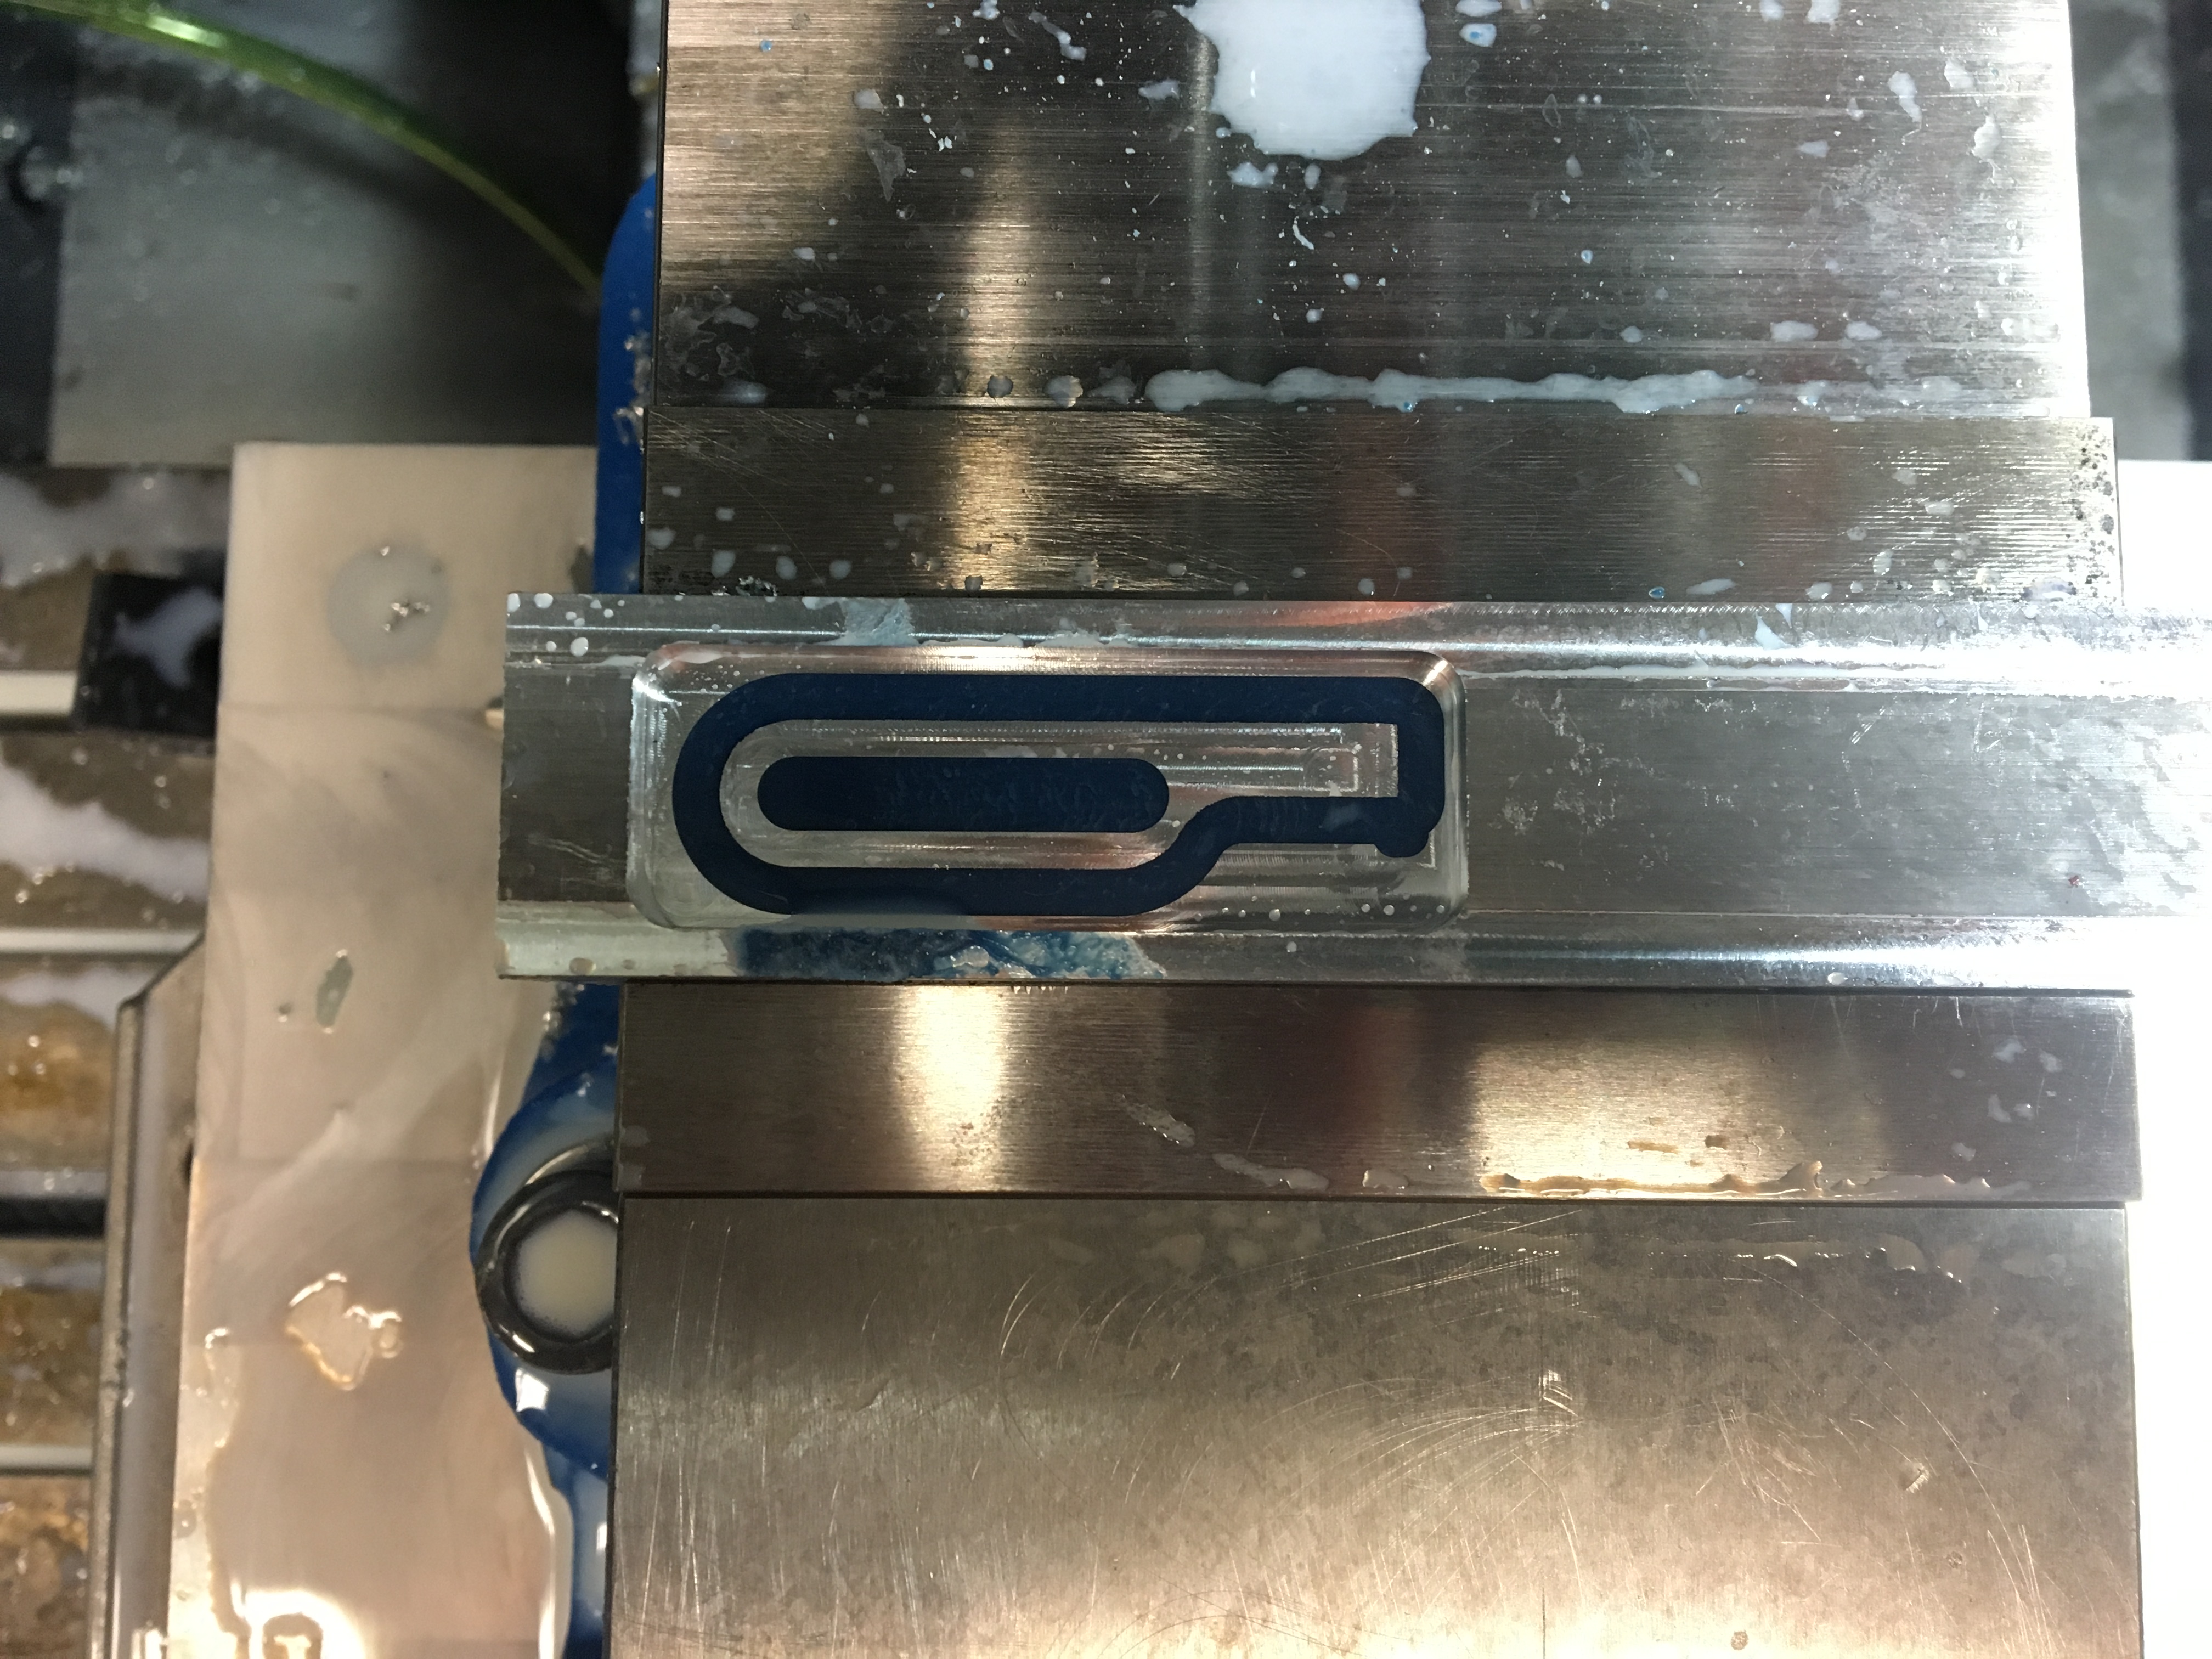
In the second half of the day, I machined the first side of Michael's forceps prototype. Everything went well. No teal breakage, clean cuts, all good. Here's a picture:
I then poured wax into the cavity for the part flip, and will finish the machining come Monday!
12. July 11
When I got in this morning, I continued to update the tool database. Man, that thing is a doozy! There are a lot of tools and I have to measure all of them in several ways. It seems like we have tons of tools that were not accounted for.
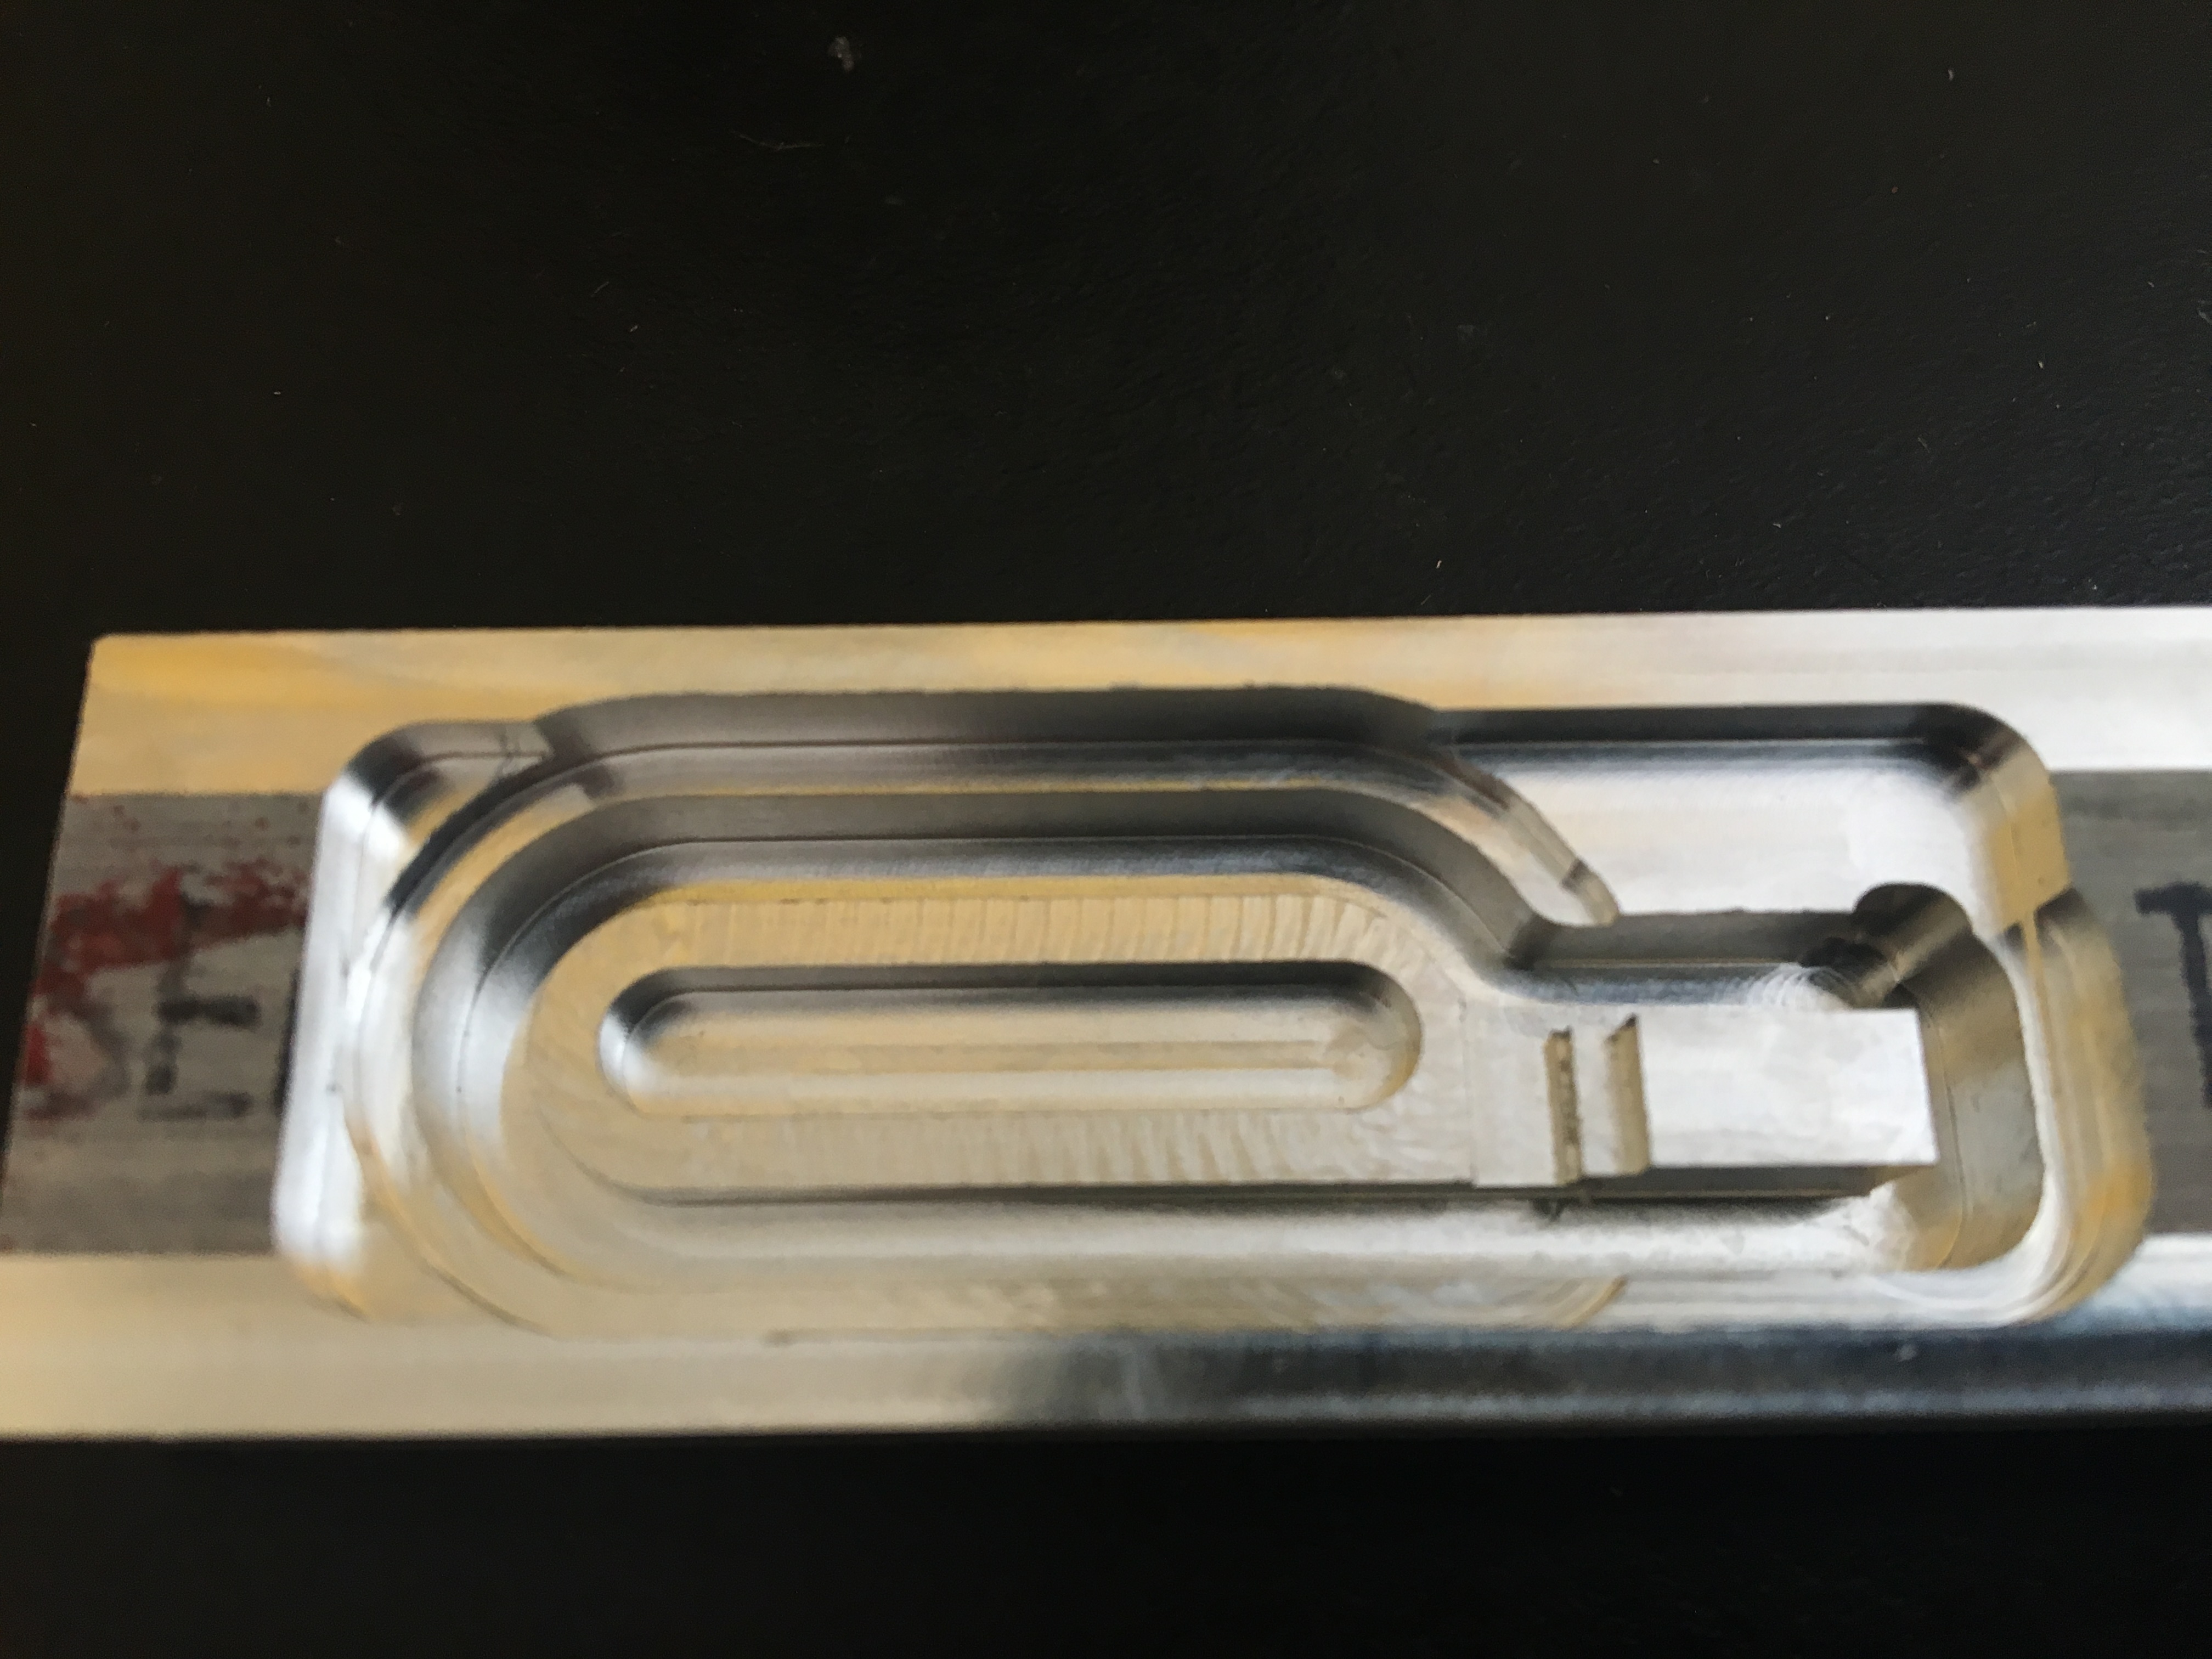
The rest of the day was a manufacturing extravaganza. The forceps part had been sitting over the weekend and so the wax had dried and hardened. I set everything up for a part flip and machined the part. Here's what the part looked like after machining the second side:
You can see the profile of the part, and that the rest of the part, which was machined from the first side, is sitting in the blue wax. To melt the part out of the wax, I got some Bioact 280 from our flammables closet. The Bioact 280 is very similar to mineral oil. The lab Wiki didn't have any information on how to use the Bioact, and people in the lab didn't know either, so I had to search for a datasheet, which I was able to find on machinablewax.com. I went down to the TLTL and heated up the Bioact and melted all the wax off the part. It took about 20-25 minutes. The part looks perfect. Here's the final product:
When I got back, I updated the Wiki, and now anyone using wax for a part flip will know exactly how to handle the process.
13. July 12
I started out the day by continuing my update of our tool library. I'd say I'm more than halfway done now. This update is making me realize a couple things: 1) people have not been updating the library as they've bought tools, and 2) there are a lot of basic tools that we don't have.
After lunch, I worked on the CAM for the burger brand. I actually finished all of it except for the feeds and speeds, so after we buy stock and get the tools in order, I should be pretty much ready to go!
14. July 13
I continued to work on the burger brander today. Chris and I realized in the morning that, due to food safety issues, we'd have to use the 304 alloy of stainless steel, which is a living nightmare to machine. To compensate for this, I had to redo my CAM and use toolpaths that I'm less familiar with.
Chris and I went out to buy the stock at Alan Steel, and we found a cheap, almost perfectly sized bar stock cutoff. We also went to my house to pick up my cutting tools, because the ones we already have in the lab wouldn't stand a chance against this material.
Arul recommended I get a free trial to an application called G-Wizard, which is basically a more precise version of fswizard, as it takes into account more factors. It took a while for me to get familiar with it, and I still am, to be honest, but I'm working at it.
So I've updated my toolpaths, and changed my feeds and speeds. Hopefully I'll be done with CAM and ready to machine by the end of the day tomorrow.
15. July 15
Today was a bit rough. The stock that Chris and I bought at Alan Steel was about 50 thou too long to fit in the vise, so I had to shave it down. The way it was clamped, the zero of the part was higher than the machine zero. Therefore, there were two rapids, one at the beginning of the program and one at the end, that plowed the tool through my part as the machine was moving the part to or from the machine home. I was extremely disappointed with this, as the two appropriate quarter inch end mills I had are now broken. It's the first time I've ever broken a tool not during a machining process, and I did it twice in about fifteen minutes. On the bright side, I finished cutting my stock down to size.
For the rest of the day, I continued to update the tool data (I'm almost done finally!!!!). Arul wanted me to point out tools that are more or less standard that we are missing, but I'm worried that I don't know what is standard for this lab. Most of the machining I do is in metal, and the tooling for cutting metal is pretty different from that for cutting wax. We shall see.
On Monday, Chris and I are going to head to Western Tool & Supply to restock tools for this project and also perhaps to fill in gaps in the lab's tool collection.
16. July 18
Today was super! I came in in the morning knowing today would be the day I started machining the burger brander. First, though, Chris and I had to go buy the cutting tools to do it. We headed out to Western Tool & Supply and got quarter inch, eighth inch, and sixteenth inch flat end mills coated in TiCN (two of each). On the way there, we got some lunch.
When we got back, it was time for business. I set everything up in the machine and got the cuts going. The quarter inch adaptive clearing was quite loud, but I suspect that's because the stock was cut very roughly and so the vise didn't hold it in the best possible way. Though it was loud, the cut was very clean. I then went in with the eighth inch tool, and the cut was quiet and smooth. No tools were broken. Everything looked excellent. I was extremely pleased. Additionally, the cuts I was making were quite deep, engaging the entire flute length in fact. This strategy of full flute engagement was previously foreign to me, and was extremely effective. It seems like previously I was doing what I thought was conservative by using a very shallow depth of cut, but it turns out that this just wears out the end of the tool, and is bad for everything. This new strategy is much faster. I'm pretty stoked, because this will cut my machining time in half at the very least in the future.
Here's what the part looks like so far. I have to do the sixteenth inch clearing tomorrow, as well as the outer contour.
17. July 19
This process of making the burger brander has proven to be a grueling one. After much shifting around with the depth and width of cut as well as the feed rates and spindle speeds for the 1/16" adaptive clearing, I ran the cut and it went very smoothly. That was great. Here's a picture:
While the cut was running, however, Arul made the cruel, sobering realization that when we stamp the brand, the logo will be mirrored. I had designed it forward, and had never thought twice about it. This was disheartening, but we realized that We knew now that all the feeds and speeds were correct and cutting a second one (mirrored) would only take a couple hours). Besides, we can use this one for testing.
All I had to do after that was run the final operation, which was the contour of the logo. My tool path had lead-in and lead-out moves that were too fast, and I broke a tool because of that. I adjusted my CAM, and fixed that problem, but for some reason that I truly haven't been able to figure out, I broke my tool again. I double and triple checked g wizard, and I don't quite know what I did wrong. I'm going to give it one more shot tomorrow, and it should work, but I'm nervous because I really don't know what led to the tool breaking.
18. July 20
I began today by attempting for a second time to cut out the contour of the logo. Mark mentioned to me that when he was at CMU, machinists told him that high speed steel was actually more effective for cutting very hard metals. So, I thought it might be a good idea to try a 3/16" high speed steel end mill. I updated feeds and speeds and the tool path, and set everything up to give it another try.
The cut was going very slowly, which is obvious because I was making very deep cuts with a high speed steel stool in 304 stainless steel, but it sounded very good. What I failed to realize when I was selecting the tool, is that it could not cut deeper than its flute length, because its shank is ever-so-slightly larger than the actual cutting diameter. This meant that as the tool reached in past its flute length, its shank rubbed against the slot it was cutting. This caused the tool to break. Tomorrow I will be buying an extended reach 1/8" end mill to cut out the slot, but I will actually be cutting it as an adaptive clearing, because we have already proven that we can make that work.
For the rest of my time, I finished updating our tool library. It felt very good to finish. I had to leave work early because I was dealing with some stomach issues.
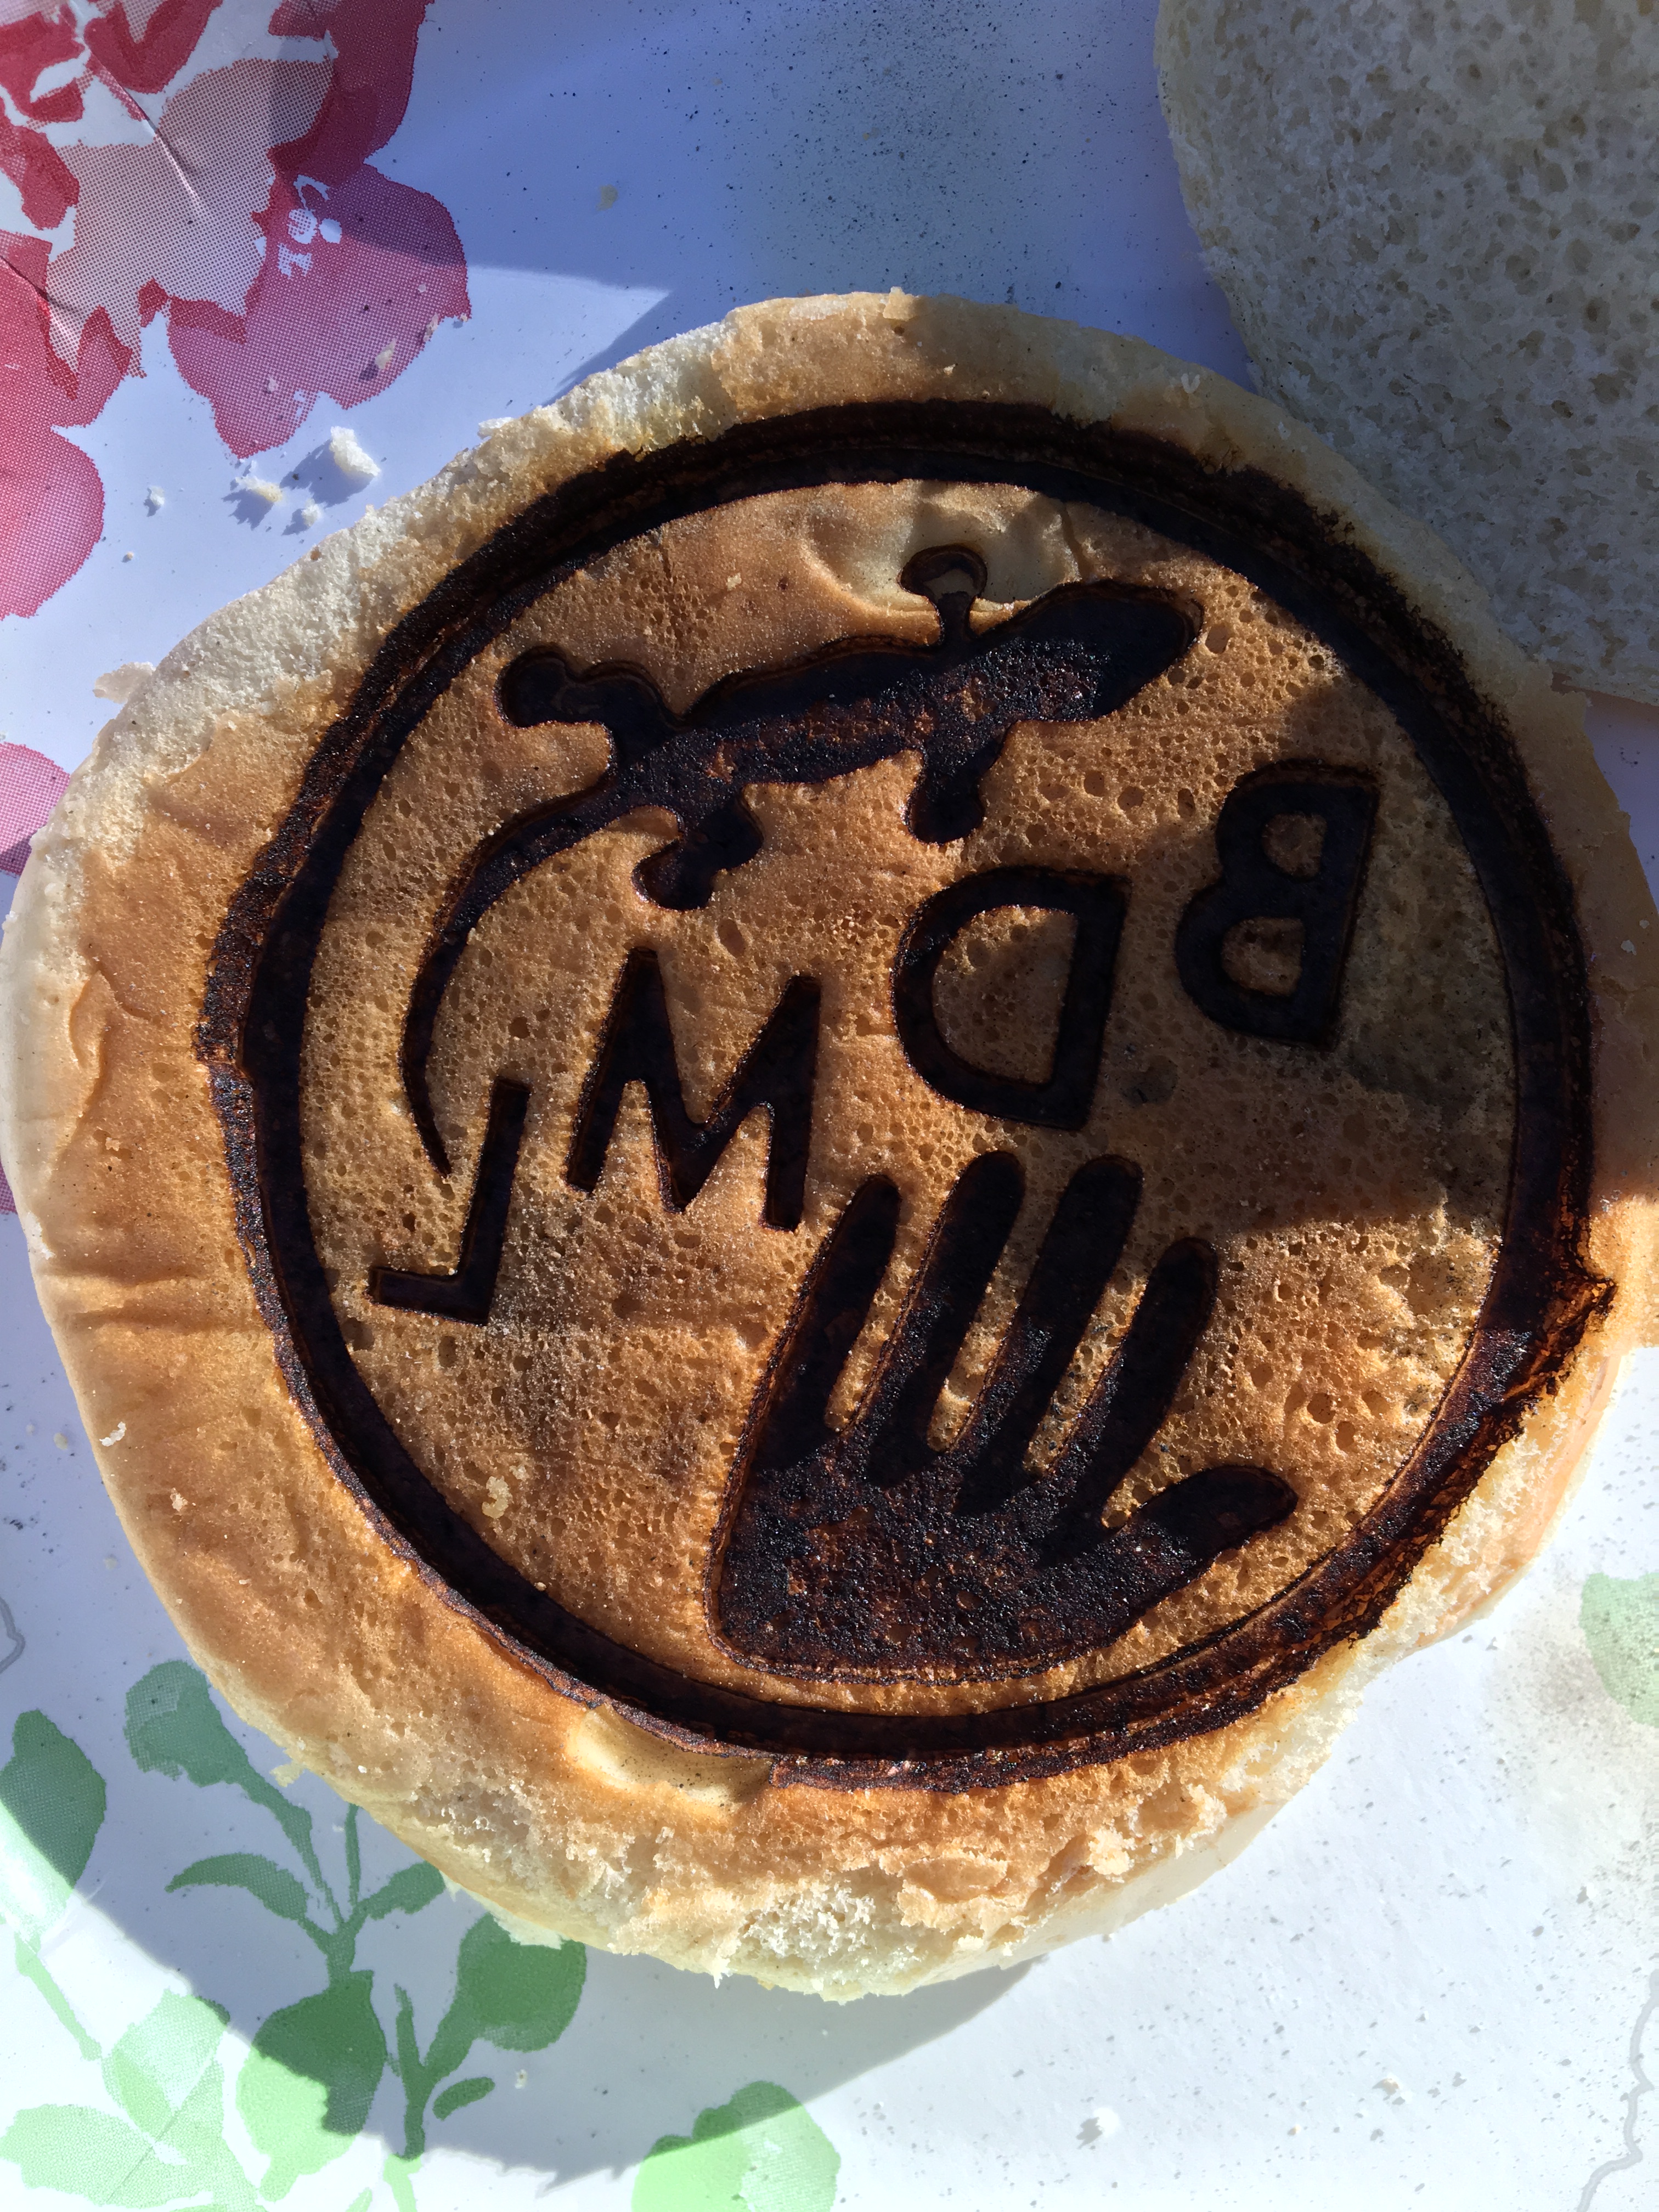
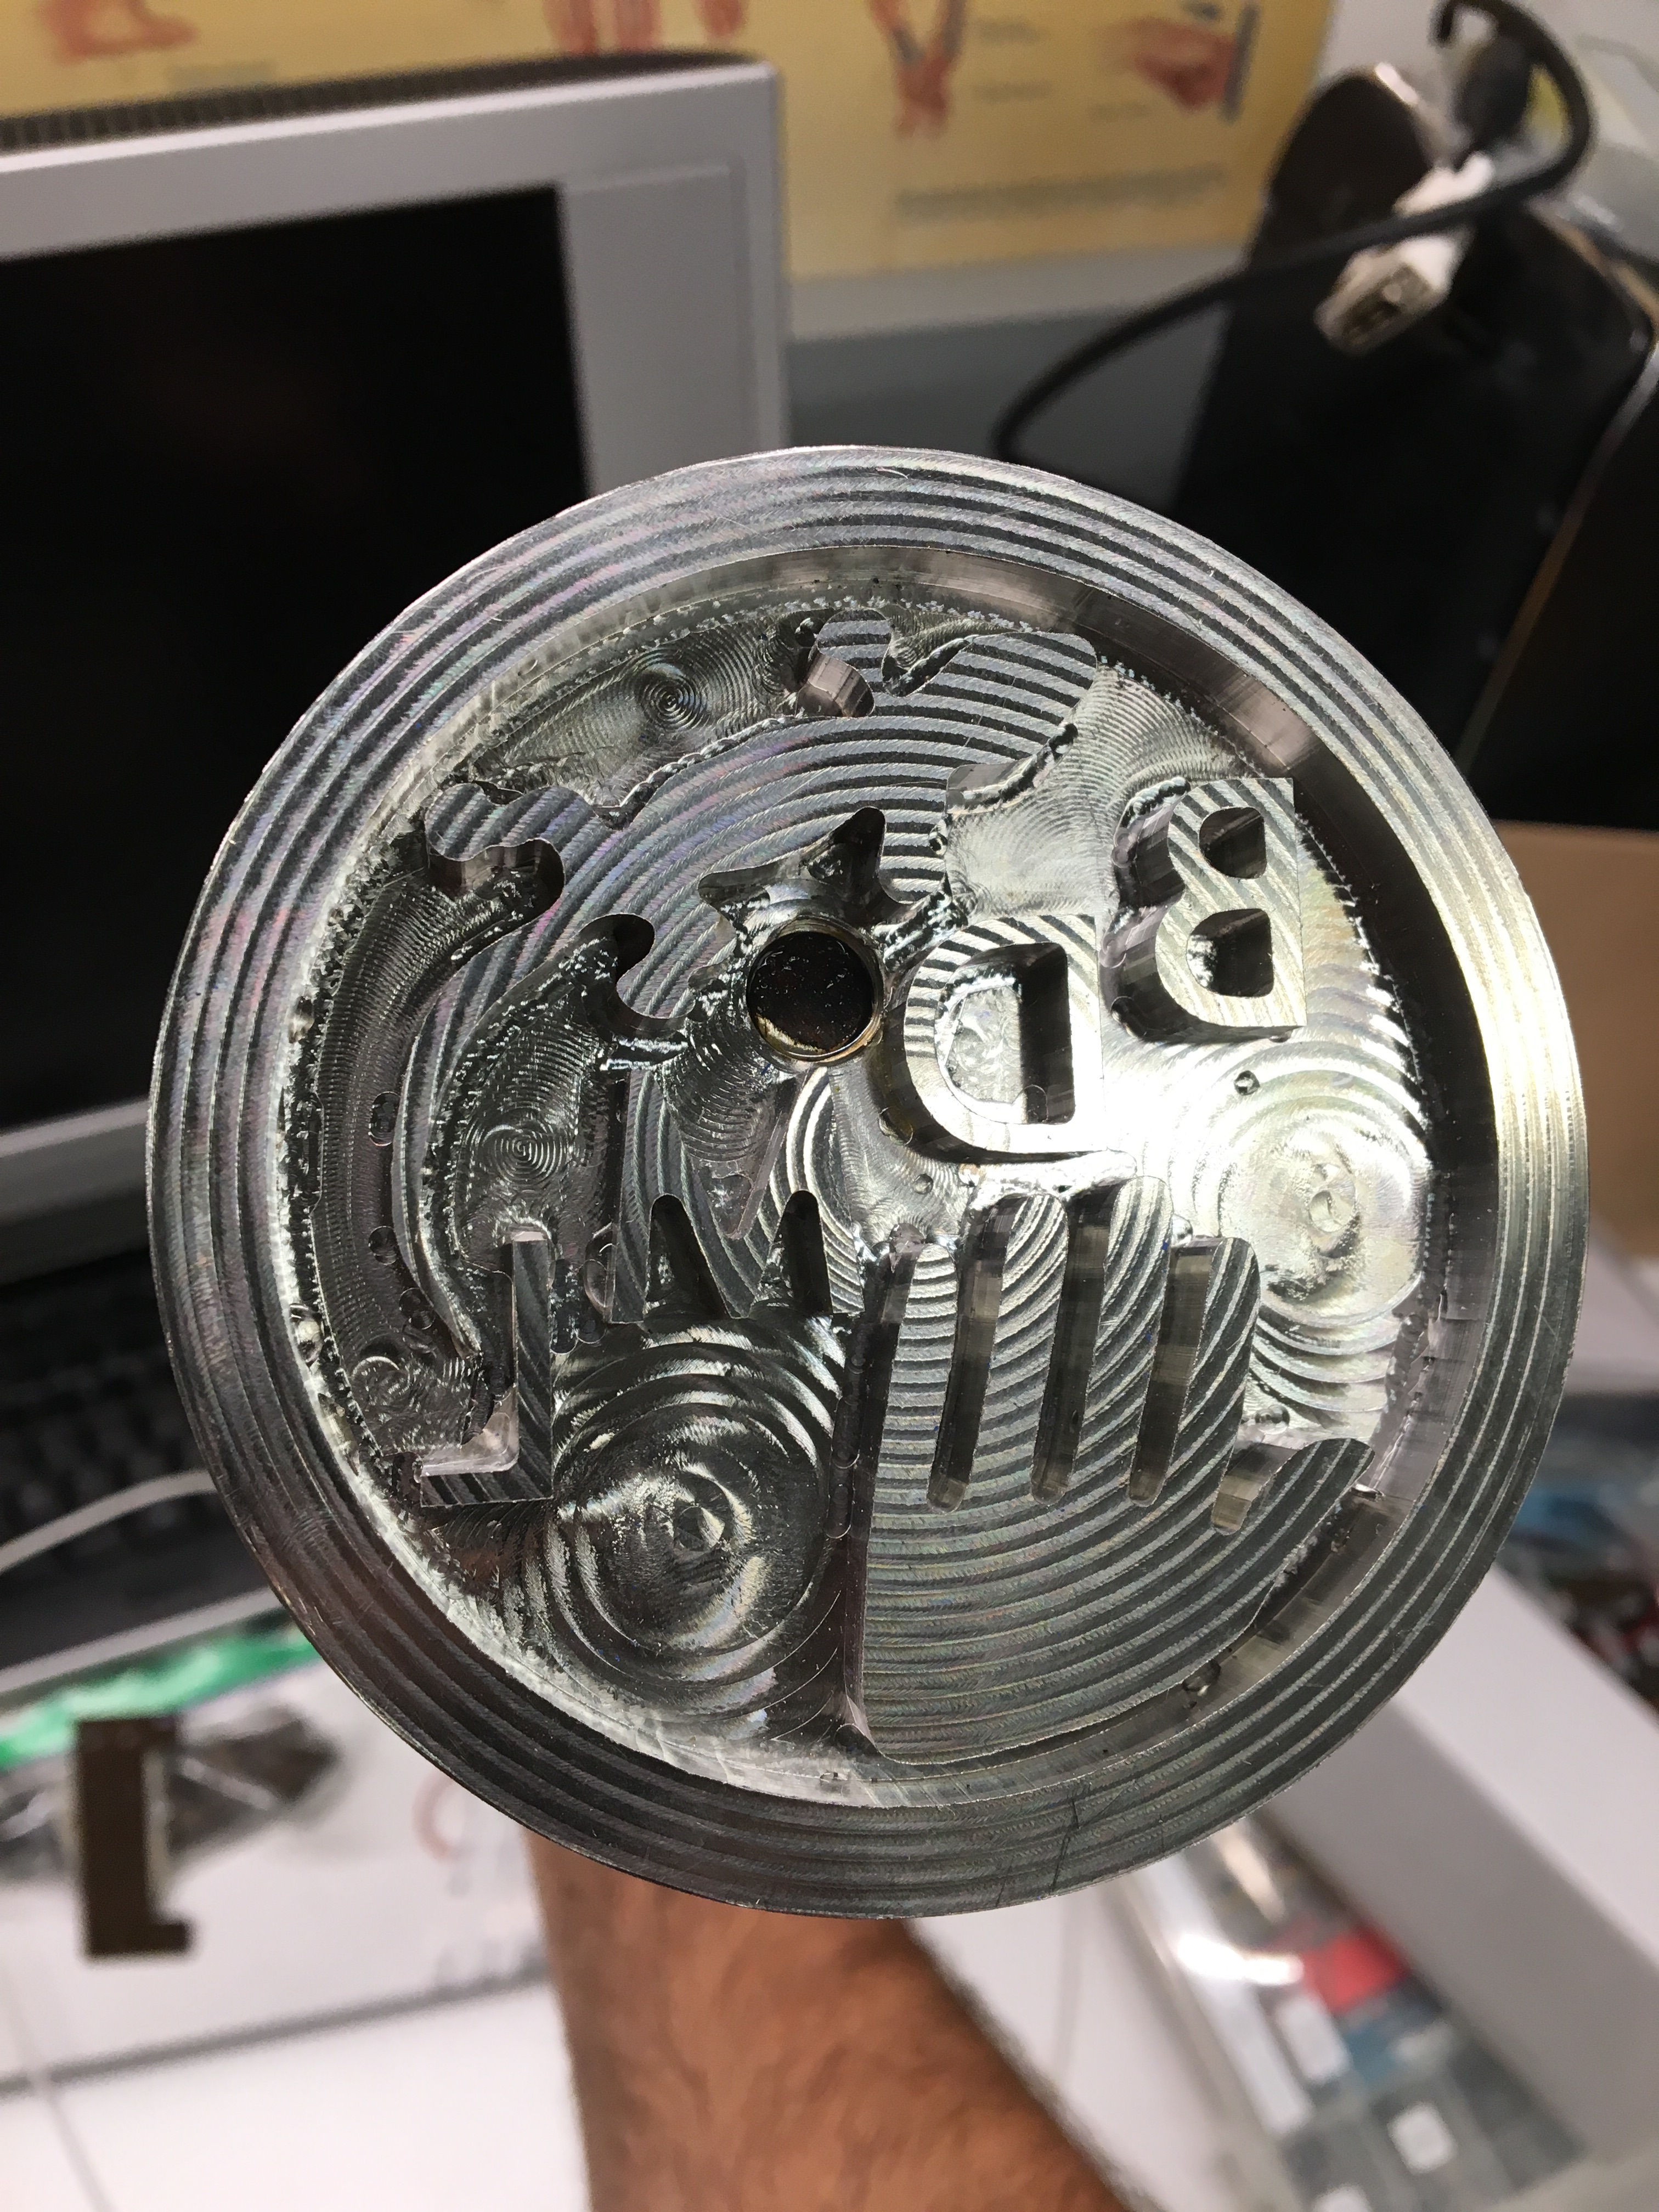
19. July 22
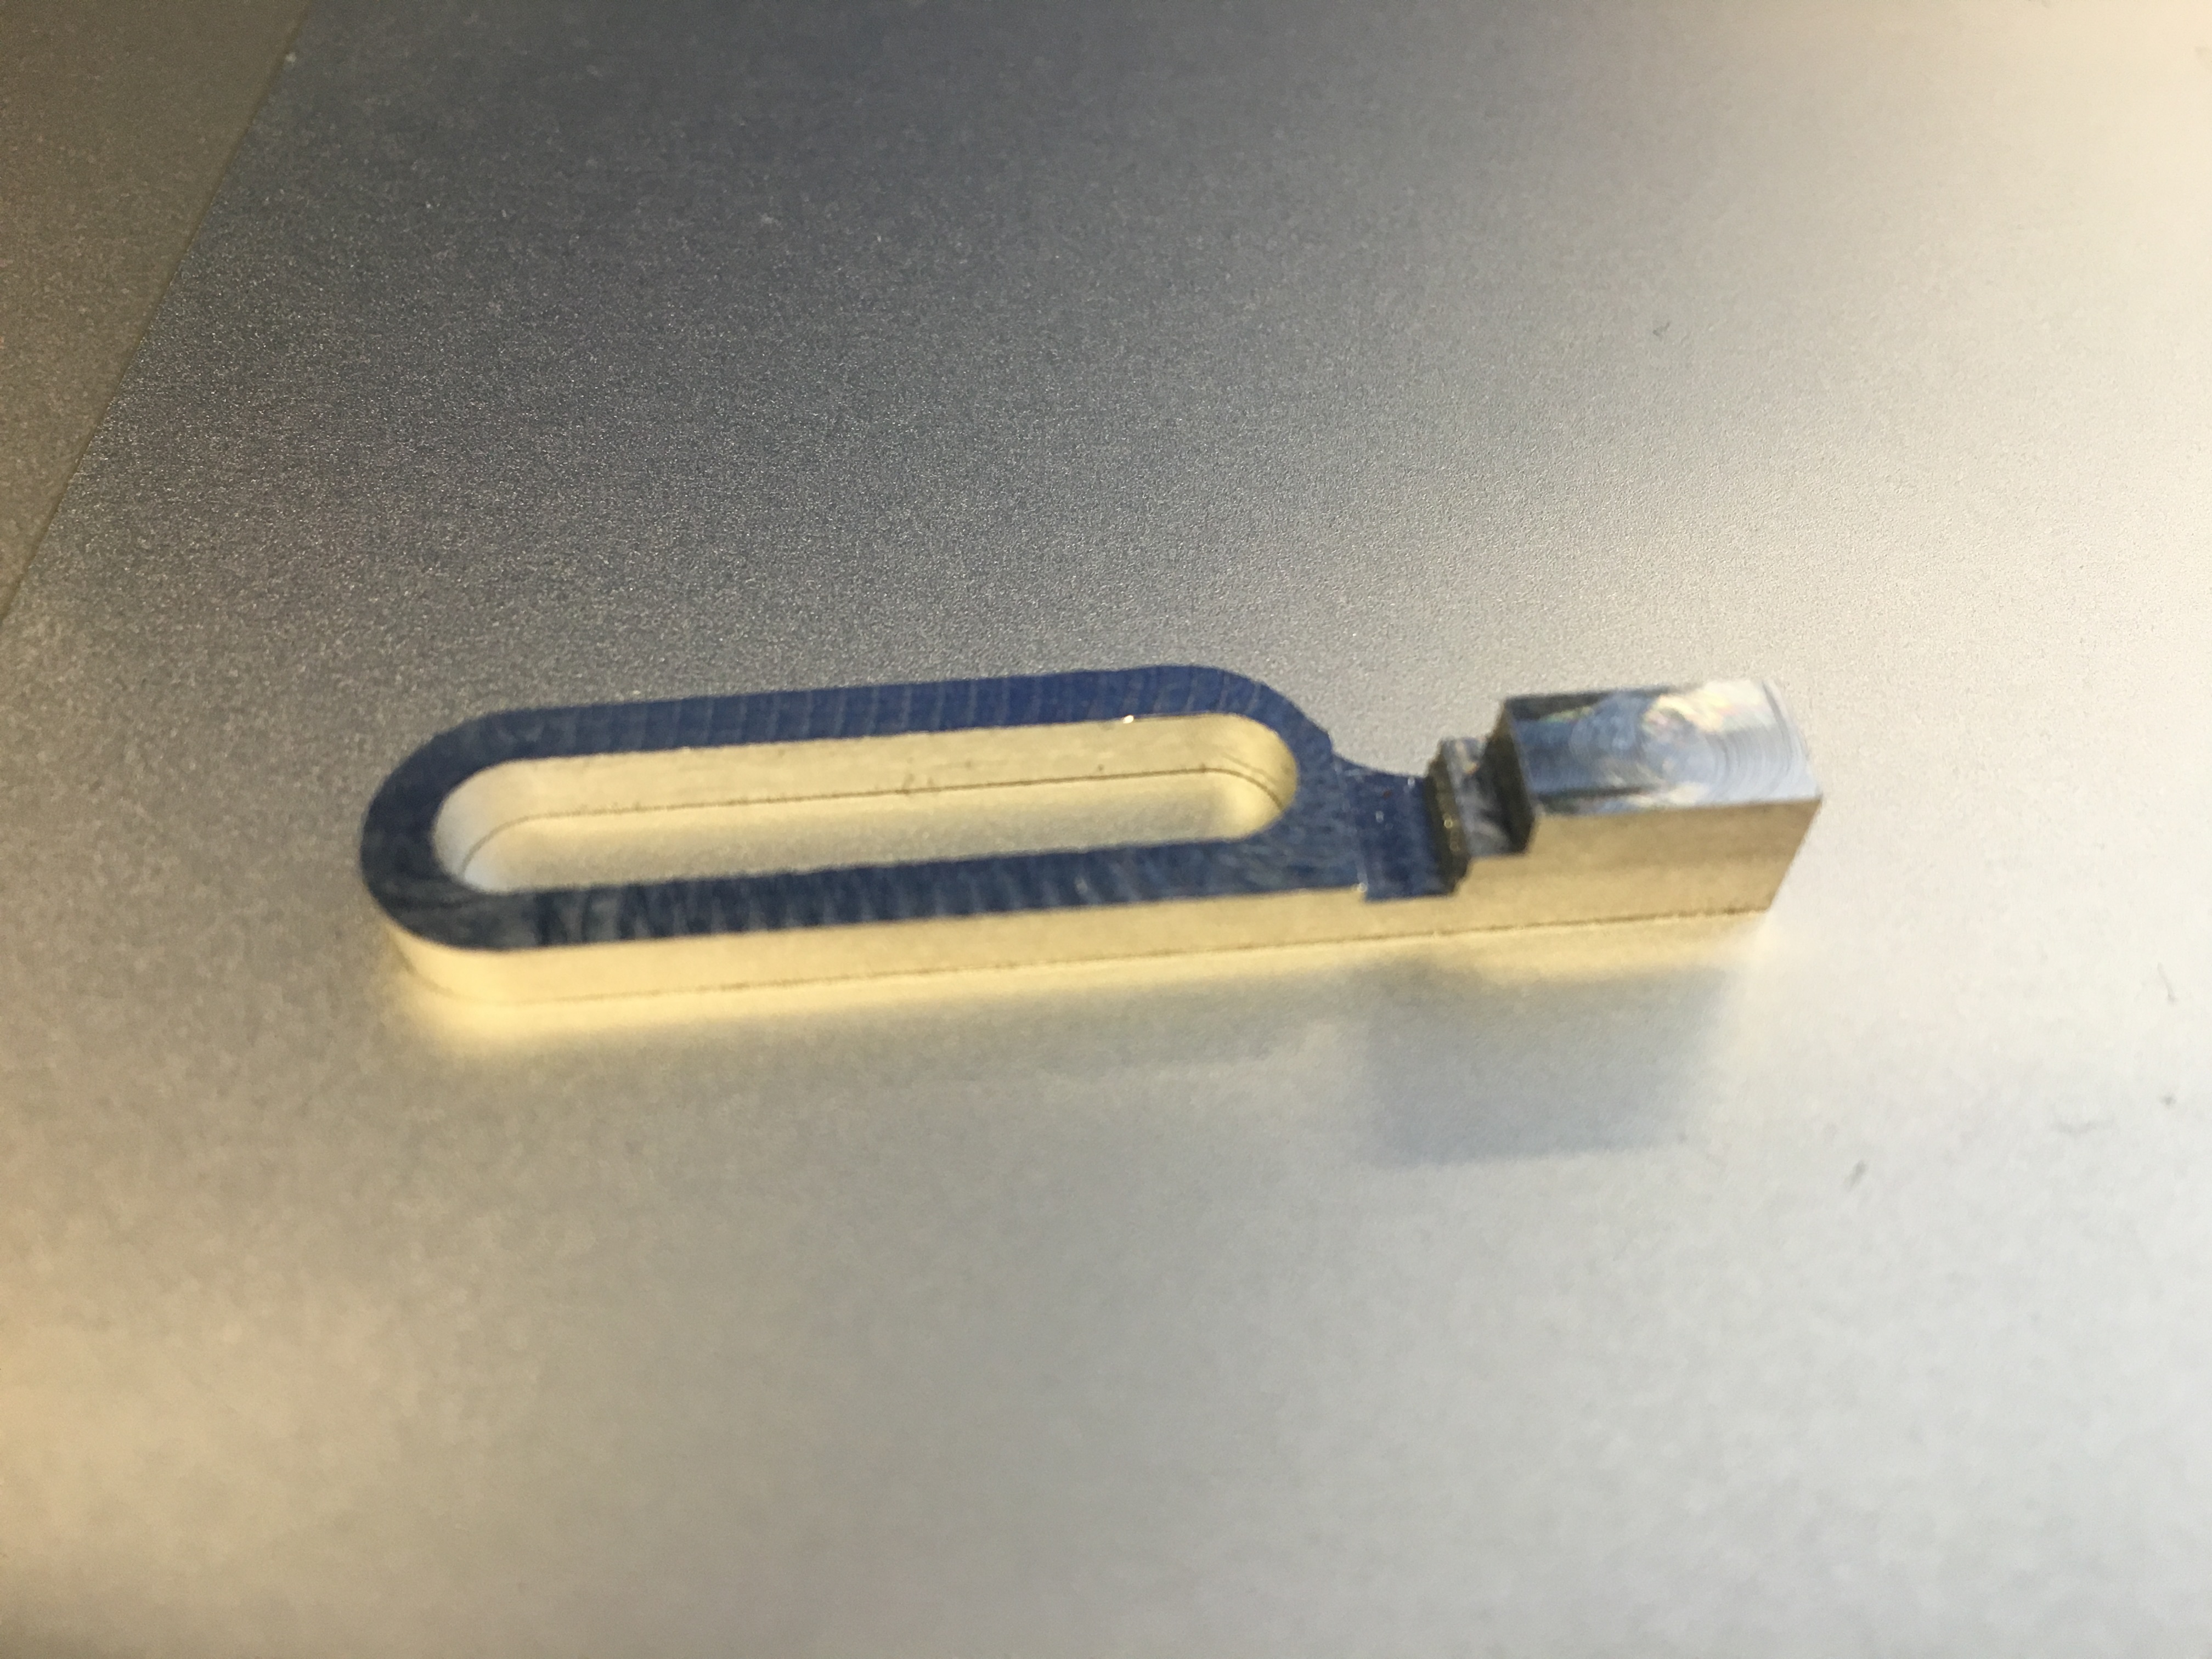
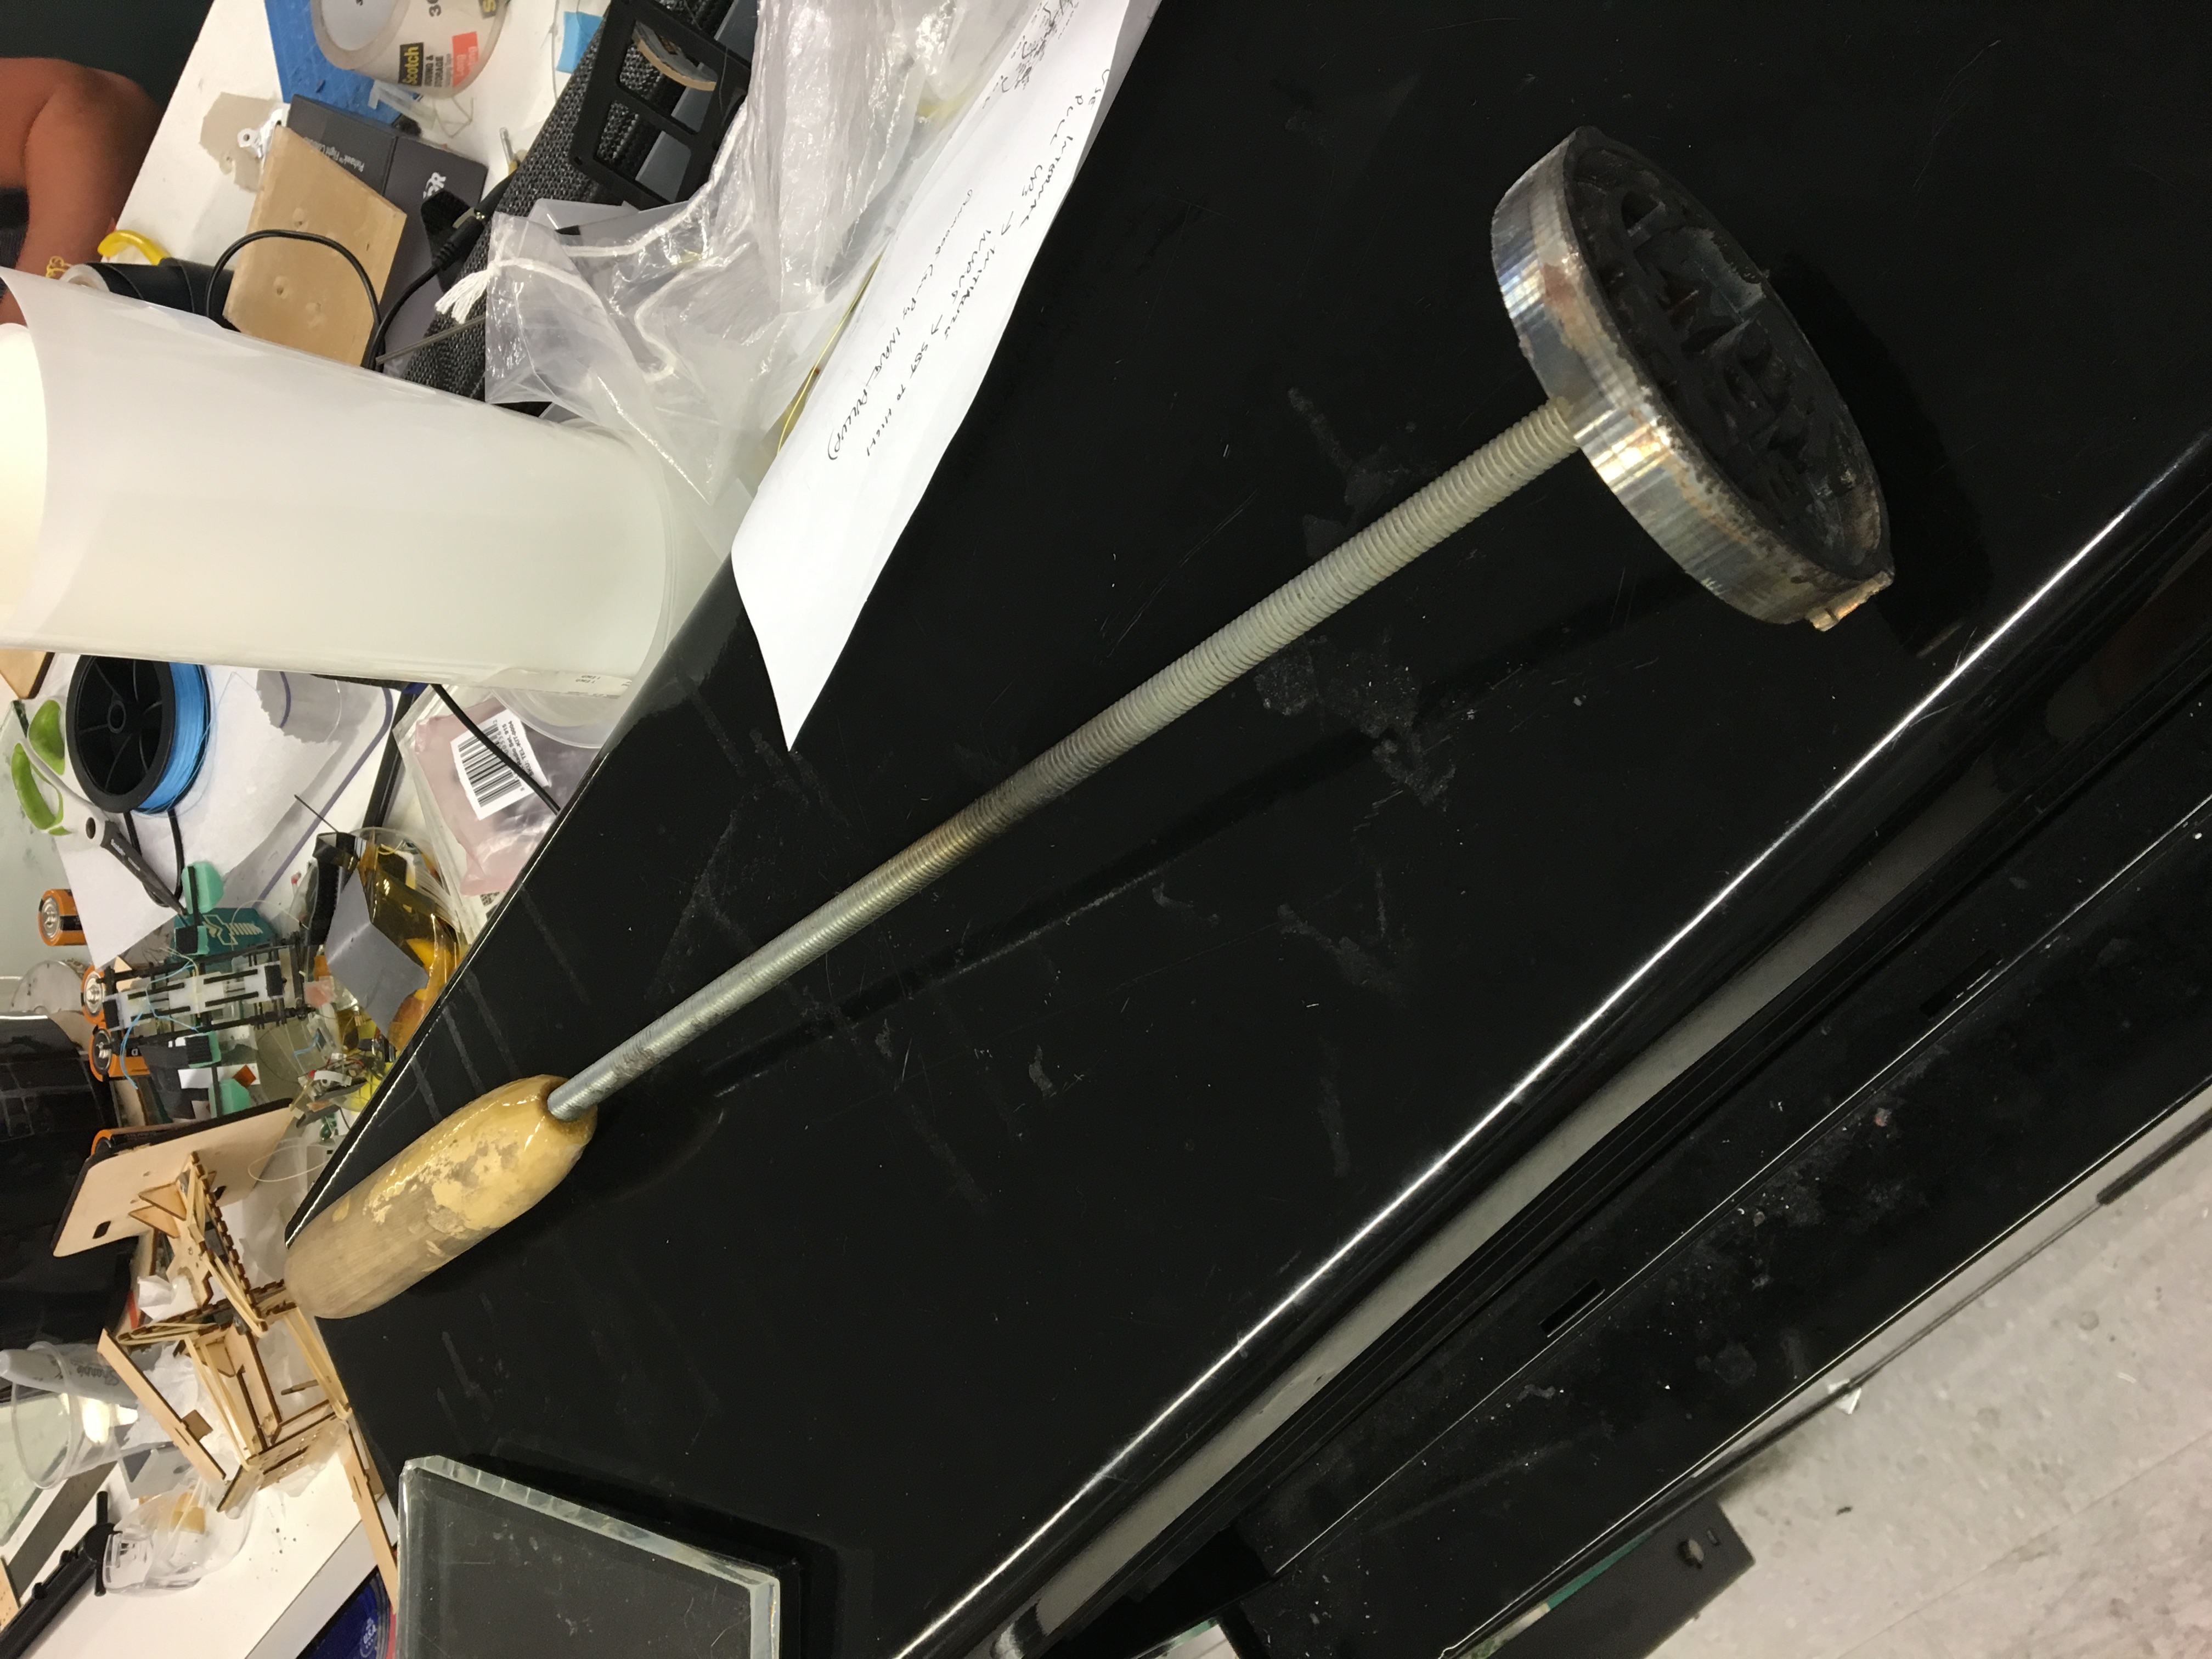
Today was a long long day at work. In fact, it crept into July 23rd. The morning was short, because it was a Friday and lab meeting starts at 10:30. Chris cut out what was remaining of the metal surrounding the logo, so that we could test it in the evening. All the strategies of cutting the slot around the logo failed, and we decided that we would just remove it via brute force, and cut it out of the stock. I glued the wooden handle onto the rod, and Arul tapped the hole for the rod to thread into. The entire assembly looks like this:
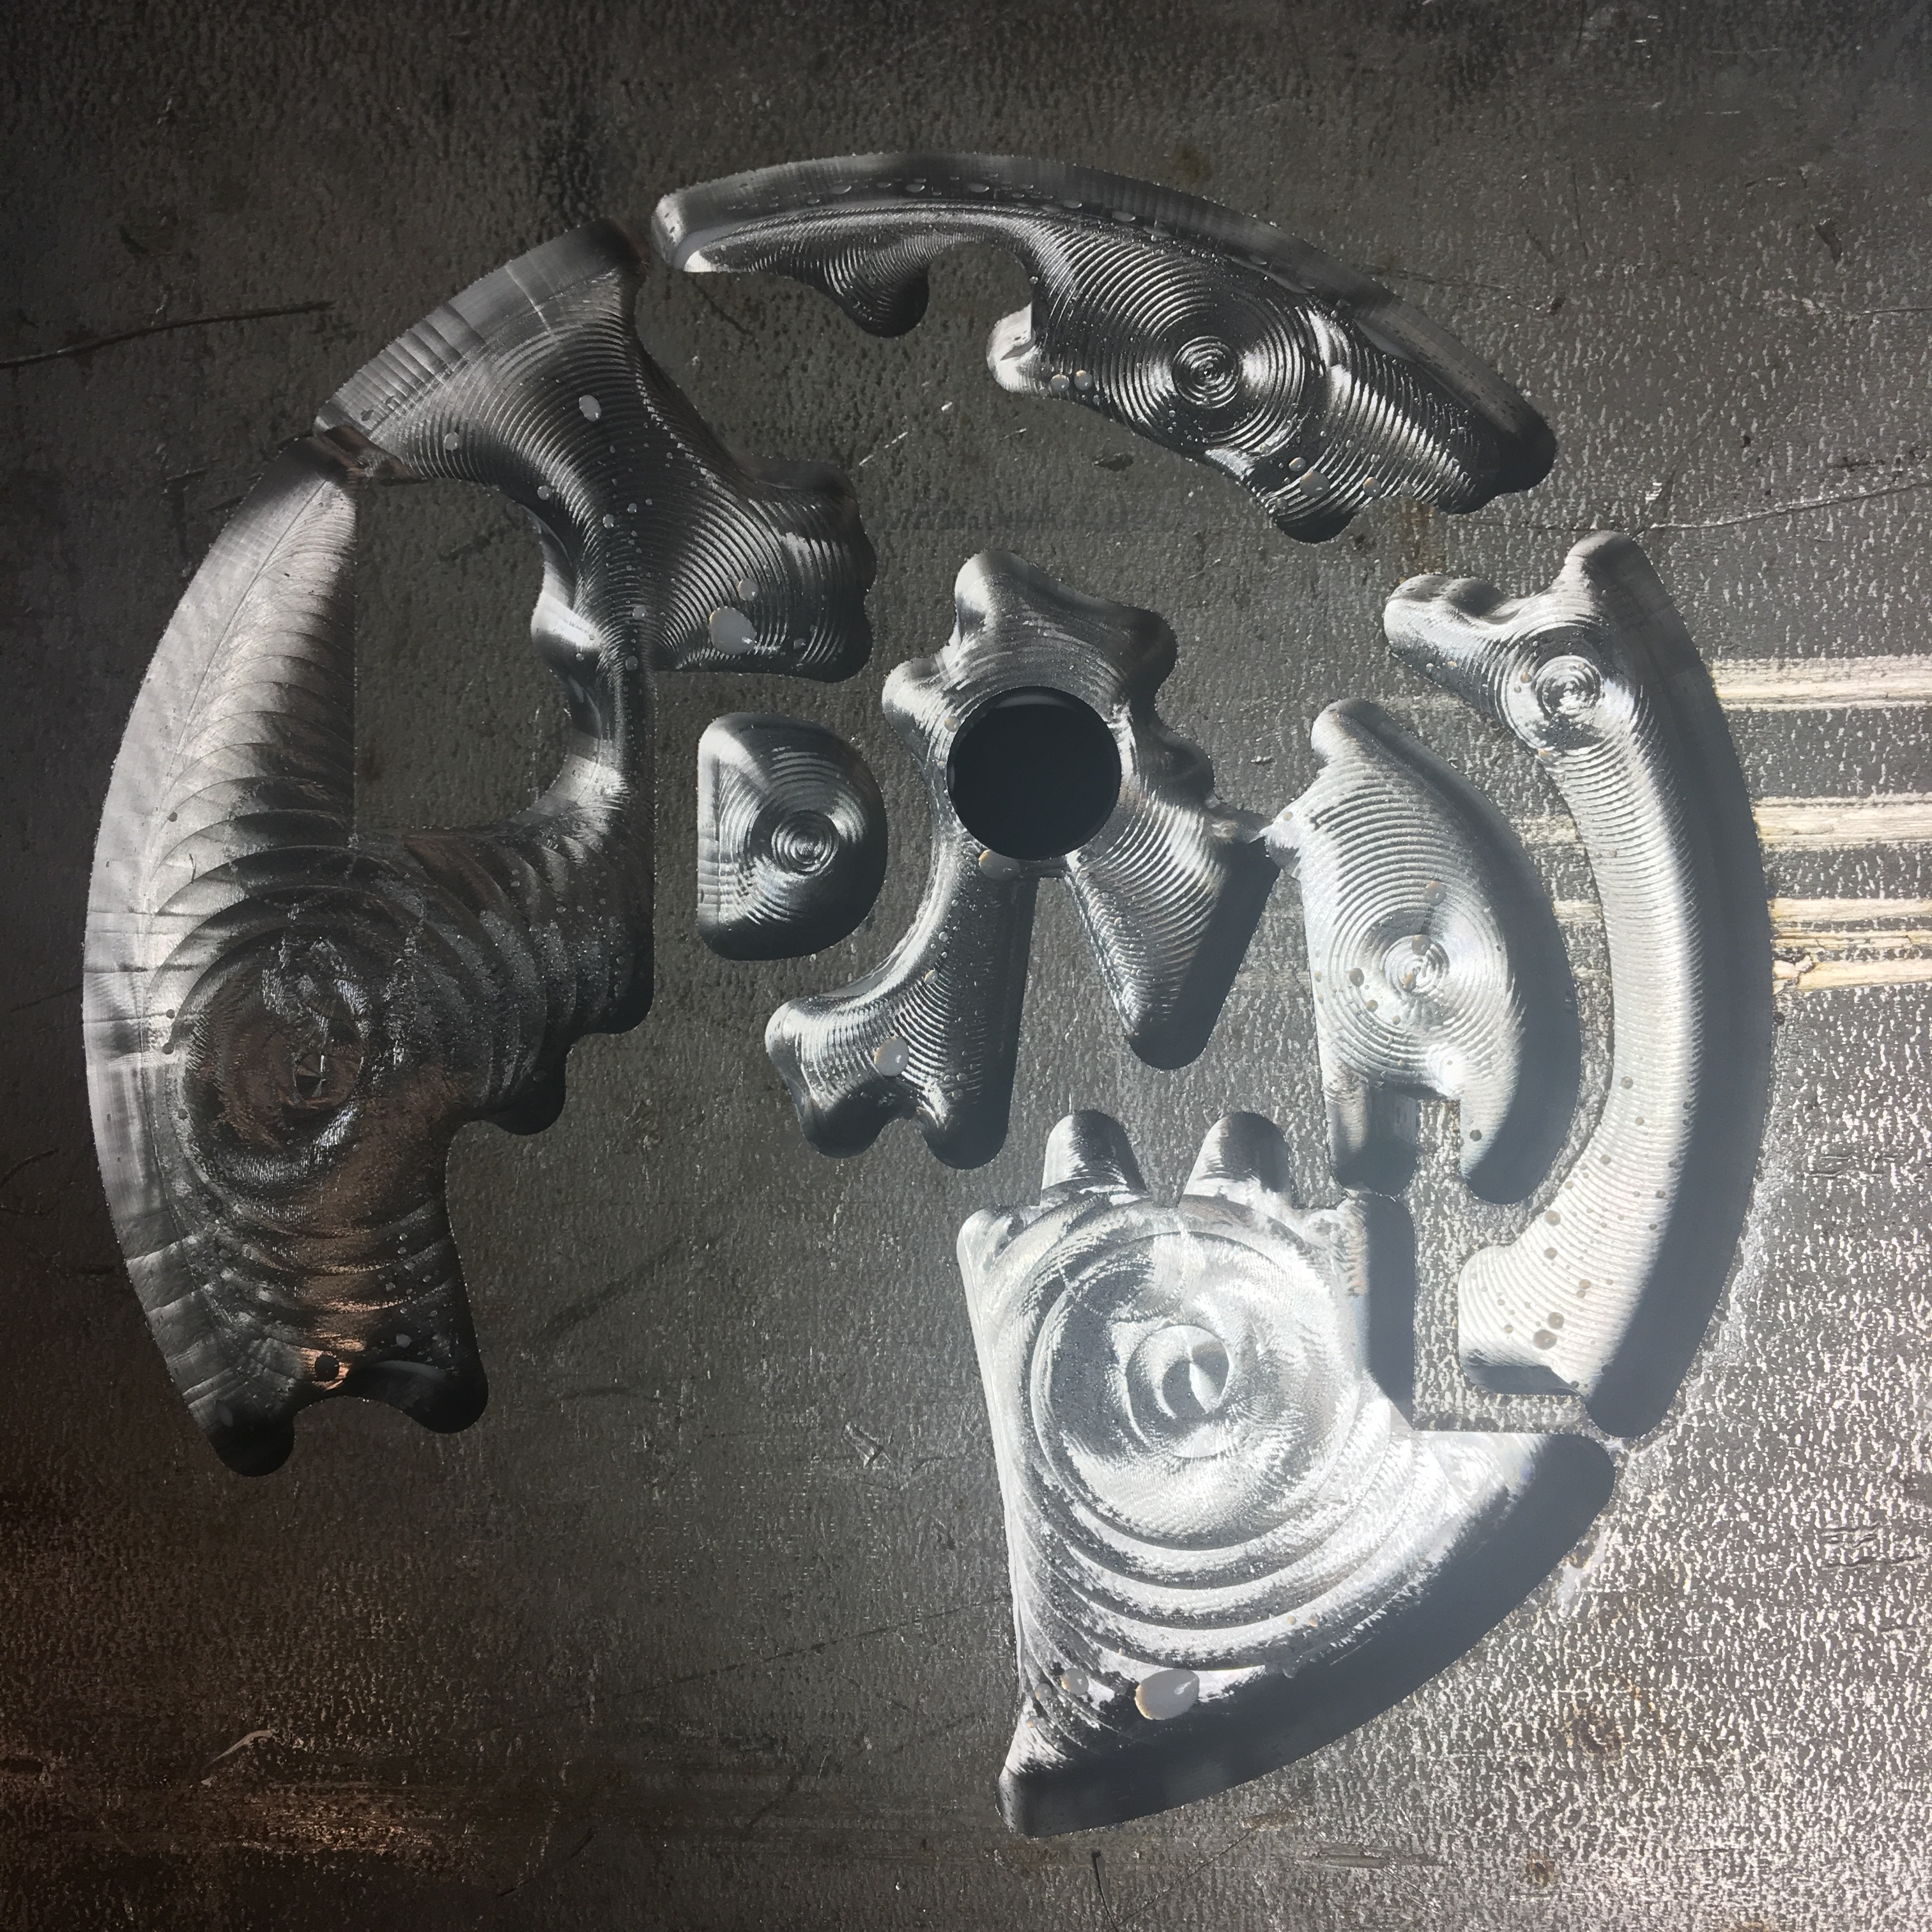
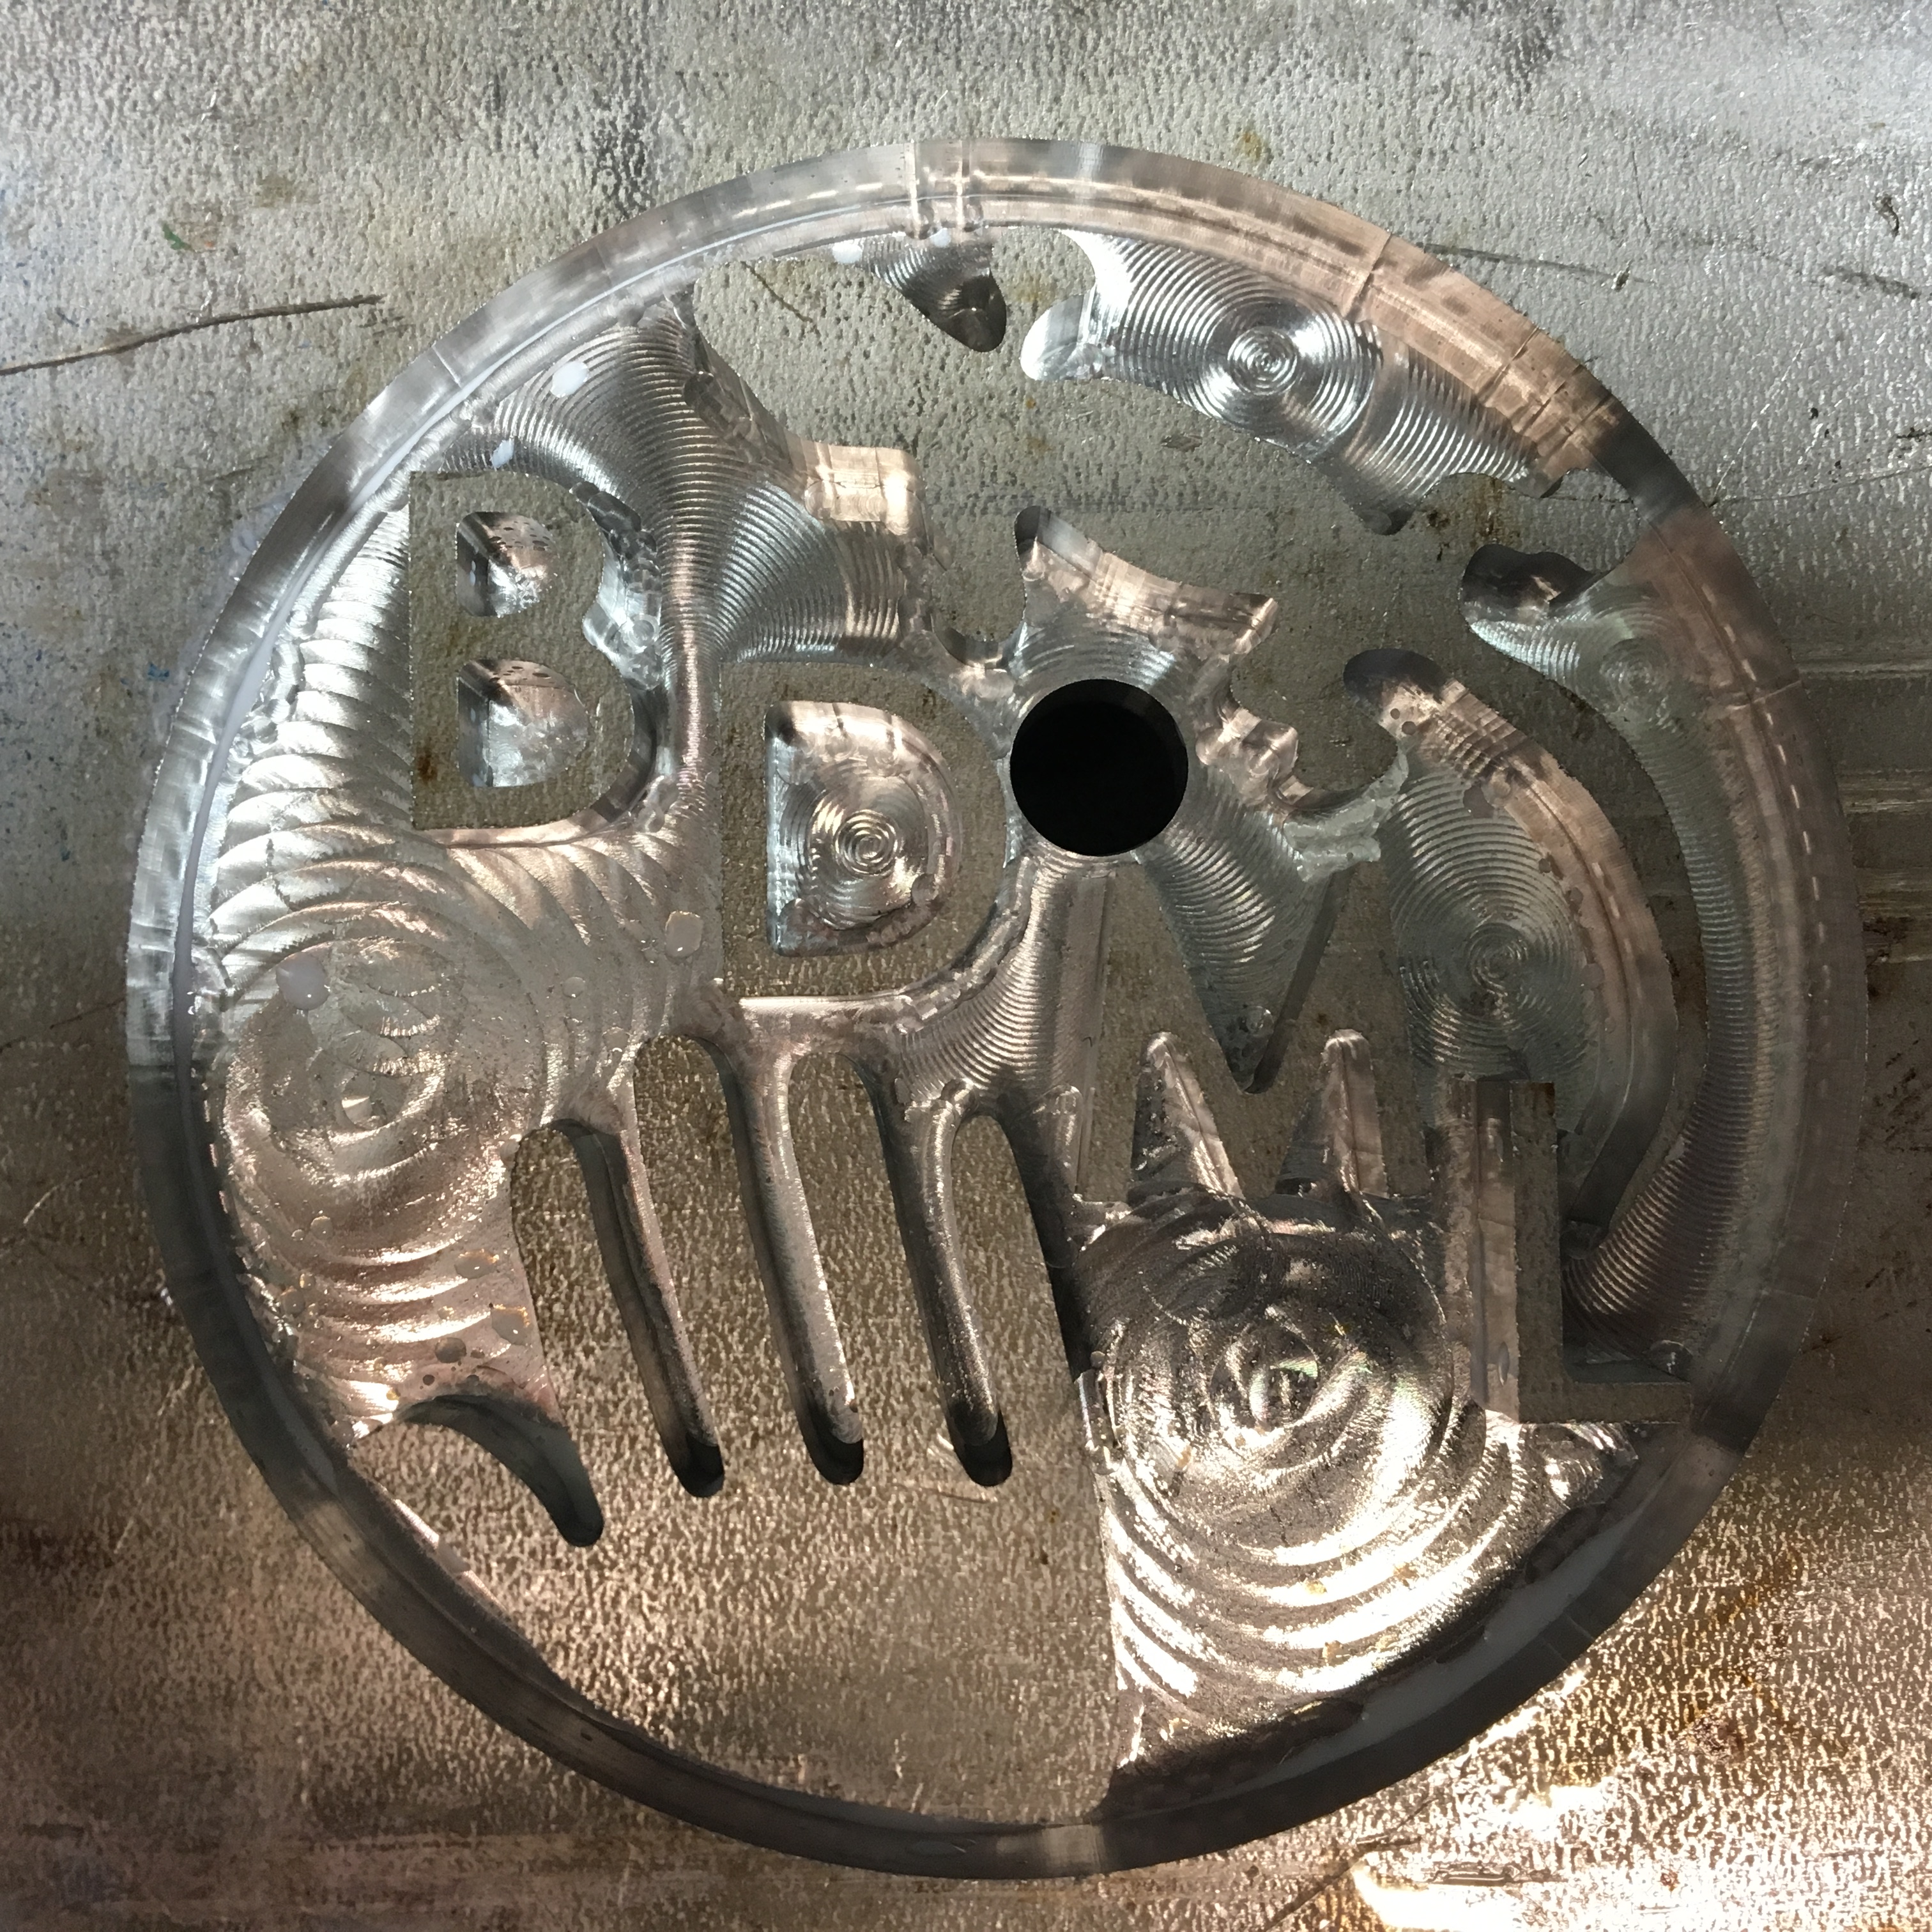
After lab meeting and the barbecue, I borrowed a friend's car to go out and buy the last things we needed for the final iteration of the logo brand. I got a long reach tool from Western Tool, and then went to Alan Steel to get new stock. Instead of getting a square stock, I bought a 1/2" cutoff of 3.5" diameter rod stock. This way, we would not need to go through the painful process of cutting out the logo from the stock and leave tabs. Instead, I could machine soft jaws to hold the part. This is exactly what I did when I got back. I CADed up some soft jaws and machined them. Then, I regenerated my CAM for the actual logo (backwards this time). The bore, quarter inch, and eighth inch passes generated fairly quickly, and I began running them on the machine. Meanwhile, Chris and Arul were out testing the brand. I stopped by here and there, and got to test it for myself. It worked incredibly. The one factor we're playing with is minimizing the burning, because it makes the bun taste worse. Here's a picture of a branded bun:
Arul told me that he needed to use the Office Mill over the weekend, which meant I had to finish my part before then. So, I had to stick around until the 1/16" tool path generated. This proved to take forever. For some reason, it didn't finish generating until about 12:30 at night. I began running the operation at about 12:45, and left for the night while it ran over night. When I got back, the part came out perfectly except for some burrs, but no broken tools! I'm very excited that it worked out so nicely.
20. July 25
Today was a short day because I was again visited by the stomach bug. However, I got some work in before I left. First, I finished up some details on the branding project, and the final brand is now completely assembled and ready for game day, as well as the next several years.
Alice is almost ready to start testing SAILR. We decided on a variety of different types of surfaces that we would like to test the robot at various parameters on. The surface types vary by stiffness, friction, and ability to be displaced. I went around campus scouting different locations and taking pictures of them for future testing.
21. July 26
I came in late today because of continued stomach pain. I finished the shell for SAILR, so that should hopefully protect it from surfaces with high displacement like sand and dirt and pine needles. We were going to begin testing outside today, but Alice ran into a bug that took a couple hours for her to fix. When she fixed it, she came over to show me, Tyler and Chris how to run the experiments with the different parameters. When the robot turned on in my hands, I sort of freaked out and dropped it, then had to replace two legs and reset one of the chains. I'm silly.
22. July 28
Today was a testing day. When I got in in the morning I started installing MATLAB on my computer. We need MATLAB because it has the program that communicates with the robot and tells it how long to run for and with what parameters. Installing MATLAB took the whole morning. After lunch, Chris and I went out to a nice grass patch and measured the speeds the robot ran at at every different combination of parameters (rpm, slow angle range, etc.). The best combination we got led us to a 0.45 m/s gait, which was pretty exciting and comparable to Boston Dynamics' robot Rex. We will continue testing for the next week or so on different surfaces.
23. July 29
Today was game day! The barbecue! Bessie, Chris, Vanessa and I started prepping at 9 am, bringing out all the materials to Gibbons Grove. When it got closer to noon, we started branding the buns, and it was incredible. We branded bun after bun. Here's a picture of a branded batch:
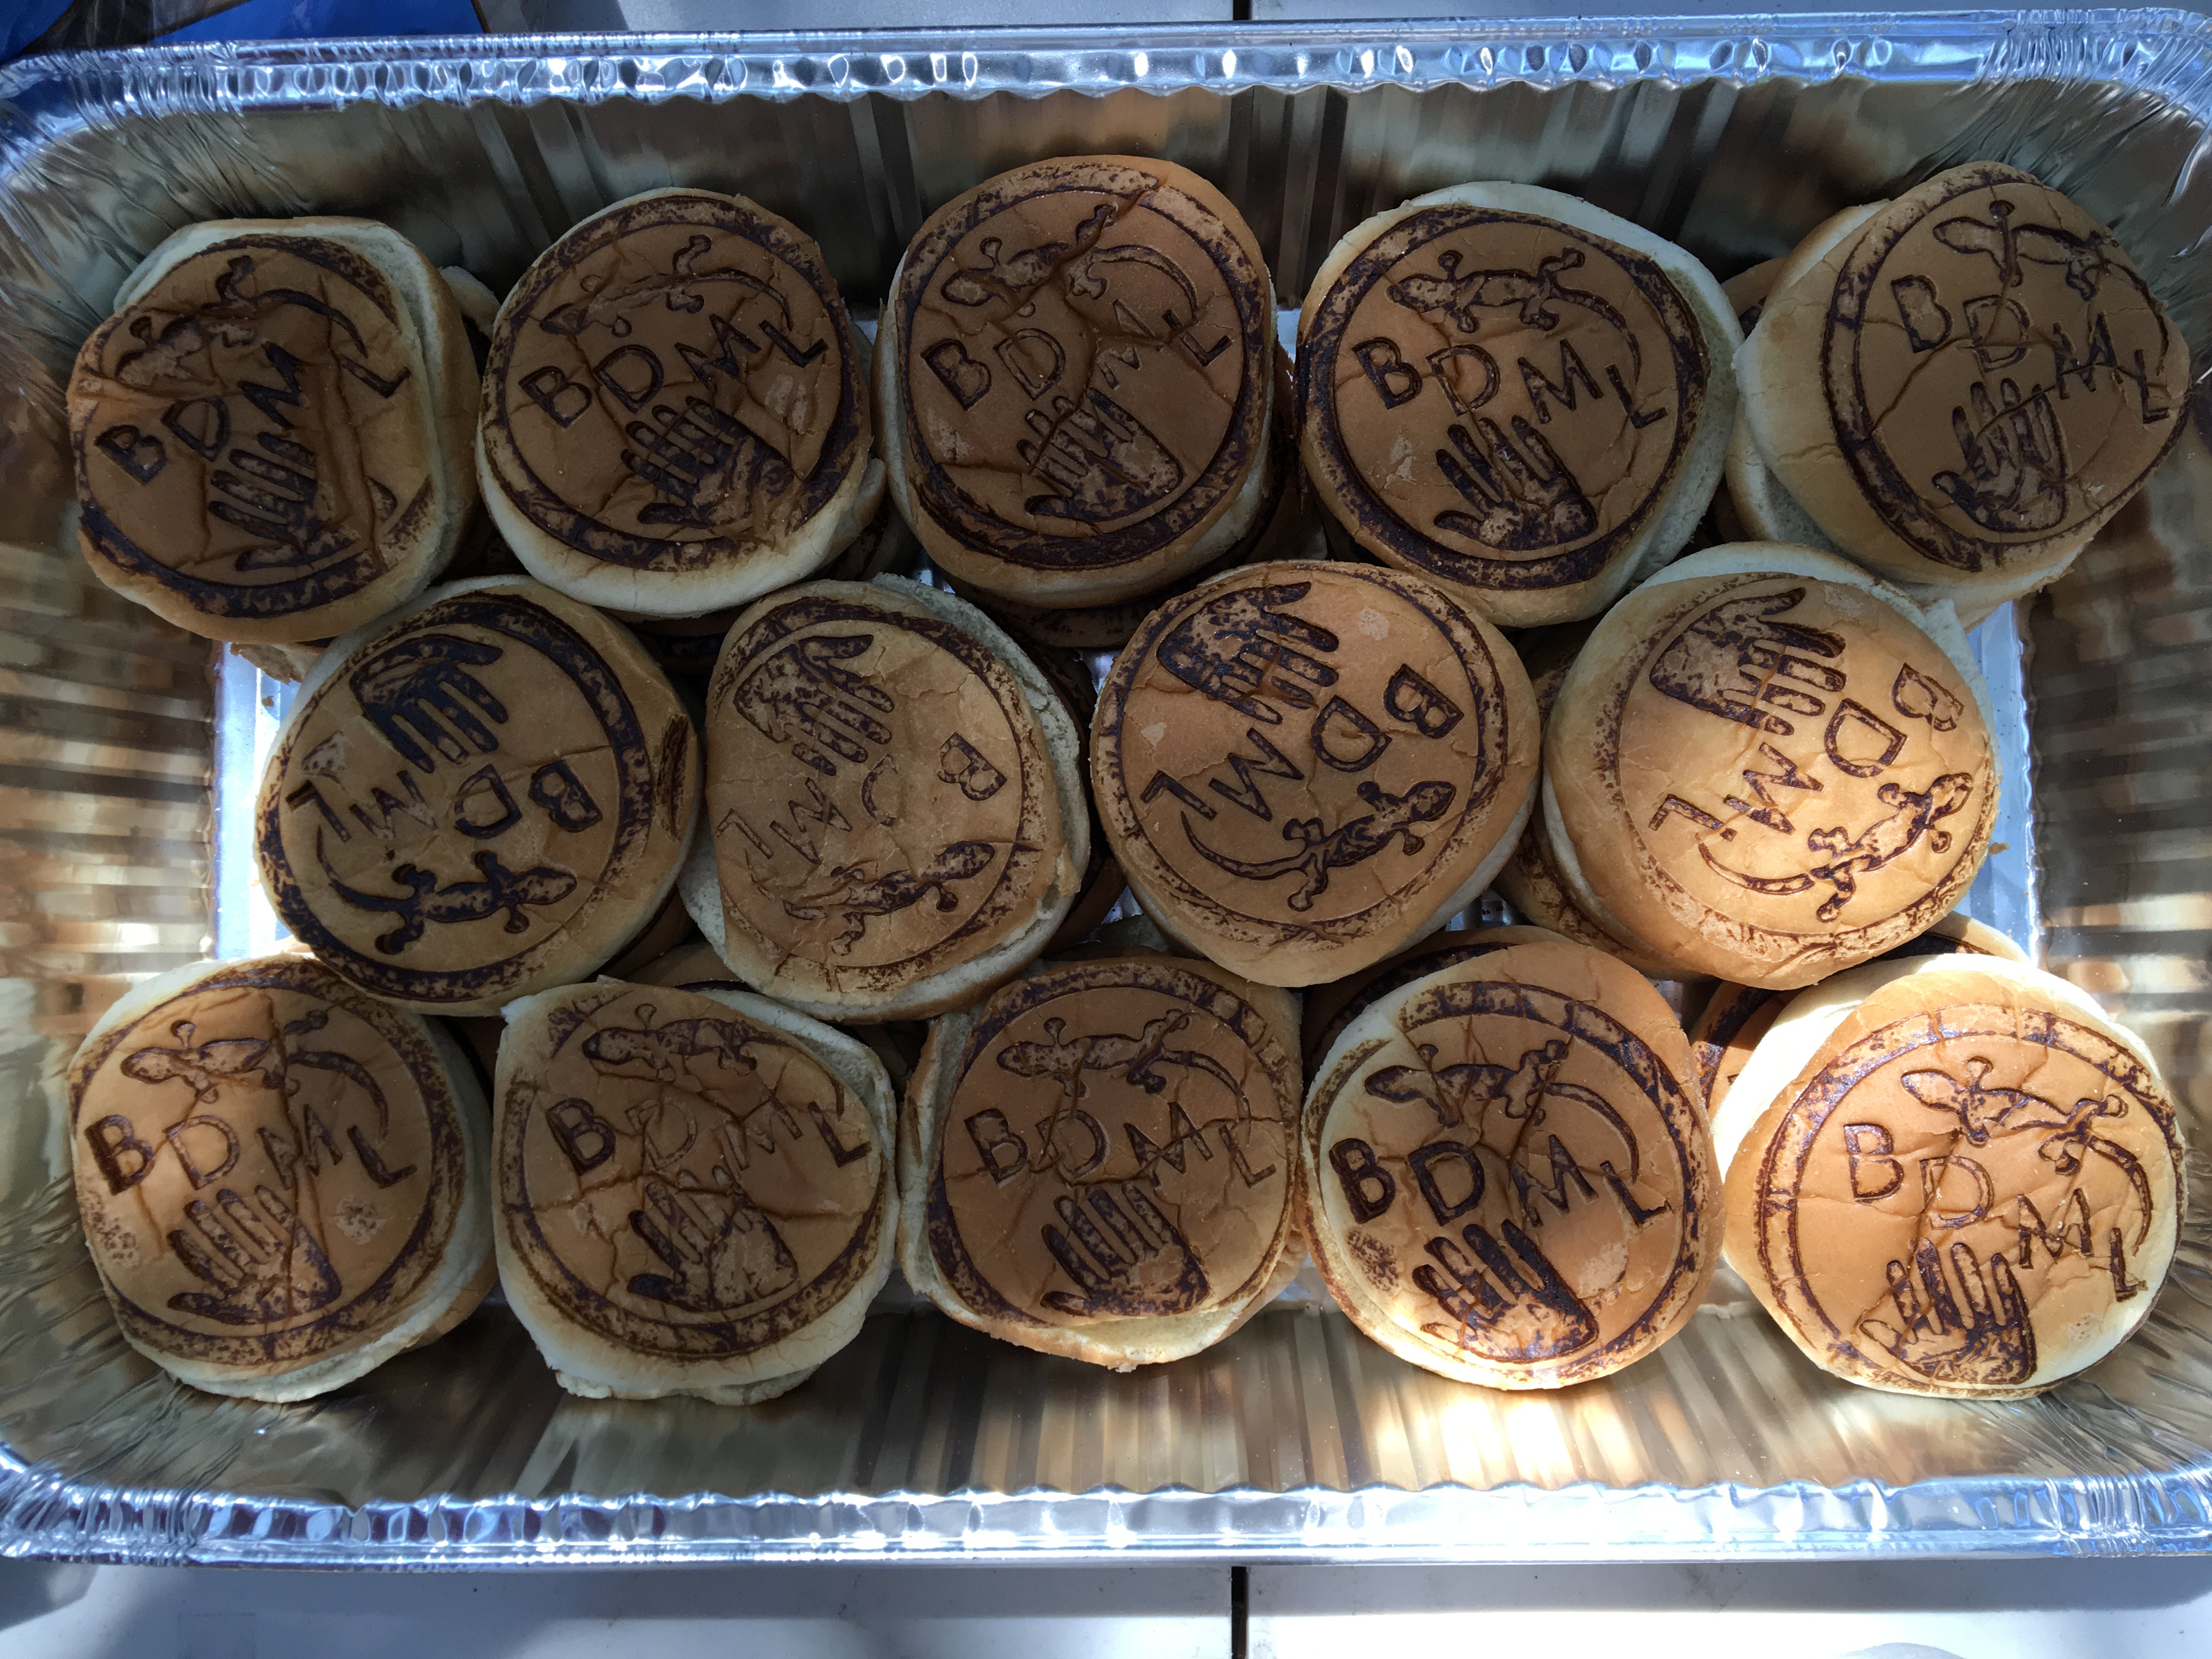
It was beautiful. People really enjoyed it. Everything came out well.
After deconstructing the barbecue and putting everything away, Chris and I ran some more tests with the robot, this time on polished concrete. It did not perform nearly as well as it did on grass, because of the decreased friction, but we were able to find a relatively slow but steady gait. We're figuring that on low-friction surfaces, slower rpms for the legs with a greater range of slow angles is more beneficial for the robot, in order to reduce slippage. On grass, the robot jogged at its best; on polished concrete, we're looking for more of a fast walk.
24. August 2
The past two days have been filled from start to finish with attempts to test SAILR on various surfaces, followed by assorted challenges and failures. On Monday, we wanted to test SAILR on sand, so I spent the morning tuning up the shell to make sure it fit nicely around the body without interfering with the legs. The shell looked pretty good, and I tested it in the lab and it ran well. When Tyler, Alice and I went out to the sand volleyball court between Stern and Wilbur, SAILR's legs kept slipping out of phase. We realized that this was because sand was getting into the external chains, causing the chain to slip occasionally on the sprockets. Once the legs are out of phase, SAILR's ability to run straight is greatly compromised, and it goes much slower and in an unhealthy way. We came back and tried to build a casing for the external chains so that sand couldn't get into them, which seemed successful, but it turned out that these guards were adding a decent amount of friction to the running. I took off the guards and decided to test on surfaces that would not send material into the gears until we had figured out a solution. Tyler and I began to test on asphalt until suddenly one set of legs was refusing to turn. After investigating thoroughly, we realized that the shaft in the motor had broken, and therefore wouldn't turn the legs. Alice said she would meet with Tae to fix that.
For the rest of the day I helped Michael with a second iteration of his haptic feedback forceps. I'm working on the CAM, and will hopefully machine soon. This version is more complicated than the previous one because it requires two part flips and soft jaws.
25. August 3
Alice and Tae fixed up SAILR last night, but Alice decided she wanted to install the sensors in the front legs to gather that data. That knocked testing back until tomorrow, so today I worked mostly on Michael's forceps.
I spent the day designing the CAM and coming up with strategies for machining his new iteration. I came up with a way to do two part flips instead of using soft jaws, and I think it will work pretty well, so I'm excited. Doing the CAM went well, and I'm pretty much all ready to go, but I had some questions for Michael that led to realizations that he needed to change the design slightly in a few areas. It's tough for someone without elaborate manufacturing experience to design a part completely ready for production, because there are small details that are easy to gloss over. Anyway, that's what I'm here for!
I spent the rest of the day designing a protective shell for the outer chains on SAILR, but SOLIDWORKS crashed before I saved it, and all was lost. Womp womp.
Tomorrow should be a day of testing on new surfaces.
26. August 8
Today was a big step forward. Over the weekend, Alice came up with a theory that the two main factors that contribute to the robot's velocity are its impact velocity and frequency of step. I told her I thought this idea made a lot of sense, and we went out to test it on different surfaces. Sure enough, the hypothesis was verified by our experiments. Keeping the frequency in the same range, we were able to increase the robot's speed by over 50% by changing the parameters to increase its impact velocity with the ground. This was awesome. We think this is the main ingredient to the paper.
In our last test, we felt one set of the legs stiffen up, so we had to return to lab and fix the problem. We realized that the middle 2 mm shaft was bent, so we were going to have replace it before doing more testing.
27. August 9
I began the day by drilling the holes for the new 2 mm shaft and installing it. While we installed it, we had to switch around some spacers on the exterior to ensure that none of the legs were colliding, and so the chain shields I designed and laser cut would fit snugly on the shafts. We decided that we wanted to adjust the location the chain shields attached to, so I had to update my design and laser cut a couple more, which wasn't too bad except for that the laser cutter at the TLTL has a knack for breaking. Eventually I was able to make them though.
I also machined the first two sides of the updated forceps for Michael. I made a silly mistake the first time I was doing it, but I had some time later in the day to correct it. I ended up staying more than an extra hour to get it done, but it was worth it because it came out nicely. The single lip engraving tool we got worked perfectly.
28. August 10
I finished machining Michael's forcep today. I made a small mistake but it shouldn't cause too much trouble. This version is just for simple testing though, and now I know my CAM and methodology works, so I'm good to go for the next time he needs me to make them. He's going to melt the wax out and take the part from here.
Alice and I did testing today. We used a tripod to take video of the robot. However, the robot was acting up quite a bit. We found that the sets of legs, which are supposed to be out of phase with each other, were sometimes shifting into phase with each other, causing the robot to flop around on its stomach. This doesn't slow the robot down at all, actually, but its likely unhealthy for the motor and transmission. It seems that it has to do with uneven torque loading on the different legs, and that the motor can't keep up with the amount of torque it has to overcome.
29. August 11
Today was a bit frustrating because we wanted to do a lot of testing on SAILR and take a lot of readings, but he wasn't performing as well as we expected. He kept flopping on his stomach as the legs became in phase with each other. This wouldn't happen on every run, but it happened often enough that it was a cause for concern about the controller and the mechanical components. It seems like one of the motors is experiencing more torque that it can't overcome, and from looking at the motor plots, one motor is not reaching its peak velocity and its fast spinning phase is delayed. Finally, after testing for a long time on gravel and grass, we realized that one of the motors is broken.
I laser cut another two sets of five thou thick shields for the outer chains, but we won't be able to test the robot more until the motor is replaced and everything is back up and running. We are hopefully going to get all of our final testing and data collection done next week.
30. August 15
Today was yet another testing day! It went pretty well too! Alice and I first tested on grass, where the robot ran straight consistently and collecting data was a breeze. We then went to wood chips, where we had some problems with the connection between the laptop and the robot's USB port, as well as problems with the sensor cutting out. All in all it went well though, and this data is definitely final.
Michael also reached out to me today saying that he wanted me to be a co-author in his paper about the haptic-feedback forceps I've been helping him manufacture. That was really exciting.
31. August 16
Alice and I got started bright and early with the testing today. The first surface we tested on was fine gravel, and it went incredibly well. We rarely had to retry runs because of the sensor dropping out or the robot and laptop losing connection. However, when we moved onto the larger gravel, the tests were not quite as successful. The robot ran decently, but the larger rocks would hit the sensor and disrupt its connection, causing the data to drop out. So, taking this data was grueling, but we got it done.
32. August 17
More testing and data collection! Alice and I began at 9:30 on the polished concrete floor of the d.school. Testing there didn't go very well, because the robot would constantly slip. It would seemingly make no progress at all, and then one leg would make good contact, causing it to turn dramatically, and then would continue treading the ground. We more or less gave up on that surface for the time being, figuring we didn't have good gait parameters to succeed on such a slippery surface.
Later, we went to the new ME admin building next door to MERL, and tested on their varnished would floor. The robot had such good traction on the floor there that it caused it to buckle a bit, and threw the legs out of whack often. So, testing there was quite unsuccessful, and so we came back to the lab to diagnose the mechanical problems. Alice found that the set screw for one of the middle legs had literally just sheared in half, which is why the leg was slipping so easily. We took it apart, and it became clear that we were not going to be able to get the collar that holds the leg off of the shaft. So, I had to machine a fresh shaft once again, which I did.
Additionally, I helped Michael today with CAM, so we can make the next iteration of the forceps. He wanted to make this iteration out of titanium, because that is the material used in medical applications, but Mark told him that it wasn't worth the extra hassle, and that aluminum would be good enough. That's good news because I've already machined it in aluminum so I know our feeds and speeds work. We're going to get started on machining them tomorrow.